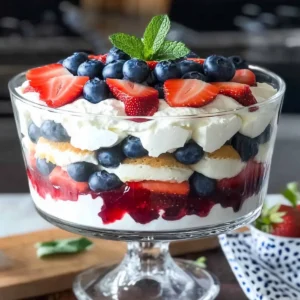
As the sun begins to warm the days of summer, I find myself eagerly planning festive gatherings where delicious food takes center stage. Enter the Red, White & Blue Cheesecake Trifle—a stunning no-bake dessert that captures the essence of Independence Day in every layer. This delightful treat showcases vibrant strawberries and blueberries, nestled among fluffy angel food cake and a rich, creamy cheesecake filling. Not only is it a showstopper that will impress your guests, but it’s also a breeze to whip together even on the busiest of days. Whether you’re celebrating with family or friends, this light and refreshing dessert is the perfect way to share the joys of summer. Curious about how to put this gorgeous trifle together? Let’s dive into the recipe!
Why is this trifle a must-try?
Simplicity at its Best: This no-bake dessert is a breeze to assemble, making it perfect for any busy host.
Vibrant Colors: The stunning layers of red strawberries and blue blueberries make this trifle not just delicious but visually captivating.
Crowd-Pleasing Flavor: The combination of creamy cheesecake filling and fluffy cake creates a delightful fusion of flavors enjoyed by everyone.
Versatility: Feel free to mix up the fruits! Swap in raspberries or peaches for a fun twist, or use gluten-free cake for a broader appeal.
Make-Ahead Friendly: Easily prepare this dessert a day in advance, allowing you to focus on enjoying time with your loved ones.
Heavenly Texture: Each bite offers a perfect balance of creamy, light, and fruity, making it the ideal summer treat.
Want to keep the festive vibe going? Check out our Blueberry White Chocolate cupcakes or the delicious Blueberry Cheesecake Swirl cookies for more berry-inspired delights!
Red, White & Blue Cheesecake Trifle Ingredients
For the Cake Layers
• Storebought Angel Food Cake or Pound Cake (12-15 oz) – Provides a light and fluffy base; any light cake can be used, but angel food maintains desired texture.
For the Berry Layer
• Blueberries (26 oz) – Adds a pop of vibrant color and sweet-tart flavor; fresh or frozen can be used.
• Strawberries, sliced lengthwise (20 oz) – Offers a juicy, sweet contrast; ensure they are thickly sliced for visual appeal.
• Blackberries (6-8) – Great for garnish and adds texture; omit if unavailable.
For the Creamy Filling
• Heavy Whipping Cream (2 cups) – Creates a rich, creamy filling for the trifle; can substitute with evaporated milk for a lighter version.
• Vanilla Extract (1½ teaspoon) – Enhances overall flavor; pure vanilla is preferred for the best taste.
• Powdered Sugar (¾ cup) – Sweetens the cream; adjust to taste, with more added if desired sweetness is needed.
• Whipped Cream Cheese (12 oz) – Adds a thick and creamy texture to the filling; substitute with regular cream cheese if needed, but whip before adding.
For the Garnish
• Mint Garnish – Adds freshness and aesthetic appeal; optional but recommended for a festive touch.
Now that you have everything you need, let’s create a stunning Red, White & Blue Cheesecake Trifle that’s bound to steal the show!
Step‑by‑Step Instructions for Red, White & Blue Cheesecake Trifle
Step 1: Prepare the Cake
Begin by cutting the store-bought angel food cake into large 1½-inch cubes. This will create a fluffy base for your Red, White & Blue Cheesecake Trifle. Set your cake cubes aside for easy layering later. Take a moment to admire your vibrant, airy pieces, as they will contribute to the visual appeal of this stunning dessert.
Step 2: Slice the Strawberries
Next, slice the strawberries lengthwise into thick pieces. Ensure they are hefty enough to stand out in the layers of the trifle. The pointy side should face down when you place them in the dish, allowing for a beautiful presentation. As you slice, enjoy the sweet scent and vibrant color these berries will lend to your trifle.
Step 3: Whisk the Cream
In a large mixing bowl, add 2 cups of heavy whipping cream, 1½ teaspoons of vanilla extract, and ¾ cup of powdered sugar. Using an electric mixer, whisk these ingredients on high speed for 40-60 seconds until the mixture thickens and resembles loose pudding. Look for soft peaks; this will create the rich, creamy filling for your trifle.
Step 4: Incorporate Cream Cheese
Gradually whisk in 12 ounces of whipped cream cheese until the filling is smooth and fully combined. The cream cheese will add a rich texture, enhancing the overall flavor of your Red, White & Blue Cheesecake Trifle. Make sure there are no lumps, so you achieve that velvety consistency that will envelop the cake and berries beautifully.
Step 5: Prepare for Layering
Transfer the cheesecake filling mixture into a large Ziploc bag, sealing it tightly. Snip off a corner of the bag to create a piping tool. This step not only simplifies the layering process but also ensures a neat and even distribution of the cheesecake filling throughout your trifle.
Step 6: Lay the Base Filling
Begin assembling the trifle by piping one-third of the cheesecake filling into the bottom of your trifle dish. Use a spatula or the back of a spoon to spread it evenly across the base, creating a smooth layer that will set the foundation for the cake and berry flavors to shine through.
Step 7: Arrange the Cake Cubes
Next, arrange the angel food cake cubes around the perimeter of the trifle dish. Ensure they are touching to create a beautiful frame for the dessert. This step will not only enhance the look but also help hold the layers together, offering a delightful bite as your guests dig in.
Step 8: Layer the Berries
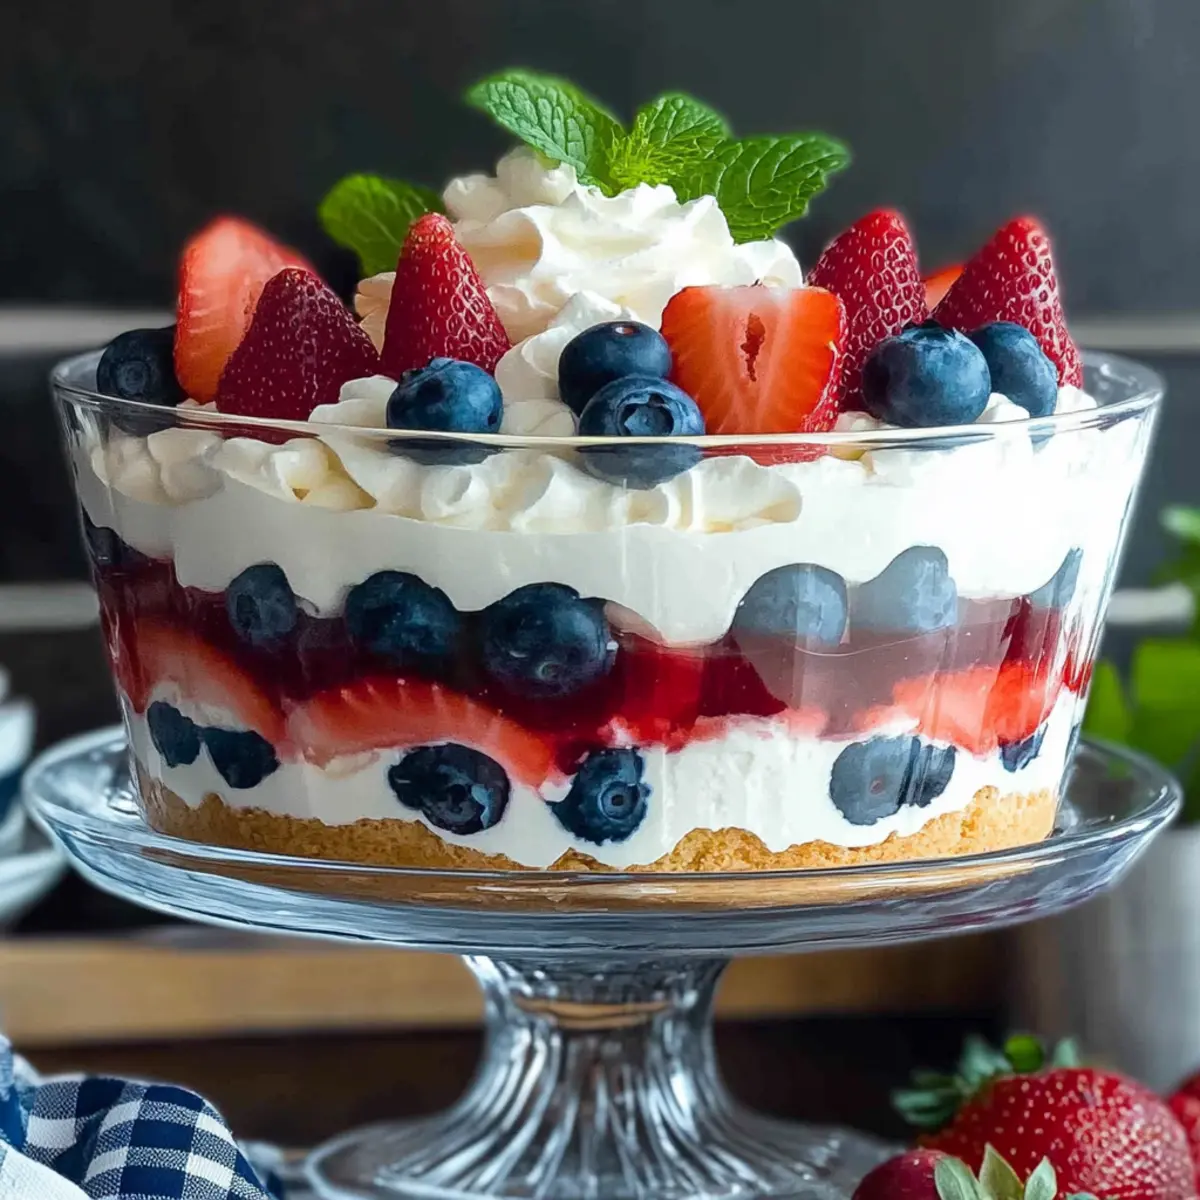
Place the sliced strawberries pointy side down in the visible areas and scatter the blueberries generously on top. This vibrant mix will create a stunning burst of colors, embodying the spirit of the Red, White & Blue Cheesecake Trifle. As you layer, step back and admire your creation’s growing beauty.
Step 9: Repeat Layering Process
Continue the layering process by repeating with more cake cubes and cheesecake filling until you approach the rim of the trifle dish. Each layer contributes to the trifle’s overall texture and flavor, combining light cake, creamy cheesecake, and juicy berries into a savory masterpiece.
Step 10: Finish with Garnish
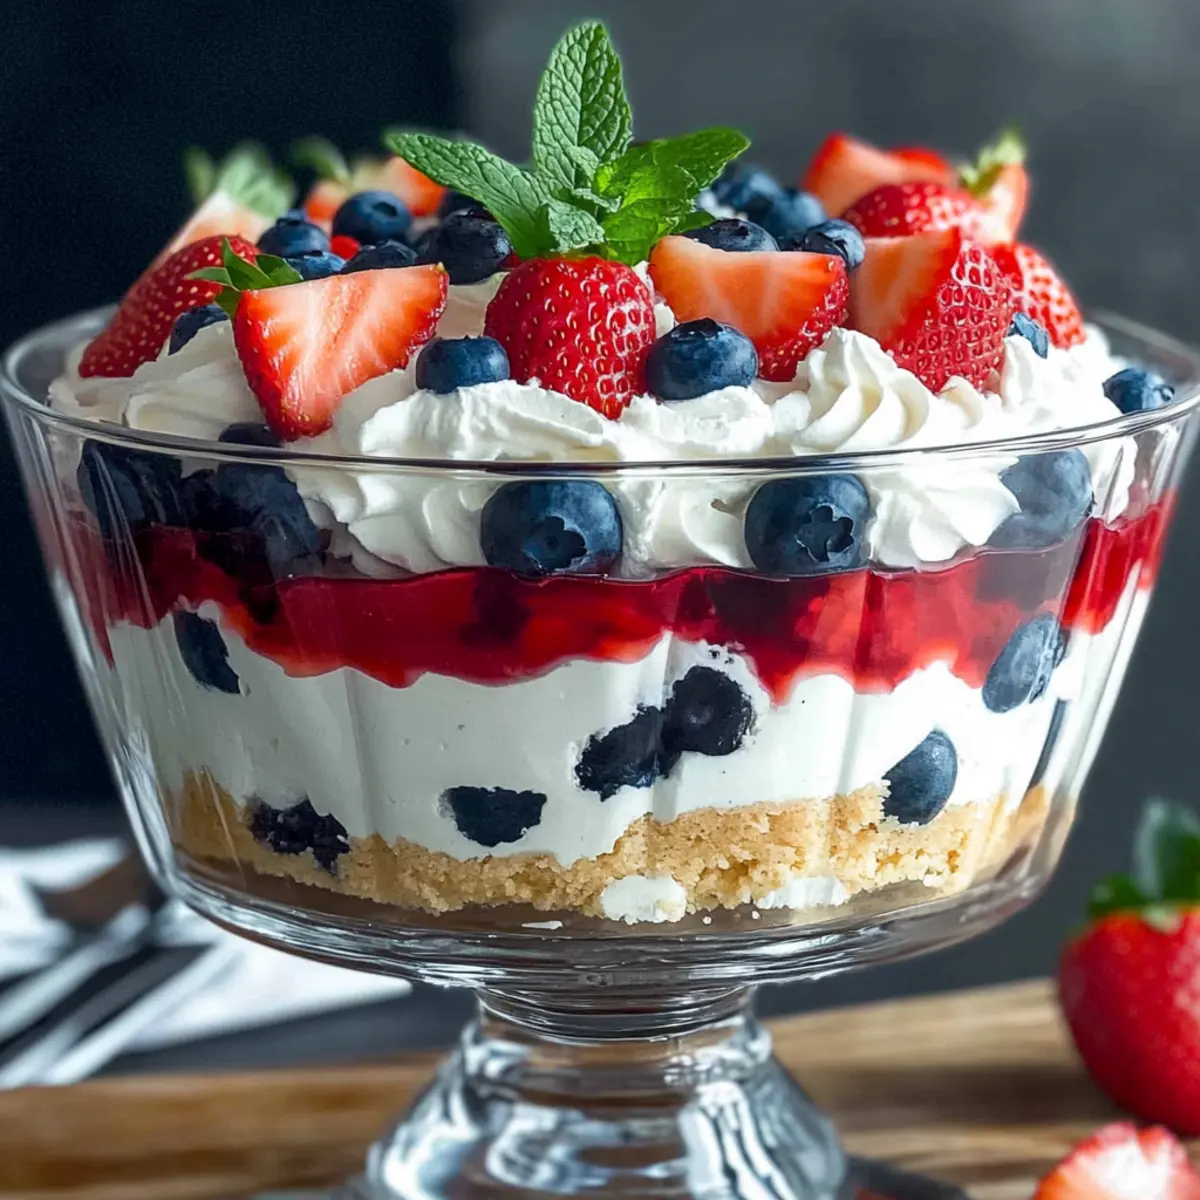
Top with the remaining cheesecake filling, smoothing it out for a polished finish. Garnish the top with the remaining blueberries, sliced strawberries, and a few mint leaves for a fresh, festive touch. Chill your trifle in the refrigerator until ready to serve, allowing all those delicious flavors to mingle together beautifully.

What to Serve with Red, White & Blue Cheesecake Trifle
As you gather for your summer celebrations, it’s essential to create a meal that complements the festive vibes of this stunning dessert.
-
Grilled Lemon Herb Chicken: Juicy and flavorful, this dish balances the sweetness of the trifle with its savory herbs and zesty marinade.
-
Caprese Salad Skewers: These colorful bites bring fresh mozzarella, tomatoes, and basil together, adding a refreshing touch to the meal. The lightness of the flavors carries the summer spirit beautifully.
-
Crispy Garlic Bread: A crunchy addition that adds texture and is perfect for sopping up any flavorful juices from main dishes. It’s simple and truly satisfying alongside your trifle’s creamy layers.
-
Watermelon Feta Salad: This vibrant salad combines sweet watermelon and salty feta, creating a delightful contrast. It’s a refreshing companion, perfect for hot summer days, ensuring everyone stays cool and satisfied.
-
Classic Coleslaw: This crunchy side brings a creamy texture that echoes the trifle while providing a delightful crunch. Its tangy flavor complements the dessert without overwhelming the palate.
-
Pineapple Pizzazz Punch: A fruity, sparkling drink bursts with flavor and pairs well with both savory and sweet elements of your meal. Refreshingly tropical, it’s sure to appeal to guests of all ages.
Enjoy the essence of summer and create lasting memories around your table with these delightful pairings for the Red, White & Blue Cheesecake Trifle!
Expert Tips for Red, White & Blue Cheesecake Trifle
-
Cream Consistency: Avoid over-beating the whipping cream; it should be thick but still spreadable. This ensures a smooth layer for your trifle.
-
Layering Technique: Use a clear trifle dish to showcase the beautiful layers of cake and berries. This will enhance the visual appeal of your Red, White & Blue Cheesecake Trifle.
-
Strawberry Placement: Position strawberries pointy side down when layering. This creates a stunning display and helps hold the structure of your trifle.
-
Make-Ahead Advantage: Assemble your trifle a day in advance for the best flavor. Just cover it tightly with plastic wrap and keep it in the fridge until serving.
-
Fruit Variations: Don’t hesitate to switch up the berries! Raspberries or peaches can offer delightful flavors while keeping with the patriotic theme.
How to Store and Freeze Red, White & Blue Cheesecake Trifle
Fridge: Store your assembled trifle tightly covered with plastic wrap in the refrigerator, where it will stay fresh for up to 3 days. This keeps flavors intact and allows the layers to meld beautifully.
Freezer: Although not recommended, you can freeze the Red, White & Blue Cheesecake Trifle for up to 1 month. Place in an airtight container, ensuring there’s no air exposure. Thaw in the fridge overnight before serving for best results.
Reheating: There’s no need to reheat this dessert; enjoy it chilled! If you’ve frozen it, let it thaw completely in the refrigerator, then serve as-is for a refreshing summer treat.
Make-Ahead Tips: Prepare the trifle a day before your celebration. Cover it well in the fridge, allowing flavors to deepen and the textures to harmonize, resulting in a deliciously cohesive dessert.
Make Ahead Options
Preparing the Red, White & Blue Cheesecake Trifle ahead of time is a fantastic way to save time and stress, especially for busy summer gatherings! You can easily assemble the trifle up to 24 hours in advance; simply layer all components, cover tightly with plastic wrap, and refrigerate. To maintain freshness and prevent the cake from becoming soggy, ensure the layers of cake and cream are well-separated by the berries. When you’re ready to serve, simply add any additional garnishes like mint leaves or extra berries to keep it vibrant and appealing. This allows you to enjoy your celebration while still presenting a stunning dessert with just as delicious flavors!
Red, White & Blue Cheesecake Trifle Variations
Feel free to adapt this luscious dessert to suit your taste—let your creativity shine through!
-
Berry Swap: Substitute other types of berries like raspberries or peaches for unique flavors and a refreshing twist. The bright colors will still keep your trifle vibrant!
-
Gluten-Free: Use gluten-free angel food cake or pound cake for a delightful version perfect for those with dietary restrictions. Your guests will appreciate the thoughtful touch.
-
Citrus Infusion: Add a splash of lemon or orange zest to the cream for a bright, citrusy flavor boost. This will elevate the cheesecake filling, making it even more refreshing.
-
Nutty Crunch: Consider folding in crushed nuts like almonds or pecans into the cream layer for added texture. This nutty twist can create a delightful contrast with the softness of the cake and cream.
-
Chocolate Delight: For chocolate lovers, sprinkle mini chocolate chips between the layers or drizzle chocolate sauce on top for a rich finish. The chocolate will harmonize beautifully with the berries.
-
Vegan Delight: Replace heavy cream with coconut cream and use dairy-free cream cheese to keep the indulgence while catering to plant-based diets. Your vegan friends will love this option!
-
Extra Layering: Add a thin layer of fruit jam between the cake and cream layers to introduce an exciting burst of flavor. Strawberry or blueberry jam would work wonders!
Want to keep the festive vibe going? Check out our Blueberry White Chocolate cupcakes or the delicious Blueberry Cheesecake Swirl cookies for more berry-inspired delights!
Advertisement
Red, White & Blue Cheesecake Trifle Recipe FAQs
How do I choose the right strawberries for my trifle?
Absolutely! When selecting strawberries, look for firm, bright red berries with fresh green leaves. Avoid those with dark spots or soft mushiness, as these can indicate overripeness. If you can, pick organic strawberries, as they offer superior flavor and sweetness.
How should I store my Red, White & Blue Cheesecake Trifle?
You can store your assembled trifle tightly covered with plastic wrap in the refrigerator for up to 3 days. This keeps the layers fresh and allows the flavors to meld together beautifully. Just remember, the longer it sits, the more the cake will absorb moisture from the cream, enhancing both texture and taste.
Can I freeze the Red, White & Blue Cheesecake Trifle?
While not ideal, you can freeze the trifle for up to 1 month. To do this, place the trifle in an airtight container or wrap it tightly. Thaw it overnight in the refrigerator before serving for the best texture. However, this may alter the quality of the fresh berries, so prepare accordingly!
What should I do if my whipped cream becomes too thick?
No worries! If your whipping cream becomes too thick and starts to resemble butter, you can salvage it by adding a tablespoon or two of milk or cream and gently folding it in until you reach your desired consistency. This will help restore that lovely, spreadable texture without compromising the flavor.
Are there any dietary considerations I should keep in mind?
Very! If you’re preparing this dessert for guests with dietary needs, consider using gluten-free cake to accommodate gluten sensitivities. Additionally, check for berry allergies; some guests might be allergic to strawberries or other berries. You can always substitute with peaches or other safe fruits if necessary!
Can I make this trifle ahead of time?
Absolutely! In fact, making it a day in advance is recommended as it allows all the flavors to deepen and the textures to harmonize. Just cover it tightly with plastic wrap and store in the fridge until you’re ready to serve. Enjoy!

Red, White & Blue Cheesecake Trifle: Perfect Summer Delight
Ingredients
Equipment
Method
- Prepare the Cake: Begin by cutting the store-bought angel food cake into large 1½-inch cubes. Set your cake cubes aside for easy layering later.
- Slice the Strawberries: Slice the strawberries lengthwise into thick pieces with the pointy side facing down for beautiful presentation.
- Whisk the Cream: In a large bowl, whisk together heavy whipping cream, vanilla extract, and powdered sugar until thick and resembling loose pudding.
- Incorporate Cream Cheese: Gradually whisk in whipped cream cheese until the filling is smooth and creamy.
- Prepare for Layering: Transfer the cheesecake filling into a Ziploc bag, sealing it tightly and snipping off a corner.
- Lay the Base Filling: Pipe one-third of the cheesecake filling into the bottom of the trifle dish and spread evenly.
- Arrange the Cake Cubes: Arrange the angel food cake cubes around the perimeter of the trifle dish.
- Layer the Berries: Place sliced strawberries pointy side down in visible areas and scatter blueberries generously on top.
- Repeat Layering Process: Repeat layering process with more cake cubes and cheesecake filling until approaching the rim.
- Finish with Garnish: Top with remaining cheesecake filling, garnish with blueberries, sliced strawberries, and mint leaves. Chill until ready to serve.