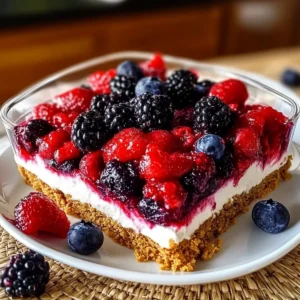
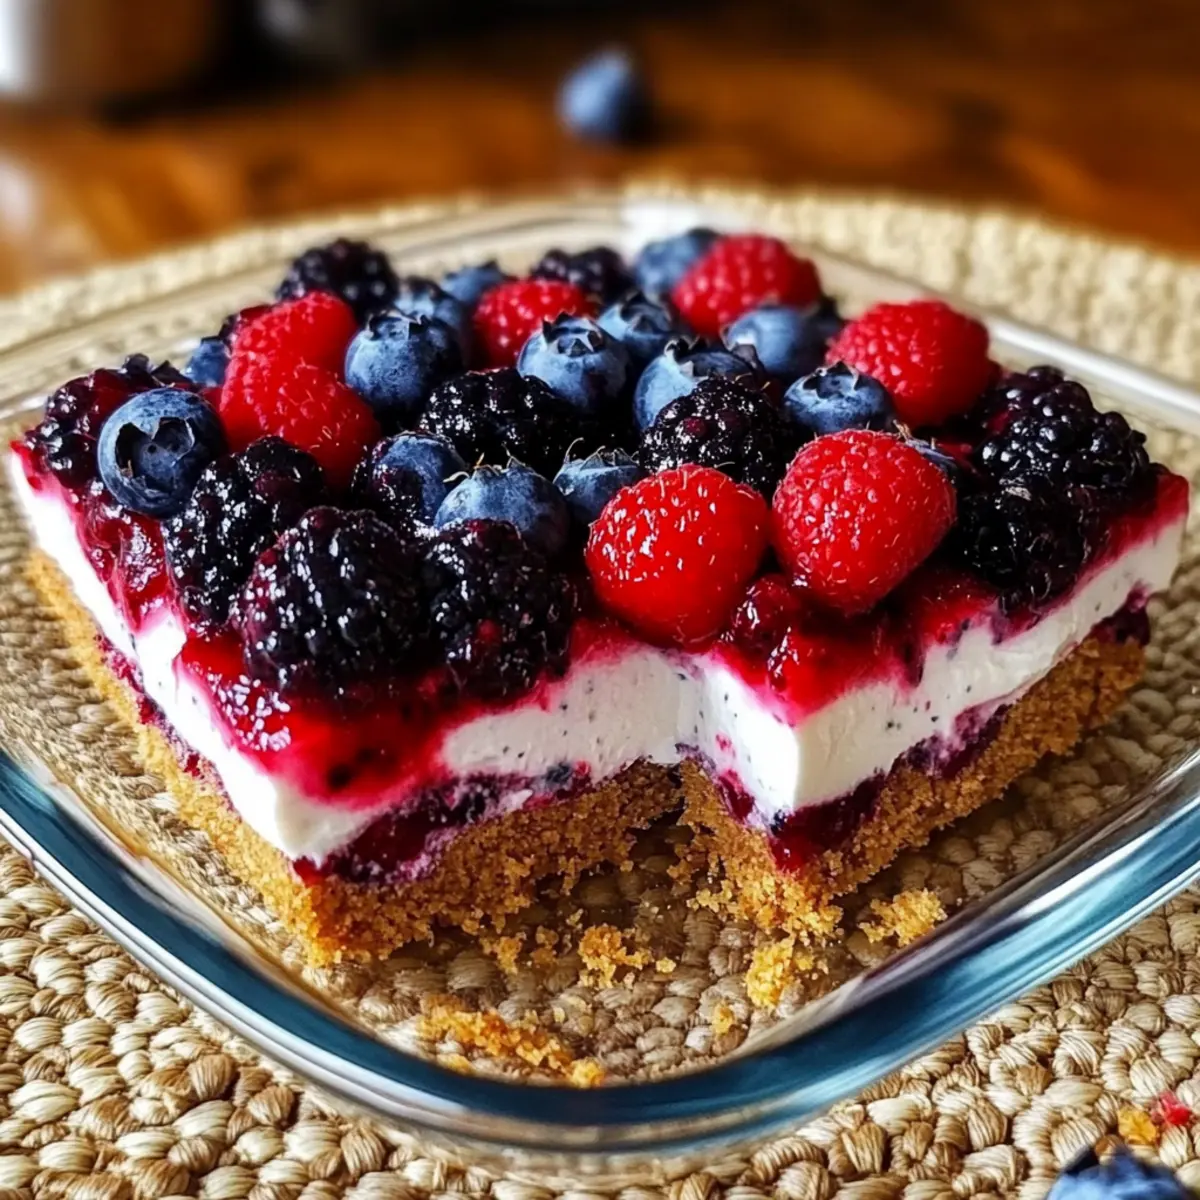
As the sun warms the air, the thought of delightful gatherings filled with laughter and indulgence comes to mind. One dessert that’s become my go-to for these occasions is the No-Bake Mixed Berry Yum Yum Dessert. This easy-to-make treat offers a refreshing twist on summer sweetness, combining a creamy filling with vibrant mixed berries that are as pleasing to the eye as they are to the palate. Not only is it a breeze to whip up—perfect for those of us who want to trade long bake times for sweet moments of fun—but it’s also family-friendly and easily adaptable for any dietary preference, thanks to a dairy-free option. So, are you ready to dive into the delightful world of no-bake desserts? Let’s get started on a treat that’s sure to impress!
Why Choose No-Bake Mixed Berry Desserts?
Effortless Preparation: With no baking required, this recipe is perfect for busy individuals and families.
Vibrant Flavors: Fresh, juicy berries provide a burst of color and taste that make each bite irresistible.
Adaptable: Whether you need a dairy-free option or want to swap in your favorite fruits, this dessert is versatile for everyone.
Light Yet Indulgent: The creamy filling balanced by a crunchy graham cracker base creates a delightful treat that doesn’t weigh you down.
Perfect for Gatherings: Impress your friends and family at picnics or dinner parties with this eye-catching dessert that’s sure to be a hit!
For a different take, check out my Mixed Berry Croissant French Toast Bake, which brings a tasty morning twist!
No-Bake Mixed Berry Ingredients
For the Crust
• Graham Cracker Crumbs – The base of the crust, providing structure and crunch; gluten-free crumbs can be used for a GF version.
• Butter – Binds the crust ingredients together, providing richness and flavor; opt for unsalted for better control over sweetness.
For the Filling
• Cream Cheese – Creates a rich, creamy filling; ensure it’s softened to room temperature for easier mixing, or use dairy-free cream cheese for a lighter option.
• Granulated Sugar – Enhances sweetness to complement the creaminess of the dessert; adjust according to the sweetness of the berries used.
• Vanilla Extract – Adds depth and warmth to the filling’s flavor profile; pure vanilla extract elevates the taste.
• Whipped Topping – Contributes a light and airy texture; you can substitute with dairy-free whipped topping to keep it allergen-friendly.
For the Topping
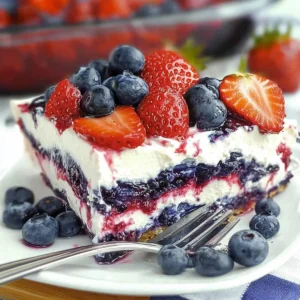
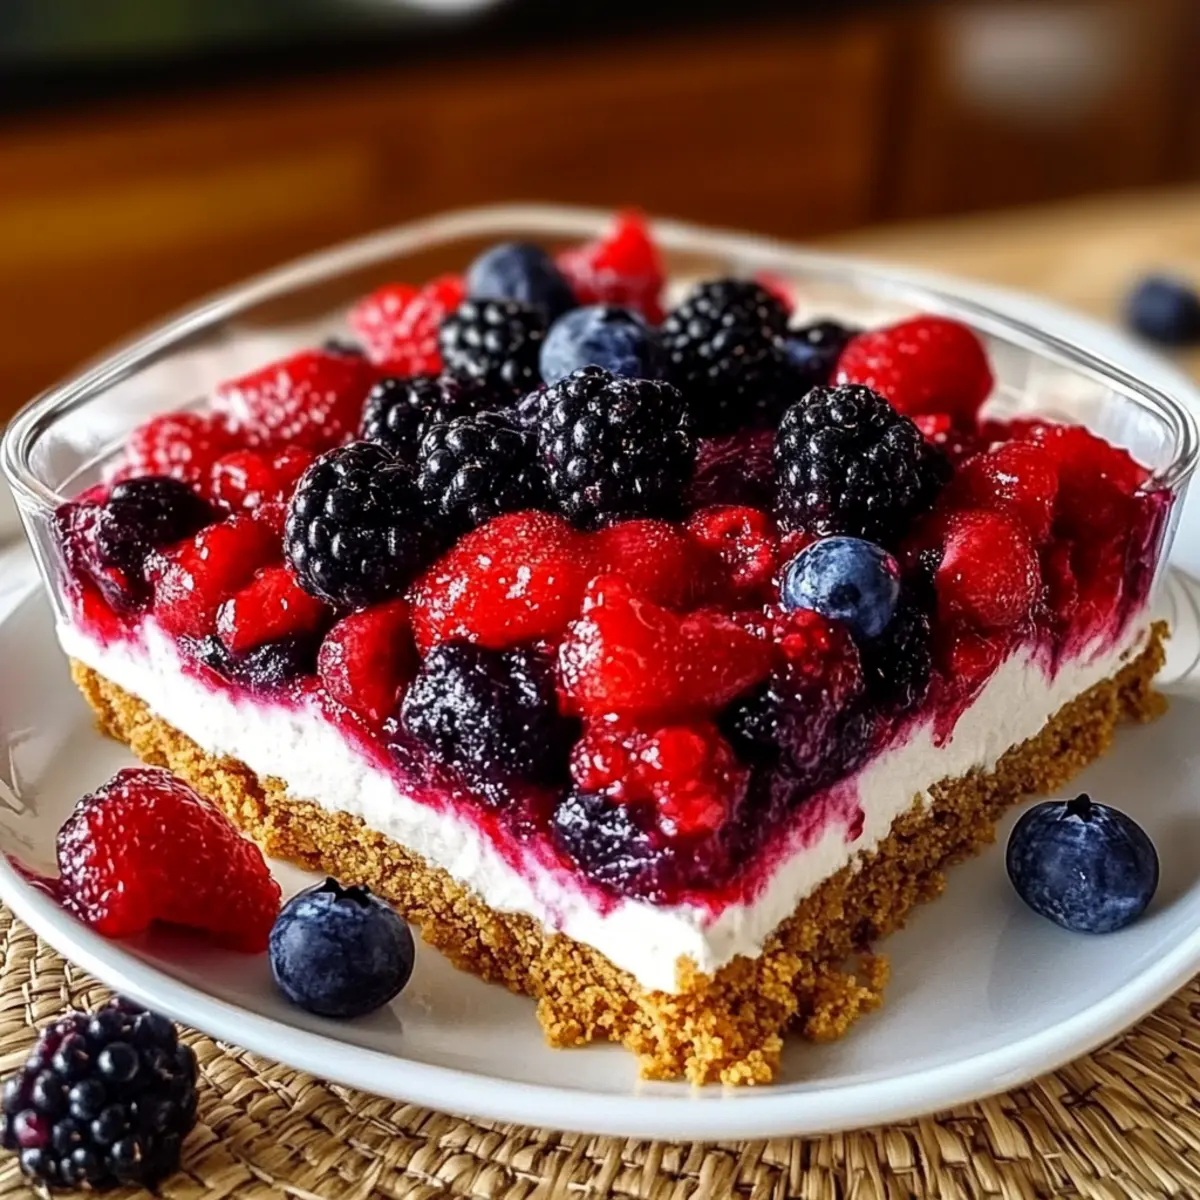
• Mixed Berries – Offers a fresh burst of flavor and natural sweetness; consider using a mix of strawberries, blueberries, and raspberries for a colorful look.
Dive into this delightful No-Bake Mixed Berry dessert and let the flavors whisk you away!
Step‑by‑Step Instructions for No-Bake Mixed Berry Yum Yum Dessert
Step 1: Prepare the Crust
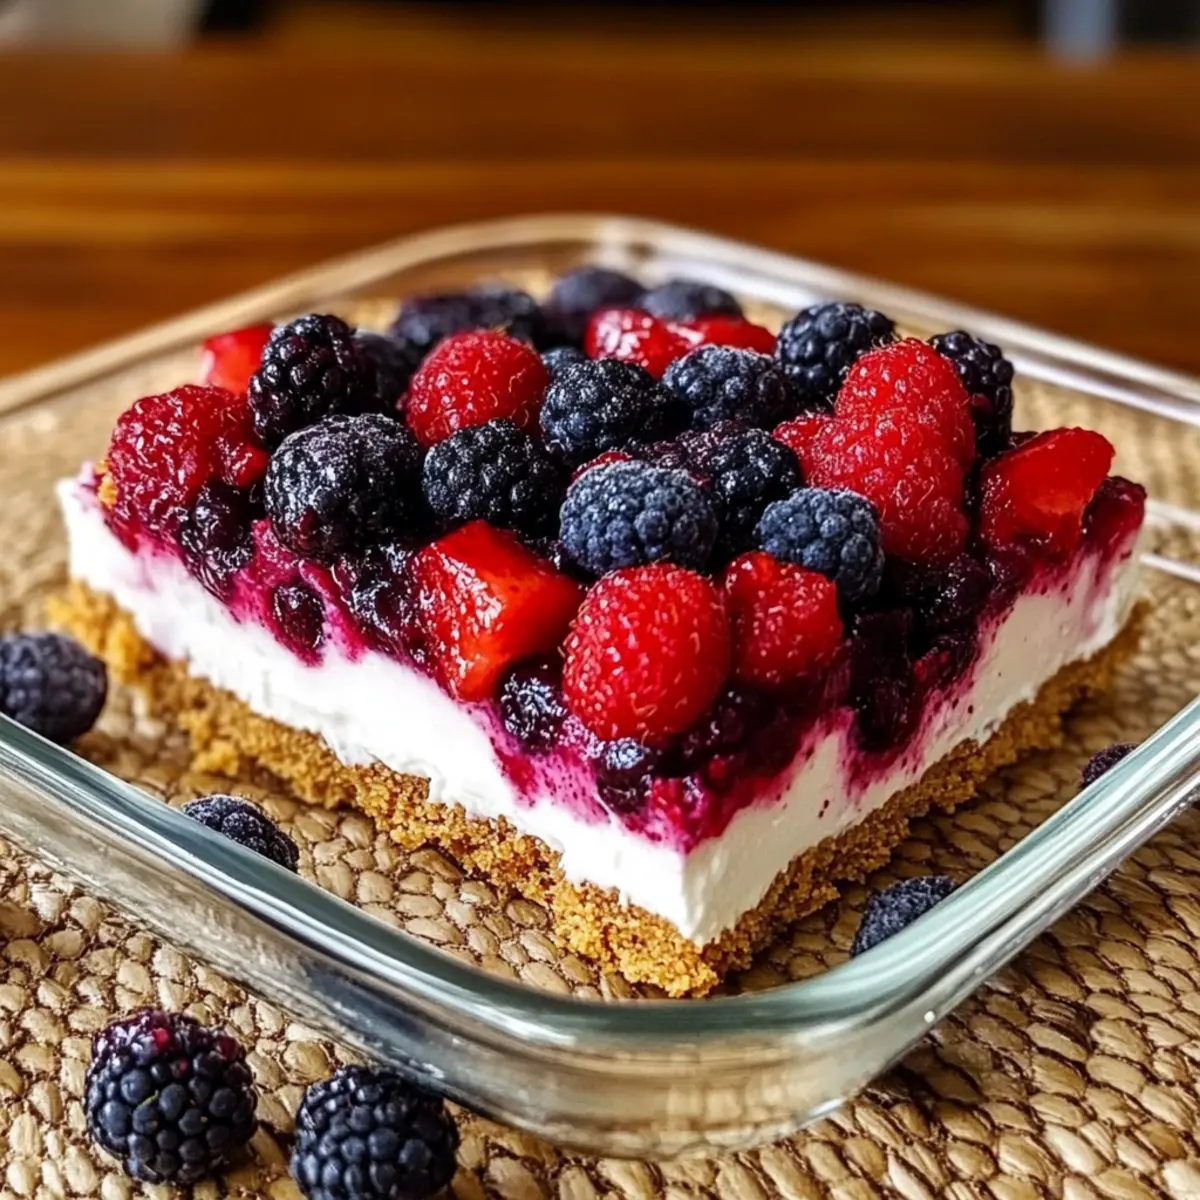
In a medium bowl, combine graham cracker crumbs with 4 tablespoons of melted butter, mixing until all crumbs are evenly coated. The mixture should be slightly damp and hold together when pressed. Next, grab a 9×9 inch dish and evenly press the crust mixture into the bottom to form a solid layer.
Step 2: Chill the Crust
Once the crust is firmly pressed down, place the dish in the refrigerator for about 15-20 minutes to set. This brief chill will help the butter solidify and ensure the crust holds its shape. While the crust chills, you can prepare the cream cheese filling.
Step 3: Make the Filling
In a separate mixing bowl, beat 8 ounces of softened cream cheese and 1/2 cup of granulated sugar together using an electric mixer on medium speed until the mixture is smooth and creamy. This should take about 2-3 minutes, so ensure no lumps remain. The filling should have a velvety consistency and a sweet, inviting aroma.
Step 4: Add Vanilla
Stir in 1 teaspoon of vanilla extract to the cream cheese and sugar mixture. Mix well until everything is fully incorporated, which enhances the flavor profile of your No-Bake Mixed Berry Yum Yum Dessert. Scrape down the sides of the bowl with a spatula to make sure all ingredients are combined evenly for a balanced taste.
Step 5: Fold in Whipped Topping
Gently fold in 8 ounces of whipped topping into the cream cheese mixture using a rubber spatula. Move slowly to maintain lightness; the filling should become airy and fluffy without deflating. The mixture should appear smooth and creamy, creating a delightful texture that complements the crust perfectly.
Step 6: Assemble the Dessert
Spread the cream cheese filling evenly over the chilled crust, smoothing it out with a spatula for an even layer. Make sure to cover every corner of the crust so that every bite is delicious. Once spread, place the assembled dish back into the refrigerator for about 1 hour to let it firm up slightly.
Step 7: Top with Berries
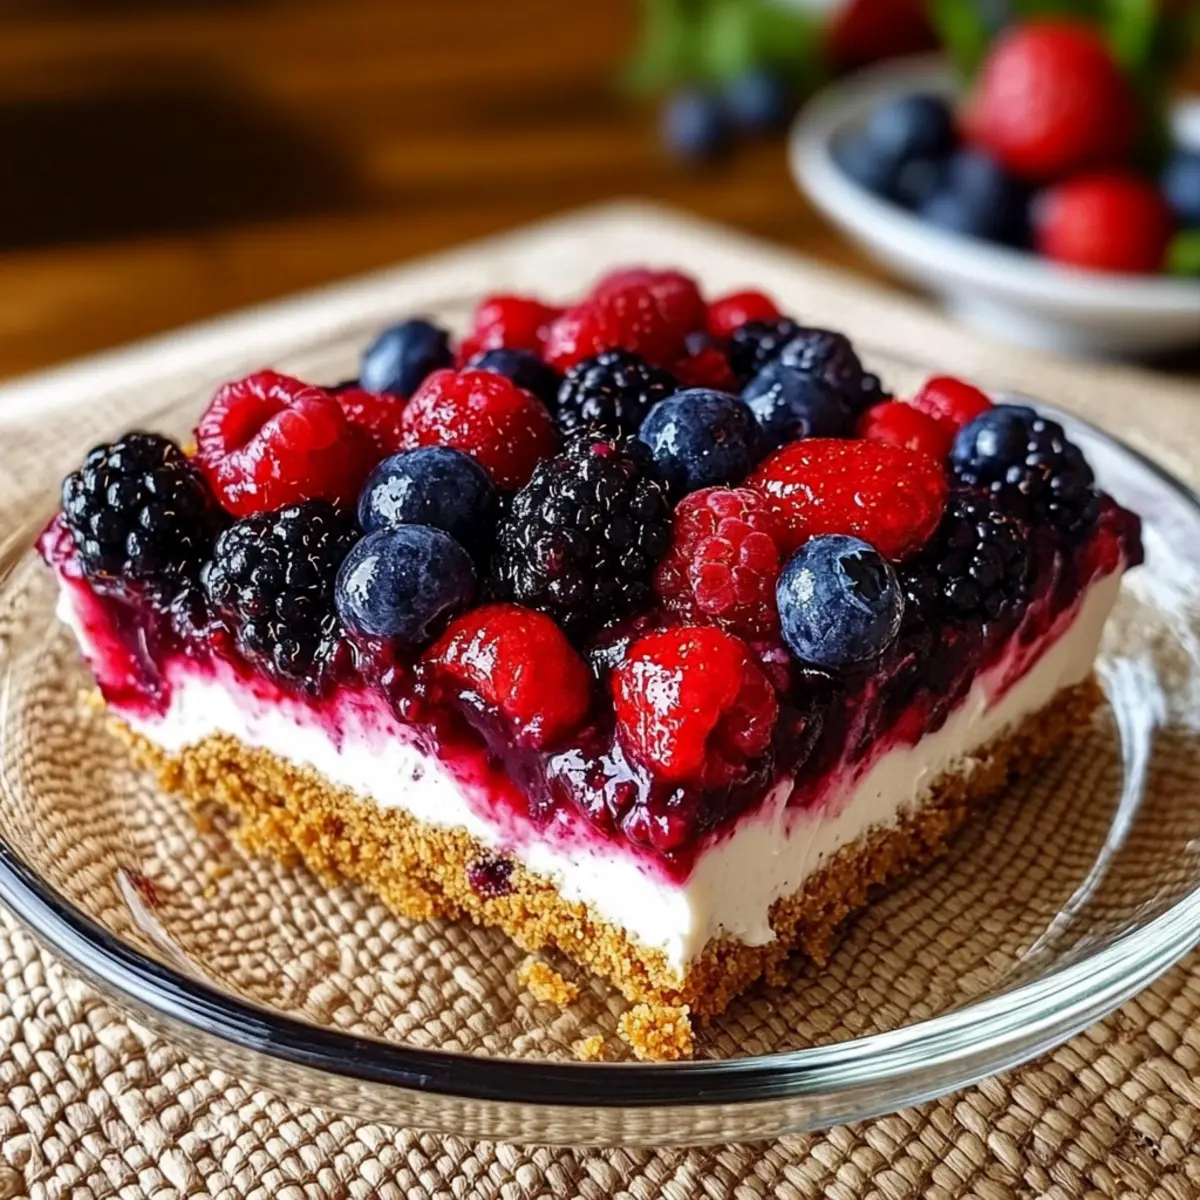
Just before serving, carefully top the chilled dessert with 2 cups of mixed berries. Arrange them artfully on top to create a vibrant visual appeal and a fresh flavor burst. The berries should glisten and look inviting, providing a beautiful contrast against the creamy filling and crust below.
No-Bake Mixed Berry Variations and Substitutions
Get creative with this dessert and explore delightful twists that will tantalize your taste buds!
- Dairy-Free: Use a dairy-free cream cheese and whipped topping for a vegan-friendly option without losing creaminess.
- Gluten-Free: Substitute graham crackers with gluten-free crumbs or oats mixed with coconut oil for a delicious, gluten-free crust.
- Fruit Swap: Replace mixed berries with your favorite seasonal fruits like peaches, bananas, or ripe cherries for a unique spin.
- Chocolate Drizzle: For an extra indulgent touch, drizzle melted chocolate over the top just before serving for a sweet contrast.
- Nutty Crunch: Add crushed nuts like almonds or walnuts to the crust for added texture and a flavor boost that complements the berries beautifully.
- Lemon Zest: Stir in some lemon zest into the cream cheese filling for a refreshing citrus touch that brightens the overall flavor profile.
- Berry Sauce: Serve with a homemade berry sauce drizzled on top for added sweetness and presentation flair.
- Layered Delight: Create a layered version by alternating the cream cheese filling with layers of fruit for a stunning visual display.
Feeling inspired? You might also enjoy making a scrumptious Strawberry Cheesecake Stuffed Cookie or showcase your berry love with a lovely Blueberry Cheesecake Swirl Cookie!
How to Store and Freeze No-Bake Mixed Berry Yum Yum Dessert
Refrigerator: Keep leftovers covered in an airtight container for up to 3 days. It ensures freshness while retaining the creamy texture of the filling and the vibrancy of the berries.
Freezer: If you have leftovers without berries, wrap tightly and freeze for up to 1 month. When ready to serve, thaw overnight in the refrigerator before adding fresh berries.
Assembly Tip: Always add the mixed berries just before serving to maintain their freshness and prevent sogginess in the dessert.
Reheating: This dessert is best served chilled, so no reheating is necessary. Enjoy the delightful No-Bake Mixed Berry experience straight from the fridge!
What to Serve with No-Bake Mixed Berry Yum Yum Dessert
As you prepare to indulge in this delightful treat, consider how to create an entire dining experience that dazzles the senses.
- Lightly Grilled Chicken: Juicy, herb-marinated chicken adds protein and complements the sweetness of the dessert, perfect for warm weather picnics.
- Fresh Garden Salad: Crisp greens and vibrant veggies topped with a citrus vinaigrette provide a refreshing contrast to the creamy dessert.
- Lemon Sorbet: The tartness of lemon sorbet balances the richness of the dessert while keeping a light and airy feel for hot summer days.
- Sparkling Water: A bubbly drink with a hint of lemon or berry ensures hydration while enhancing the flavor profile of the dessert.
- Cheese Platter: A mix of sharp cheeses and honey provides a savory element that perfectly contrast the sweet and fruity bites of the dessert.
- Chocolate-Covered Strawberries: These luscious treats create additional sweetness and decadence, enticing guests with their delightful pairing potential.
- Mint-Infused Iced Tea: This refreshing drink, with hints of cooling mint, complements the flavors of the berries, enhancing each bite’s enjoyment.
- Coconut Macaroons: Chewy, sweet treats add a tropical touch, contrasting with the no-bake berry dessert’s smooth, creamy texture.
Expert Tips for No-Bake Mixed Berry Yum Yum Dessert
Room Temperature Cream Cheese: Ensure your cream cheese is at room temperature before mixing to avoid lumps and achieve a smooth, creamy filling.
Chill Time Matters: Don’t skip the chilling time for the crust—15-20 minutes is essential for firming up and maintaining structure.
Berry Selection: Choose ripe, seasonal mixed berries for the best flavor. Frozen berries work too; just thaw and drain them beforehand to avoid excess moisture.
Adapt with Ease: Feel free to adapt the recipe for dietary preferences; use gluten-free crumbs and dairy-free cream cheese for a delicious allergen-friendly option.
Serving Freshness: Top the dessert with berries just before serving to keep them vibrant and fresh; this enhances both appearance and taste.
Storage Tips: Store leftovers covered in the refrigerator for up to 3 days, but avoid freezing after the berries are added for the best texture.
Make Ahead Options
These No-Bake Mixed Berry Yum Yum Desserts are perfect for meal prep enthusiasts! You can prepare the crust and filling up to 24 hours in advance, which not only saves time but also allows the flavors to meld beautifully. To prep ahead, simply make the crust and press it into the dish as instructed, then cover with plastic wrap and refrigerate. For the filling, mix the cream cheese, sugar, and vanilla, and store it in an airtight container in the fridge. Just before serving, gently fold in the whipped topping and spread the mixture over the crust. Top with mixed berries, and you’ll have a refreshing, delightful dessert that tastes just as delicious as if made fresh that day!
Advertisement
No-Bake Mixed Berry Yum Yum Dessert Recipe FAQs
How do I select ripe mixed berries for the dessert?
Absolutely! When choosing mixed berries, look for ones that are firm, plump, and brightly colored. Strawberries should be vibrant red without any dark spots, while blueberries should have a light bloom on their skin, indicating freshness. If you opt for raspberries, they should be whole and not overly mushy. If using frozen berries, ensure they are thawed and drained well to prevent excess moisture ruining your dessert.
How should I store leftovers of the No-Bake Mixed Berry Yum Yum Dessert?
Very important! Store any leftovers in an airtight container in the refrigerator for up to 3 days. This helps preserve the creamy texture of the filling and the freshness of the berries. When you’re ready to indulge again, just scoop out a piece and enjoy it straight from the fridge!
Can I freeze the No-Bake Mixed Berry Yum Yum Dessert?
Of course! If you have leftovers without the berries, wrap the dessert tightly in plastic wrap or aluminum foil and freeze it for up to 1 month. Just make sure to label it with the date. To enjoy, thaw it overnight in the refrigerator. Once it’s defrosted, top it with fresh mixed berries just before serving to maintain their vibrant color and texture.
What should I do if my cream cheese filling is lumpy?
No worries! If your cream cheese filling is lumpy, it’s likely that the cream cheese wasn’t softened enough. To remedy this, you can do a couple of things: First, ensure your cream cheese is at room temperature before mixing—this usually takes about 30 minutes outside of the fridge. If you’ve already mixed it and it’s still lumpy, try mixing it again with an electric mixer for a few extra minutes until smooth. A splash of milk or cream while mixing can also help achieve a silkier consistency!
Is this dessert suitable for people with allergies?
Absolutely! This No-Bake Mixed Berry Yum Yum Dessert can be easily adapted to fit various dietary restrictions. For a dairy-free option, simply substitute the cream cheese and whipped topping with dairy-free alternatives available in stores. Also, if you need a gluten-free option, you can use gluten-free graham cracker crumbs for the crust. Always double-check labels to ensure ingredients are allergy-safe for those you’re serving!
How do I make this dessert more visually appealing?
I often recommend adding a sprig of fresh mint or a dusting of powdered sugar on top right before serving to elevate the presentation! You can also layer the mixed berries for an attractive pattern. For an added flair, consider drizzling some chocolate sauce on top or using a mix of berry colors for a stunning visual contrast—because we eat with our eyes too!
Delightful No-Bake Mixed Berry Dessert for Easy Summer Indulgence
Ingredients
Equipment
Method
- In a medium bowl, combine graham cracker crumbs with melted butter, mixing until all crumbs are evenly coated. Press the mixture into the bottom of a 9x9 inch dish.
- Place the dish in the refrigerator for about 15-20 minutes to set.
- In a separate bowl, beat softened cream cheese and granulated sugar with an electric mixer until smooth and creamy.
- Stir in vanilla extract, mixing until fully incorporated.
- Gently fold in whipped topping until the mixture is smooth and creamy.
- Spread the cream cheese filling evenly over the chilled crust.
- Top the chilled dessert with mixed berries just before serving.