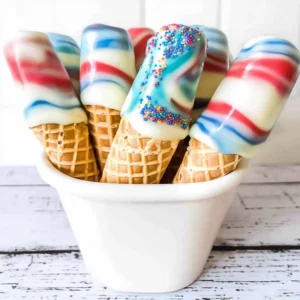
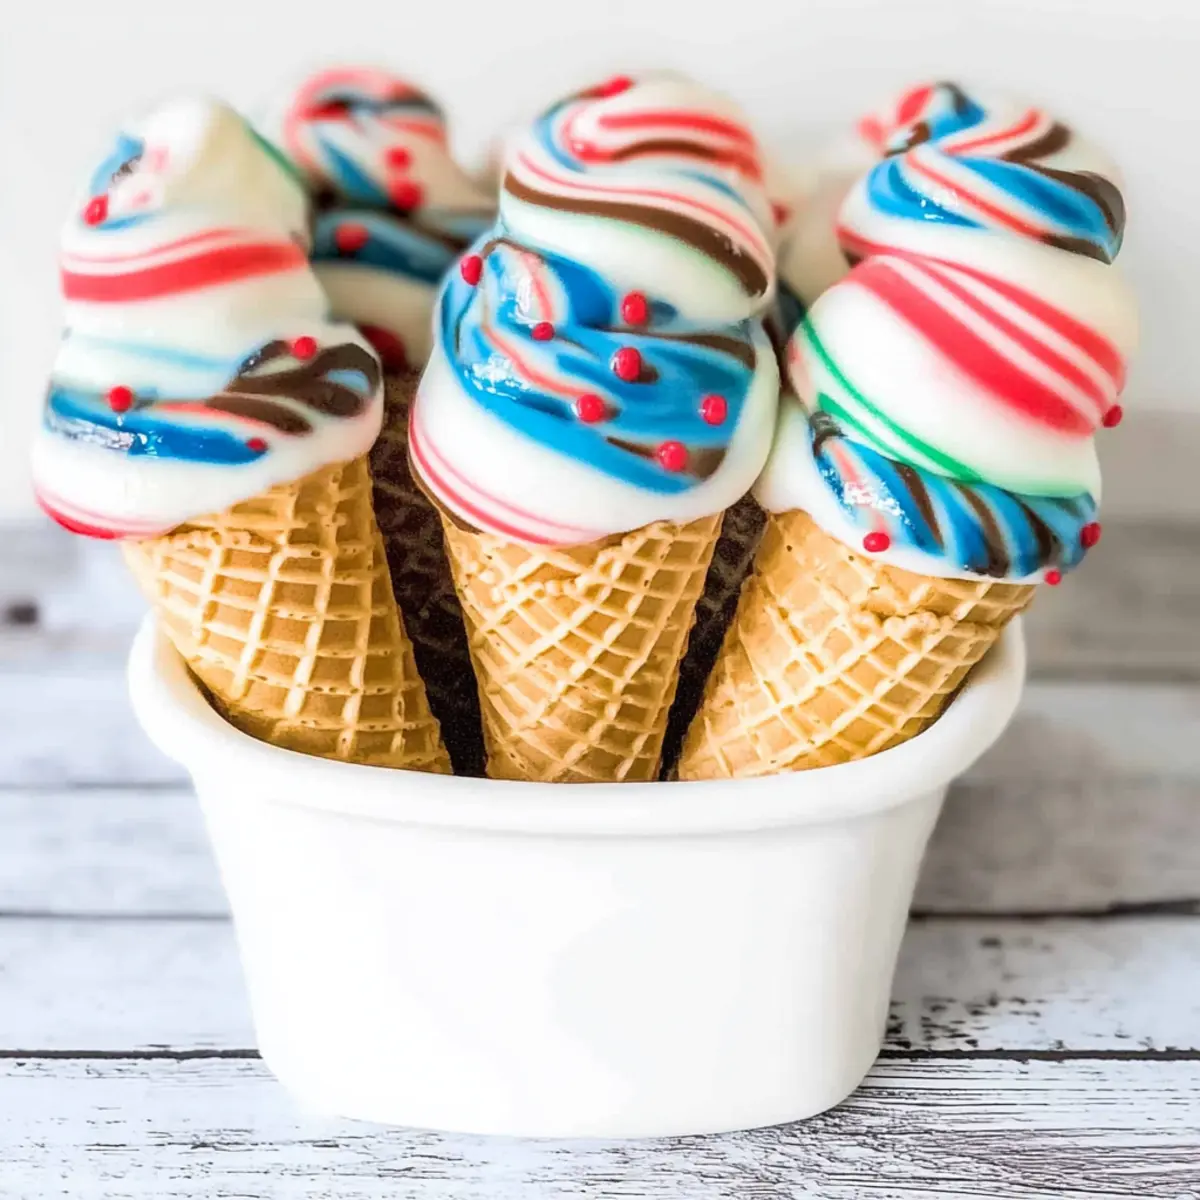
As summer days heat up, nothing beats the excitement of a simple, yet vibrant treat like dipped sugar cones! These delightful creations are not only a colorful addition to any gathering, but they also bring a satisfying crunch paired with a hint of sweet chocolate that melts in your mouth. With quick prep and endless customization options—from swirling different candy melts to rolling them in sprinkles—these dipped sugar cones are a win for every home chef looking to make family-friendly desserts. Whether you’re hosting a backyard barbecue or celebrating a festive occasion, you’ll find that these cones are a playful treat that brings smiles all around. Curious about how to whip up these delightful desserts in no time? Let’s dive into the recipe!

Why are Dipped Sugar Cones a Must-Try?
Vibrant, Fun Presentation: These cones are not just a dessert; they’re a celebration! With a riot of colors from candy melts, they brighten up any event, making them a showstopper.
Quick & Easy: You won’t need to spend hours in the kitchen—these delightful treats are quick to prepare, leaving you more time to enjoy with friends and family.
Customizable Treats: From dark chocolate to a rainbow of candy melts, you can tailor these cones to fit any theme or preference. Plus, rolling them in sprinkles adds that extra touch of fun!
Perfect for Summer Gatherings: Whether it’s a backyard barbecue or a festive holiday, these cones are a crowd-pleaser that everyone loves. Pair them with your favorite ice cream flavors, as suggested in our Sugar Cookie Amp recipe, for the ultimate treat!
Make Ahead for Convenience: Prepare them ahead of time and store them in the freezer—ideal for stress-free entertaining. Trust me, these Dipped Sugar Cones will quickly become your go-to summer dessert!
Dipped Sugar Cone Ingredients
• For the Coating
- Candy Melts – Choose your favorite colors; they add sweetness and a festive look, making these dipped sugar cones irresistibly fun!
- Dark Chocolate – A rich alternative to candy melts if you’re craving a deeper flavor profile.
• For the Cones
- Sugar Ice Cream Cones – The perfect crispy base that gives a delightful crunch; stick with the classic for the best results!
Step‑by‑Step Instructions for Dipped Sugar Cones
Step 1: Prepare the Surface
Begin by laying out a sheet of wax or parchment paper on a baking sheet. This will serve as the cooling surface for your dipped sugar cones, preventing them from sticking. Make sure the surface is clean and smooth; this will ensure easy handling once the cones are dipped.
Step 2: Melt Candy Melts
In separate microwave-safe bowls, place your chosen colors of candy melts. Heat each bowl in the microwave in 30-second intervals, stirring after each session until the melts are completely smooth. Aim for a glossy consistency without lumps, which should take about 1 to 2 minutes total.
Step 3: Combine Colors
To create a playful swirled effect, gently swirl together the melted candy melts with a toothpick or thin knife in a bowl slightly wider than the base of your sugar cones. Be careful not to overmix, as you want to maintain vibrant color contrast. This fun step adds excitement and creativity to your dipped sugar cones!
Step 4: Dip Cones
Take your sugar cone and carefully dip it into the swirled melted candy melts, ensuring the cone is well-coated but allowing excess to drip back into the bowl. Hold the dipped cone upside down for a moment to allow the chocolate to set slightly, then place it upright on your prepared wax paper.
Step 5: Set the Cones
Let the dipped sugar cones sit at room temperature for 15 to 30 minutes, allowing the chocolate to harden completely. For a quicker option, place the cones in the freezer for about 10 to 15 minutes until the coating is firm to the touch. Either way, make sure they’ve set properly before moving on.
Step 6: Storage
Once fully set, your vibrant dipped sugar cones can be served immediately or stored for later enjoyment. Keep them in an airtight container in the freezer, where they will stay fresh for up to 30 days. This makes these delightful cones an easy treat to prepare ahead of gatherings or for a sweet surprise any day.
Storage Tips for Dipped Sugar Cones
Room Temperature: Store the dipped sugar cones in a cool, dry place for up to 1 day if serving immediately. Avoid humidity, which can affect the chocolate coating.
Fridge: If you need to keep them longer, you can refrigerate your dipped sugar cones for up to 3 days in an airtight container. This helps maintain their freshness and prevents them from becoming too soft.
Freezer: For longer storage, place the dipped sugar cones in an airtight container and freeze them for up to 30 days. This keeps them crisp and ready for whenever you’re craving a festive treat.
Reheating: When you’re ready to enjoy them, take the frozen cones out, and let them sit at room temperature for a few minutes. This ensures your sweet chocolate coating stays perfect when craving these Dipped Sugar Cones!
Make Ahead Options
These colorful dipped sugar cones are perfect for meal prep enthusiasts! You can prepare the cones up to 24 hours in advance by simply dipping them in the melted candy melts and then placing them on wax paper to set. Once finished setting, store them in an airtight container in the freezer for optimal freshness, where they’ll last up to 30 days. To maintain their quality and vibrant colors, ensure they are completely cooled and hardened before stacking them in your container. When ready to serve, you can pull them out of the freezer and enjoy them with your favorite ice cream—making dessert a breeze on busy summer nights!
Dipped Sugar Cones: Fun Variations
Feel free to unleash your creativity with these delightful dipped sugar cones, adding colors and flavors that delight the senses!
-
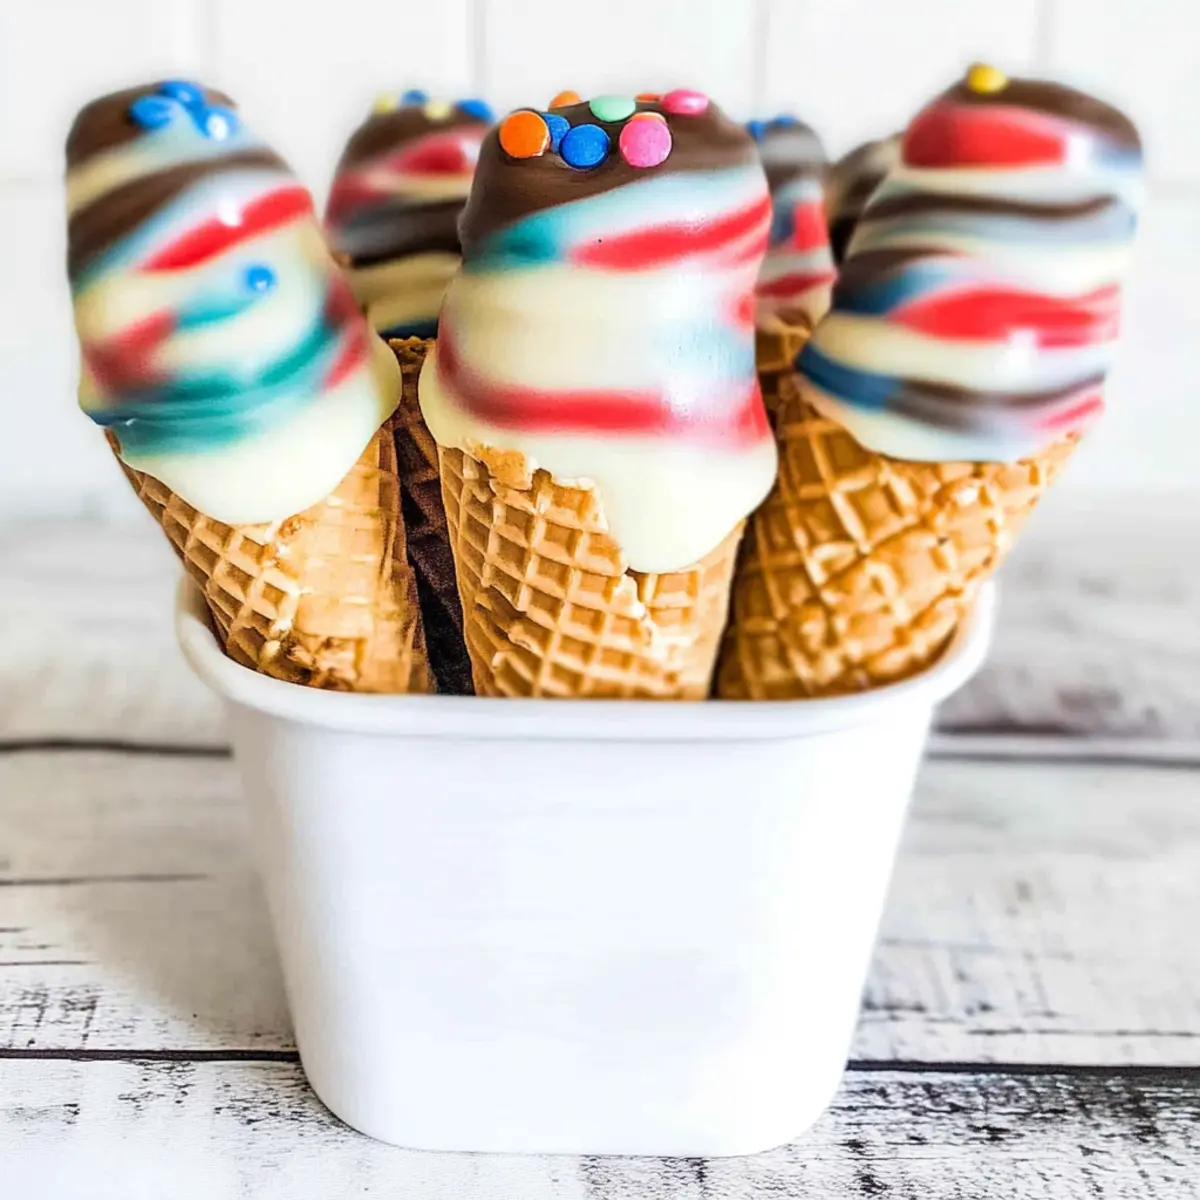
Chocolate Lovers: Use rich dark chocolate instead of candy melts for a deeper, luxurious taste. This twist brings an indulgent twist that chocolate enthusiasts will adore.
-
Rainbow Swirls: Mix multiple colors of candy melts to create a vibrant rainbow effect. The more colors, the more fun! You’ll be amazed at the delightful surprise pack with every bite.
-
Nutty Crunch: Roll your dipped cones in crushed nuts or coconut for a tasty texture upgrade. This adds delicious crunch and a whole new flavor dimension to your treat.
-
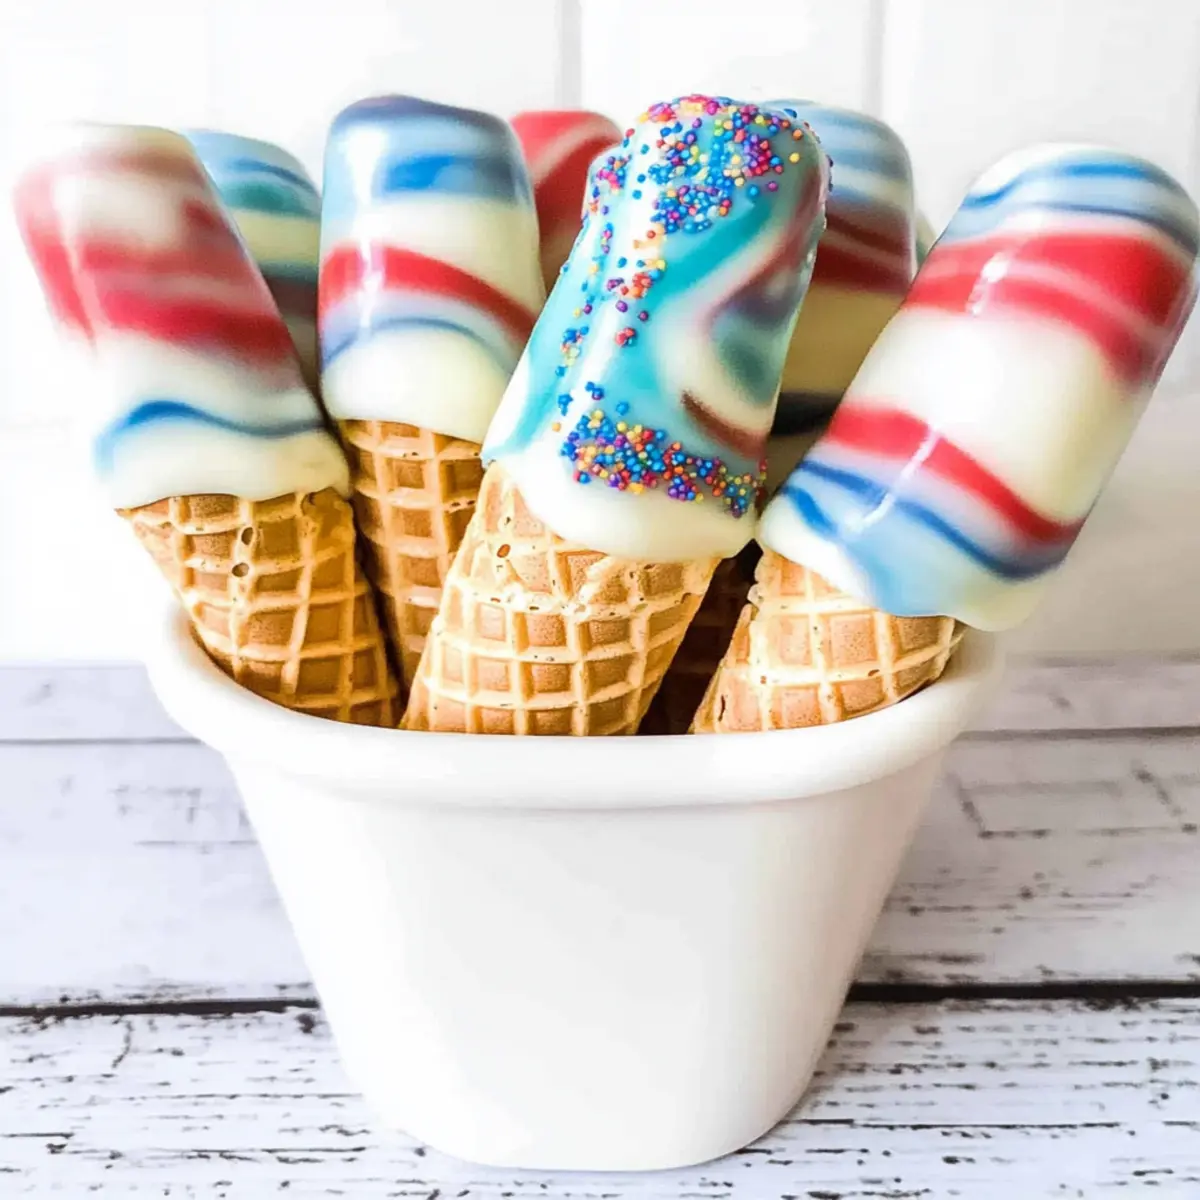
Festive Sprinkles: After dipping, generously coat the cones with sprinkles for a party-ready look. This adds a festive touch that’s perfect for birthdays, holidays, or just because!
-
Citrus Zing: Add a few drops of citrus extract to melted white chocolate for a refreshing lemon or orange flavor. It’s a bright twist to elevate your cones to another level.
-
Spicy Surprise: Blend in a dash of cayenne or chili powder to dark chocolate for a sweet and spicy combo. This unexpected addition will tantalize adventurous taste buds!
-
Candy Coated: Dip the finished cones in mini chocolate chips or candy pieces for extra sweetness and a pop of color. This fun method guarantees a sweet surprise with every crunch!
-
Cookies & Cream: Crush up some chocolate sandwich cookies and roll your dipped cones in the crumbs. It’s a delightful way to enjoy that classic cookie flavor! For more cookie fun, check out our Chocolate Dipped Brownie recipe for another tasty treat.
Feel inspired to mix and match these variations, making each batch of dipped sugar cones a unique and enjoyable experience for everyone!
Expert Tips for Dipped Sugar Cones
• Melt Separately: Always melt each color of candy melts in separate bowls to avoid muddying the colors and ensure a vibrant swirled look.
• Swirl Gently: Be careful not to overmix the melted candy when combining colors; a few gentle swirls will keep the vibrant effects intact.
• Use Quality Ingredients: For the best flavor and texture, opt for high-quality candy melts or chocolate. This makes your dipped sugar cones truly shine!
• Don’t Rush Setting: Allow the cones to set at room temperature; patience is key to achieving the perfect glossy finish. If you’re in a hurry, use the freezer for a quicker chill.
• Avoid Over-Dipping: When dipping cones, ensure you’re allowing excess chocolate to drip off, which prevents a thick layer that can lead to a messy look.
What to Serve with Colorful Dipped Sugar Cones?
Savor every bite of these vibrant treats by pairing them with delightful accompaniments that elevate the experience!
-
Assorted Ice Cream Flavors: Create a classic combination by serving these cones with your favorite ice cream. The contrast of flavors is a hit!
-
Fresh Fruit Salad: A refreshing fruit salad adds a burst of color and natural sweetness that complements the chocolatey cones beautifully.
-
Chocolate Drizzle: Enhance the sweetness by drizzling extra melted chocolate over the cones before serving—a decadent touch of indulgence!
-
Sprinkles Galore: Offer a variety of sprinkles on the side for guests to customize their cones, adding fun texture and vibrant colors.
-
Whipped Cream: A dollop of homemade or store-bought whipped cream creates a creamy dimension that pairs perfectly with the crunchy cone.
-
Fizzy Lemonade: A chilled glass of fizzy lemonade balances the sweetness of the cones with a zesty zing, making for a refreshing drink option.
-
Mini Marshmallows: Sprinkle mini marshmallows over your cone creations for added texture and a nostalgic camping feel, taking you back to summer nights by the fire.
-
Chocolate Milkshake: For a truly indulgent treat, pair your cones with a thick chocolate milkshake—a dreamy dessert duo!
-
Frozen Yogurt: Lighten things up by serving with frozen yogurt, a creamy alternative that adds a delicious tang to your festive cones.
Dipped Sugar Cones Recipe FAQs
What type of candy melts should I use for dipped sugar cones?
You can use any color of candy melts that you fancy! I recommend starting with classic white chocolate for a beautiful base, but feel free to experiment with dark chocolate or milk chocolate for a richer flavor. For a festive look, try to mix it up with vibrant colors like turquoise, pink, or yellow!
Advertisement
How long do dipped sugar cones last in storage?
Dipped sugar cones can be stored at room temperature for up to 1 day if you’re serving them immediately. However, if you want to keep them fresh longer, place them in an airtight container in the refrigerator for up to 3 days. For ultimate freshness, freeze them for up to 30 days, ensuring they remain crisp and delightful!
Can I freeze my dipped sugar cones?
Absolutely! To freeze, make sure your dipped sugar cones are completely set, then place them in an airtight container, separating layers with parchment paper to avoid sticking. When you’re ready to enjoy them, simply take them out and let them sit at room temperature for a few minutes to regain their delightful crunch.
What if my candy melts don’t melt smoothly?
If you find that your candy melts aren’t melting smoothly, try microwaving in shorter intervals—15 to 20 seconds, stirring in between. This method reduces the risk of burning the melts. Additionally, add a small amount of vegetable oil or cocoa butter to the melts; this helps achieve a smoother, more fluid consistency.
Can pets eat dipped sugar cones?
It’s best to keep dipped sugar cones away from pets, especially due to the chocolate content, which can be toxic to dogs and cats. If you’re considering a pet-friendly alternative, you could make “dog-safe” cones using yogurt melts or peanut butter, but always check with your vet first!
How can I ensure a beautifully swirled effect with my colors?
To achieve that lovely swirled effect, melt each color of candy melts separately. Pour them into a bowl and use a toothpick to gently swirl the colors together. Be careful not to overmix—just a few gentle swirls will keep those vibrant distinctions intact, ensuring your dipped sugar cones look as delicious as they taste!
Colorful Dipped Sugar Cones – A Festive Summer Delight
Ingredients
Equipment
Method
- Prepare the Surface: Lay out a sheet of wax or parchment paper on a baking sheet for cooling.
- Melt Candy Melts: Heat candy melts in separate microwave-safe bowls in 30-second intervals until smooth.
- Combine Colors: Swirl melted candy melts together in a bowl to create a playful effect.
- Dip Cones: Dip each cone into the melted candy, allowing excess to drip back.
- Set the Cones: Let cones set at room temperature for 15 to 30 minutes or freeze for quicker setting.
- Storage: Store in an airtight container in the freezer for up to 30 days.