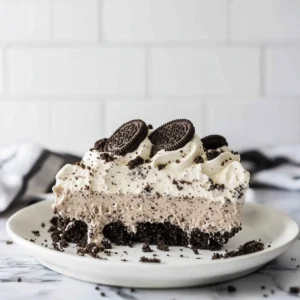
As I stood in my kitchen, remnants of a busy day swirling around me, I felt the familiar tug of comfort food calling my name. That’s when I decided to whip up my Easy No-Bake Oreo Pudding Pie. This delightful dessert is not only a breeze to prepare—taking just 20 minutes of hands-on time—but it also chills overnight for that dreamy mousse texture that keeps everyone coming back for seconds. It’s the kind of dish that brings nostalgic smiles, perfect for potlucks or cozy family gatherings. Plus, with a gluten-free option using gluten-free Oreos, everyone can join the deliciousness. Are you ready to indulge in a slice of this creamy goodness? Let’s dive into the scrumptious details!

Why Is This Oreo Pudding Pie Irresistible?
No-Bake Simplicity: You can have this decadent dessert ready in just 20 minutes! No oven needed, making it perfect for any skill level.
Fluffy Texture: The combination of cream and pudding creates a mousse-like filling that melts in your mouth.
Gluten-Free Option: Substitute with gluten-free Oreos, ensuring everyone can enjoy this treat at gatherings.
Versatile Flavors: Easily swap vanilla pudding for chocolate or use flavored Oreos to keep things exciting.
Crowd-Pleaser: Ideal for potlucks and family events, this dessert is sure to impress. It pairs beautifully with fresh berries or a drizzle of chocolate sauce. For more fabulous desserts, check out our Hearty Slow Cooker pie for hearty flavor or dive into a creamy Chocolate Protein Pudding for guilt-free indulgence!
Oreo Pudding Pie Ingredients
For the Crust
• Oreos – 36 pieces for a rich, chocolatey base; opt for gluten-free Oreos to keep it gluten-free.
• Unsalted Butter – 7 Tbsp, melted to bind the Oreo crumbs perfectly for a crunchy crust.
For the Filling
• Instant Vanilla Pudding Mix – 2 boxes for that rich flavor and thick texture; substitute with chocolate pudding for a twist on the classic Oreo pudding pie.
• Heavy Whipping Cream – 3 cups creates a thick, stable filling; coconut cream can replace it for a dairy-free option.
• Cool Whip – 8 oz, thawed for creaminess; use homemade whipped cream if you prefer a fresher taste.
• Chopped Oreos – 2 cups to add texture and delightful bites of Oreo throughout the filling.
For the Topping
• Heavy Whipping Cream – 1 cup for the topping; chill your beaters for the best results.
• Powdered Sugar – 1/4 cup to sweeten the whipped cream; adjust based on your sweetness preference.
• Vanilla Extract – 1 tsp to enhance the flavor profile of the topping; keep it as is for a classic taste.
Step‑by‑Step Instructions for Oreo Pudding Pie
Step 1: Prepare the Crust
Begin by placing 36 Oreo cookies into a food processor and pulse them until they turn into fine crumbs. In a medium bowl, combine the Oreo crumbs with 7 tablespoons of melted unsalted butter and mix until fully coated. Press this mixture firmly into the bottom and up the sides of a 9 or 10-inch pie pan. Chill the crust in the refrigerator for at least 30 minutes to set.
Step 2: Mix the Filling
In a large mixing bowl or using a stand mixer, combine 2 boxes of instant vanilla pudding mix with 3 cups of heavy whipping cream. Beat this mixture on medium speed until it thickens into a smooth and creamy consistency, which should take about 2 to 3 minutes. Avoid preparing the pudding as directed on the package; this step is crucial for that rich Oreo pudding pie filling.
Step 3: Add Ingredients
Gently fold in 8 oz of thawed Cool Whip and 2 cups of chopped Oreos into the thick pudding mixture. Use a spatula for this task, making sure not to deflate the filling while mixing. The resulting filling should be smooth and creamy, speckled with delightful pieces of Oreo for added texture and flavor throughout your Oreo pudding pie.
Step 4: Assemble the Pie
Once the crust has chilled, spread the pudding mixture evenly over the crust in the pie pan. Use a spatula to smooth out the top so it looks lovely and inviting. Cover the pie with plastic wrap and refrigerate it for at least 4 to 8 hours, or ideally overnight, to allow the flavors to meld and the filling to firm up beautifully.
Step 5: Prepare Topping
About 15 minutes before you’re ready to serve the Oreo pudding pie, chill a mixing bowl and beaters in the freezer. Then, pour 1 cup of heavy whipping cream into the chilled bowl and whip it on high speed, gradually adding 1/4 cup of powdered sugar and 1 teaspoon of vanilla extract, until stiff peaks form. This will create a luscious topping that complements the creamy pie perfectly.
Step 6: Serve
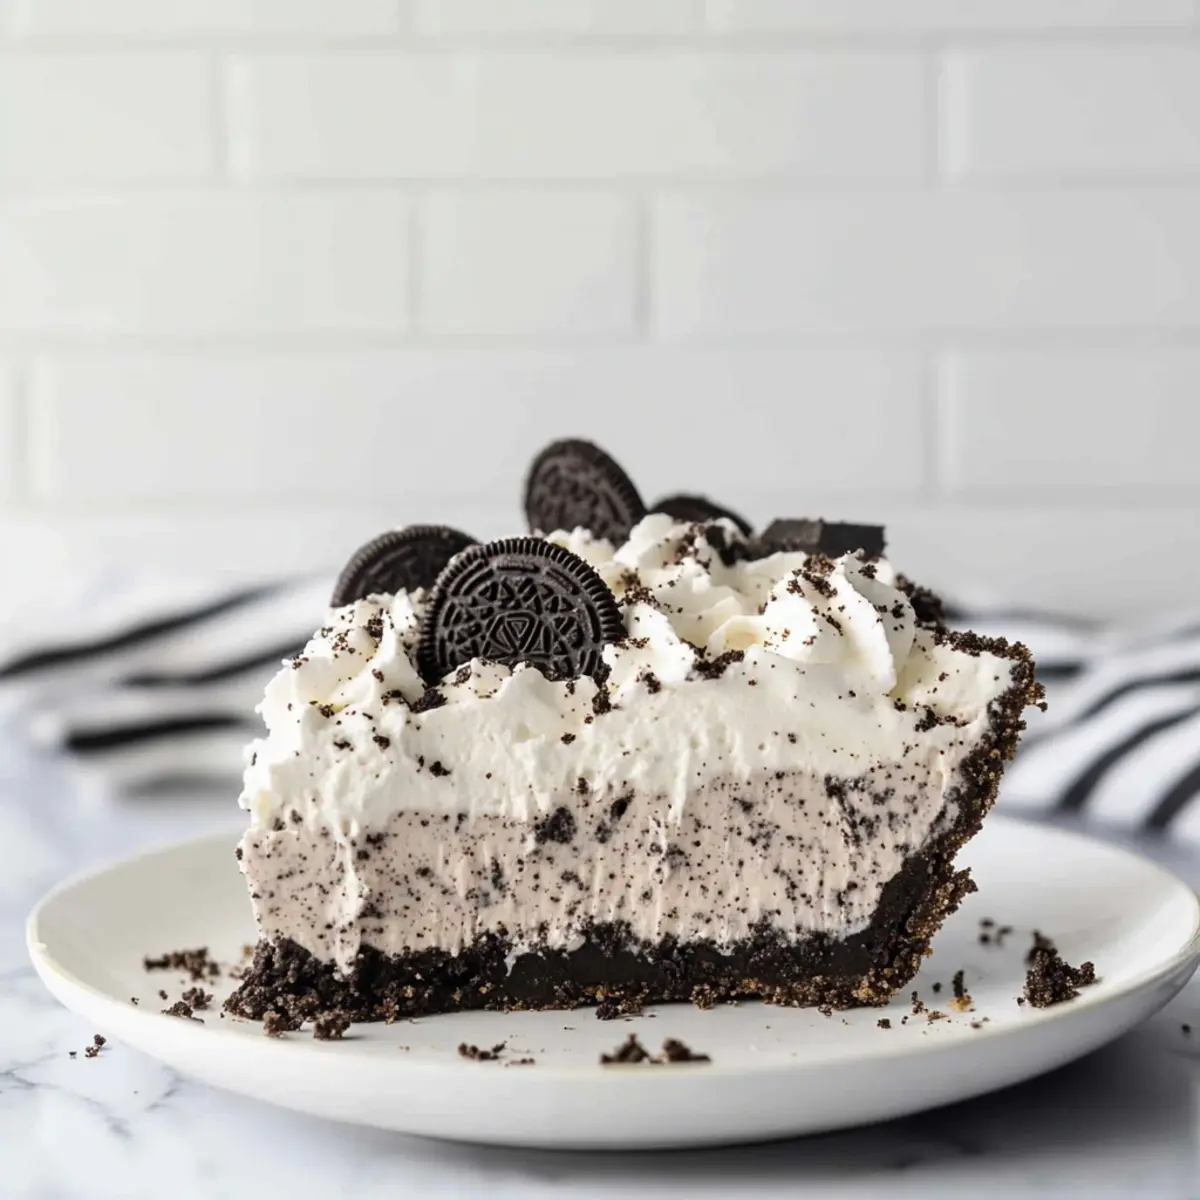
Once ready to serve, remove the pie from the refrigerator. Top it generously with the prepared whipped cream mixture, spreading it evenly over the filling. For an extra touch, sprinkle crushed Oreos on top before cutting into slices. Enjoy your delicious Oreo pudding pie at gatherings or cozy family events!
What to Serve with Oreo Pudding Pie
Creating a masterpiece like this pie deserves a delightful spread to complement its rich, creamy goodness.
- Fresh Berries: The natural tartness of strawberries or raspberries cuts through the sweetness, balancing the flavors perfectly. Their vibrant colors also add a touch of freshness to your dessert table.
- Chocolate Sauce: Drizzling warm chocolate sauce over each slice enhances the chocolate flavor of the pie, creating a decadent experience that chocolate lovers adore.
- Whipped Cream: A dollop of freshly whipped cream adds extra fluffiness, enhancing the mousse-like texture of the pie. We recommend a touch of vanilla extract for an aromatic twist.
- Ice Cream: Vanilla or cookies and cream ice cream pairs beautifully with the pie’s texture, offering a delightful contrast that delightedly melts in your mouth.
- Coffee or Espresso: Enjoy your pie with a cup of strong coffee to amplify the chocolatey flavors of the pie, creating a comforting combination perfect for afternoon gatherings.
- Mint Chocolates: Offering a few mint chocolates on the side gives a hint of refreshment and an unexpected flavor twist that surprises and pleases.
- Nutty Cookies: Light, nutty cookies add a delightful crunch, inviting your guests to enjoy different textures along with their pie. A perfect treat alongside!
- Soda Float: Create a fun dessert experience by serving the pie with a soda float, pairing the rich pie with refreshing soda and a scoop of ice cream.
- Peanut Butter Drizzle: A drizzle of creamy peanut butter elevates the pie’s flavor profile, making it a dream for those who adore that sweet and salty combination.
- Chilled Wine: A glass of sweet dessert wine pairs beautifully, enhancing the rich, creamy flavors while providing a sophisticated touch to your gathering.
Make Ahead Options
These Easy No-Bake Oreo Pudding Pie delights are perfect for busy home cooks looking to save time without sacrificing flavor! You can prepare the crust and filling up to 24 hours in advance, simply storing the assembled pie covered in the refrigerator. If you prefer, the pie can be made the day before serving and chilled overnight, allowing the flavors to meld beautifully. When ready to serve, whip the cream and top the pie with it alongside some crushed Oreos for that finishing touch. By preparing ahead, you’ll enjoy all the creamy, rich goodness of the Oreo pudding pie with minimal effort on the day of your gathering!
Oreo Pudding Pie Variations
Feel free to get creative with this deliciously rich dessert and make it uniquely yours!
-
Chocolate Twist: Swap vanilla pudding with chocolate pudding mix for an extra layer of chocolatey goodness. This variation is perfect for chocolate lovers craving a richer flavor.
-
Dairy-Free Delight: Use coconut cream instead of heavy whipping cream. You’ll achieve a similarly creamy texture with a hint of tropical flavor, perfect for those on a dairy-free diet.
-
Homemade Whipped Cream: Replace Cool Whip with stabilized homemade whipped cream. This adds a touch of freshness to your pie, making it even more delightful.
-
Minty Fresh: Use mint-flavored Oreos instead of regular ones for a refreshing twist. The combination of mint and chocolate creates a decadent dessert that’s reminiscent of mint chocolate chip ice cream.
-
Savory Crunch: Add a sprinkle of sea salt on top of the whipped cream for a savory contrast. The salt enhances the sweetness of the pudding while adding an intriguing layer of flavor.
-
No Bake Individual Cups: Layer the pie filling and crushed Oreos in small jars for a fun, individual serving option. Perfect for parties or when you want a manageable dessert portion.
-
Peanut Butter Lovers: Incorporate peanut butter into the filling by mixing in a couple of tablespoons. The nutty flavor pairs beautifully with the Oreos for an irresistible combination.
-
Fruit Fusion: Garnish with fresh berries like raspberries or strawberries before serving. Their tartness will cut through the richness of the pie, adding brightness and flavor.
Don’t forget to check out our other delightful desserts, like the Thick Cheesy Pie for a savory treat or a guilt-free indulgence like our Chocolate Protein Pudding!
Expert Tips for Oreo Pudding Pie
Chill Everything: Ensure your heavy cream and mixing bowl are cold for optimal whipping. This prevents the whipped cream from deflating.
Avoid Overmixing: When folding in the Cool Whip and chopped Oreos, be gentle to maintain that fluffy texture in your Oreo pudding pie.
Use Fresh Ingredients: Fresh, high-quality ingredients enhance flavor and texture—especially the dairy components!
Plan Ahead: Make the pie a day in advance to let the flavors meld beautifully. This will elevate your dessert experience.
Perfect Presentation: Chill the assembled pie for at least 4 hours or overnight for the best sliceability and texture when serving.
How to Store and Freeze Oreo Pudding Pie
Fridge: Store your Oreo pudding pie covered in the refrigerator for up to 3-4 days. This keeps the pie fresh and the filling creamy.
Freezer: To freeze the pie, wrap it tightly in plastic wrap and then in aluminum foil to prevent freezer burn. It can be frozen for up to 2 months.
Thawing: When ready to enjoy, transfer the frozen pie to the fridge to thaw overnight. This allows the texture to return to its creamy form, making it just as delightful as fresh.
Reheating: There’s no need to heat the Oreo pudding pie; simply slice and serve it cold for the best experience!
Oreo Pudding Pie Recipe FAQs
What kind of Oreos should I use for this pie?
You can use regular Oreos to create a classic taste and texture for your pie. If you’re looking for a gluten-free option, I recommend using gluten-free Oreos instead. They provide the same delightful flavor and crunch without compromising on taste!
Advertisement
How should I store the Oreo pudding pie once it’s made?
To keep your Oreo pudding pie fresh, store it in the refrigerator covered in plastic wrap or aluminum foil for up to 3-4 days. This helps maintain its creamy filling and delicious flavor. Just make sure it’s well-sealed to keep out any odors from other foods.
Can I freeze the Oreo pudding pie?
Absolutely! To freeze your pie, wrap it tightly in plastic wrap and then in aluminum foil to safeguard against freezer burn. It can be stored in the freezer for up to 2 months. Just remember to thaw it overnight in the refrigerator before serving for the best texture.
What if my heavy cream isn’t whipping well?
If your heavy cream isn’t whipping well, it’s often because the cream or the bowl isn’t cold enough. Make sure to chill both your mixing bowl and the beaters in the freezer for about 15 minutes before whipping. Additionally, using fresh heavy cream can make a big difference in achieving those stiff peaks!
Can I make this pie in advance?
Yes, definitely! In fact, making the Oreo pudding pie a day in advance is a great idea. The flavors have time to meld beautifully while it chills in the refrigerator. Just remember to cover it properly to keep it fresh!
Are there any dietary considerations for this recipe?
The Oreo pudding pie can be adapted to meet various dietary needs. For a gluten-free version, simply use gluten-free Oreos. If you’re looking for a dairy-free alternative, you can substitute heavy whipping cream with coconut cream in the filling and topping.
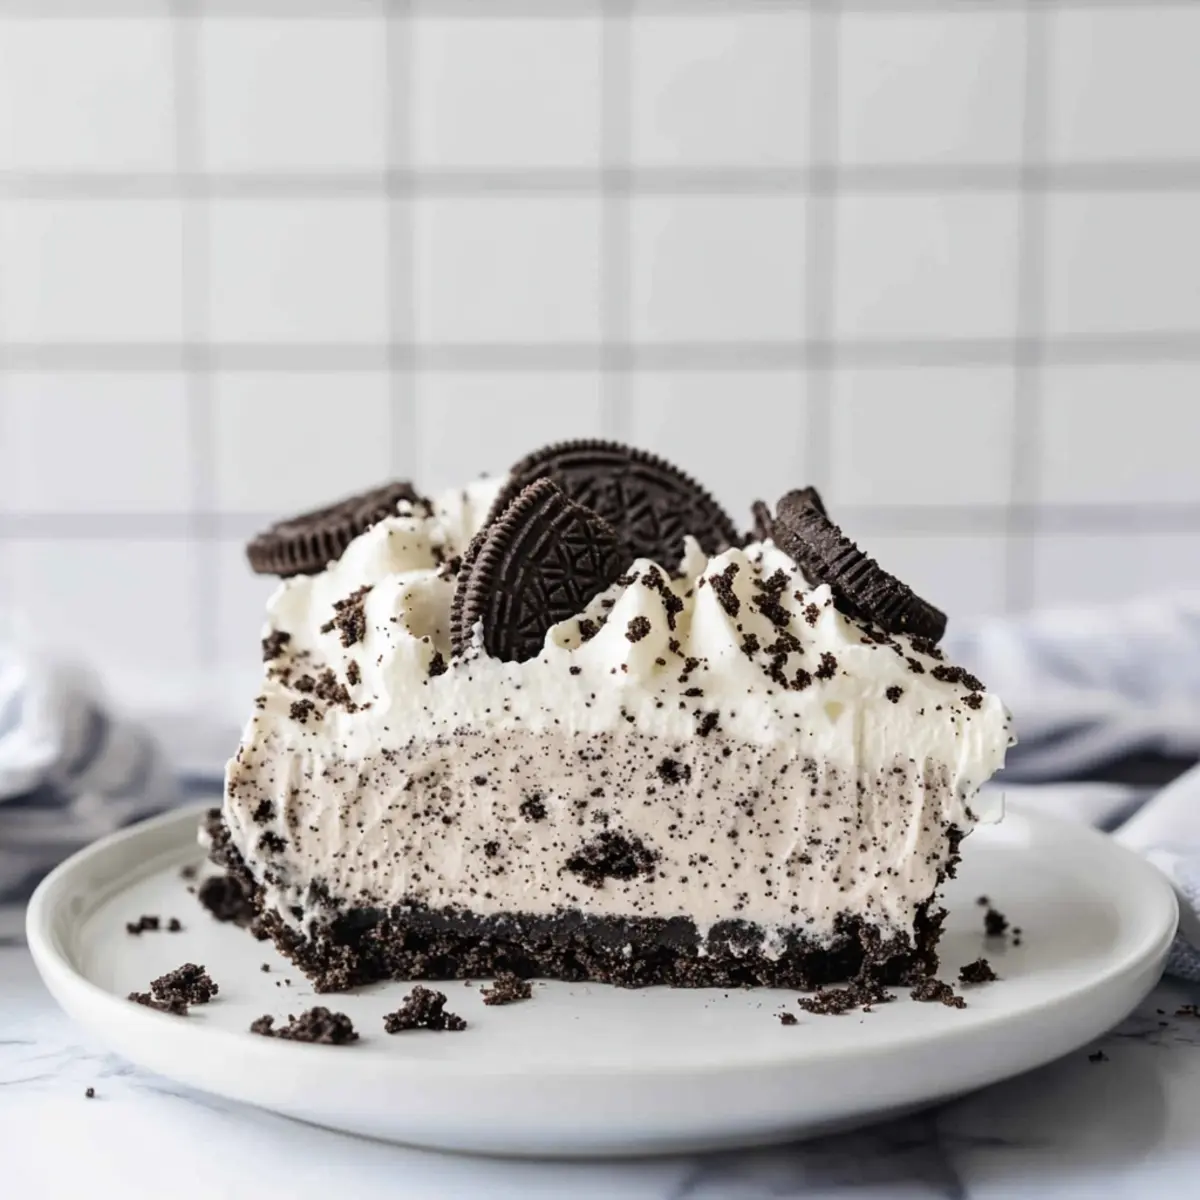
Indulge in Heavenly Oreo Pudding Pie: Creamy No-Bake Delight
Ingredients
Equipment
Method
- Begin by placing 36 Oreo cookies into a food processor and pulse them until they turn into fine crumbs. In a medium bowl, combine the Oreo crumbs with 7 tablespoons of melted unsalted butter and mix until fully coated. Press this mixture firmly into the bottom and up the sides of a 9 or 10-inch pie pan. Chill the crust in the refrigerator for at least 30 minutes to set.
- In a large mixing bowl or using a stand mixer, combine 2 boxes of instant vanilla pudding mix with 3 cups of heavy whipping cream. Beat this mixture on medium speed until it thickens into a smooth and creamy consistency, which should take about 2 to 3 minutes.
- Gently fold in 8 oz of thawed Cool Whip and 2 cups of chopped Oreos into the thick pudding mixture. Use a spatula for this task, making sure not to deflate the filling while mixing.
- Once the crust has chilled, spread the pudding mixture evenly over the crust in the pie pan. Use a spatula to smooth out the top. Cover the pie with plastic wrap and refrigerate it for at least 4 to 8 hours, or ideally overnight.
- About 15 minutes before you're ready to serve, chill a mixing bowl and beaters in the freezer. Then, pour 1 cup of heavy whipping cream into the chilled bowl and whip it on high speed, gradually adding 1/4 cup of powdered sugar and 1 teaspoon of vanilla extract, until stiff peaks form.
- Once ready to serve, remove the pie from the refrigerator. Top it generously with the prepared whipped cream mixture. For an extra touch, sprinkle crushed Oreos on top before cutting into slices.