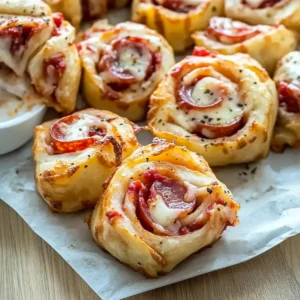
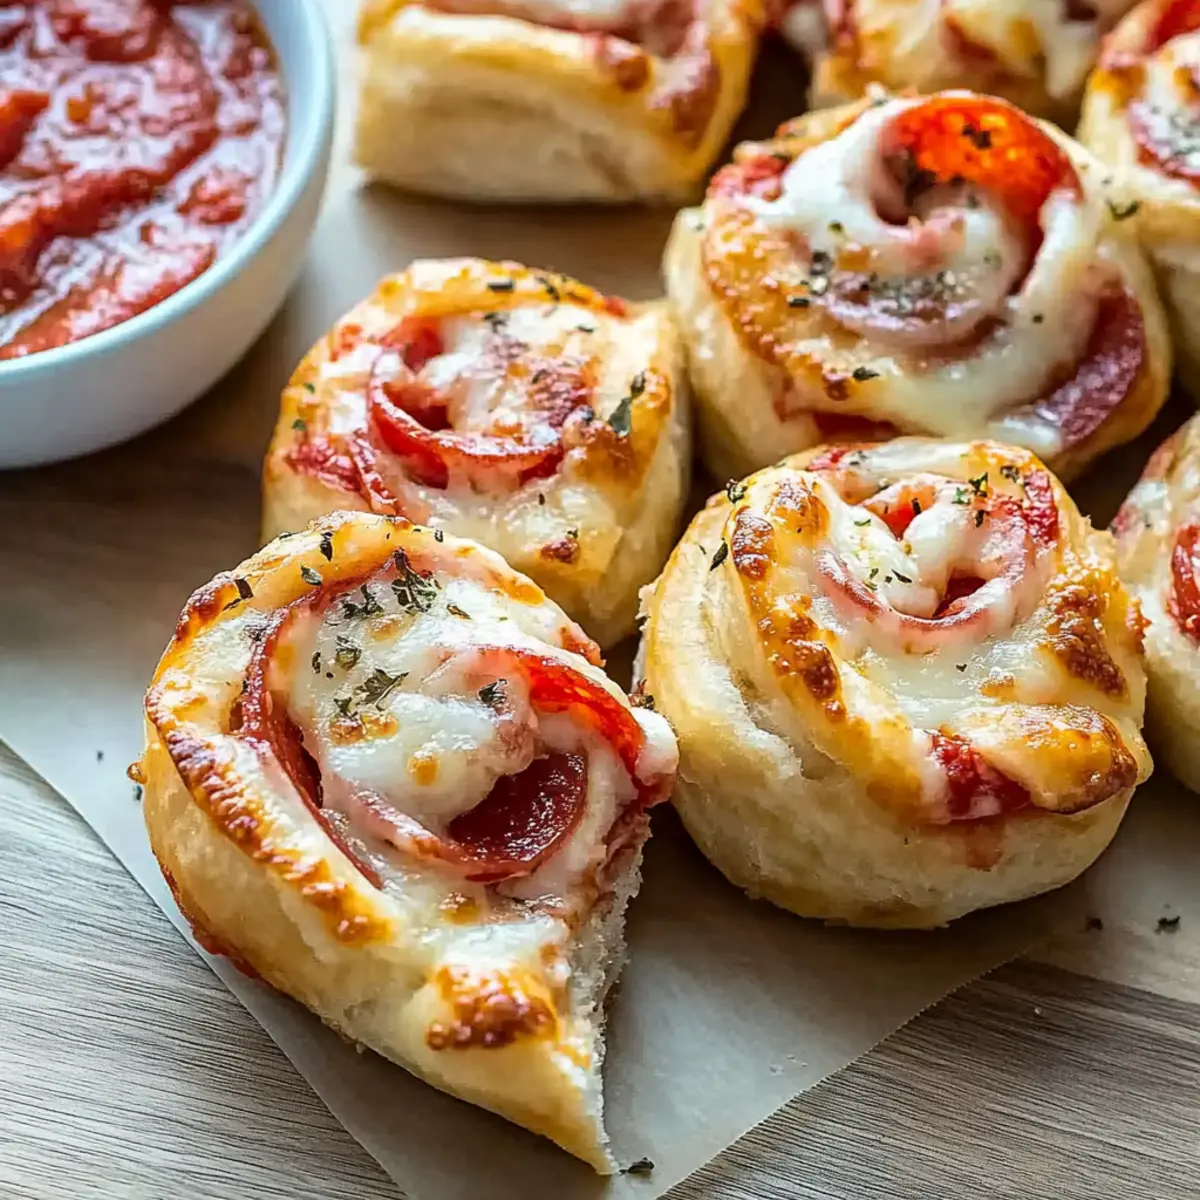
Picture this: a bustling game day gathering, laughter filling the air, and the enticing smell of freshly baked snacks wafting through your home. My Easy Homemade Pizza Rolls are here to steal the show! These delightful bite-sized beauties combine gooey mozzarella, savory pepperoni, and a sprinkle of Italian seasonings, making them the ultimate appetizer for any occasion. What I love most about this recipe is how quickly you can whip them up—just 20 minutes from prep to plate—perfect for those last-minute snack cravings! Plus, they’re a crowd-pleaser, sure to satisfy even the pickiest of eaters. So, why not add a little fun to your next gathering with these delicious rolls? Your tastebuds are in for a treat! Ready to dive into the recipe?
Why Are Homemade Pizza Rolls So Irresistible?
Crowd-Pleasing Delight: Everyone loves pizza, and turning it into bite-sized rolls makes it even better! These homemade pizza rolls are perfect for gatherings, ensuring you’ll have happy snackers all around.
Quick Preparation: In just 20 minutes, you can go from prep to oven, which means fewer stressors in the kitchen—ideal for those last-minute get-togethers!
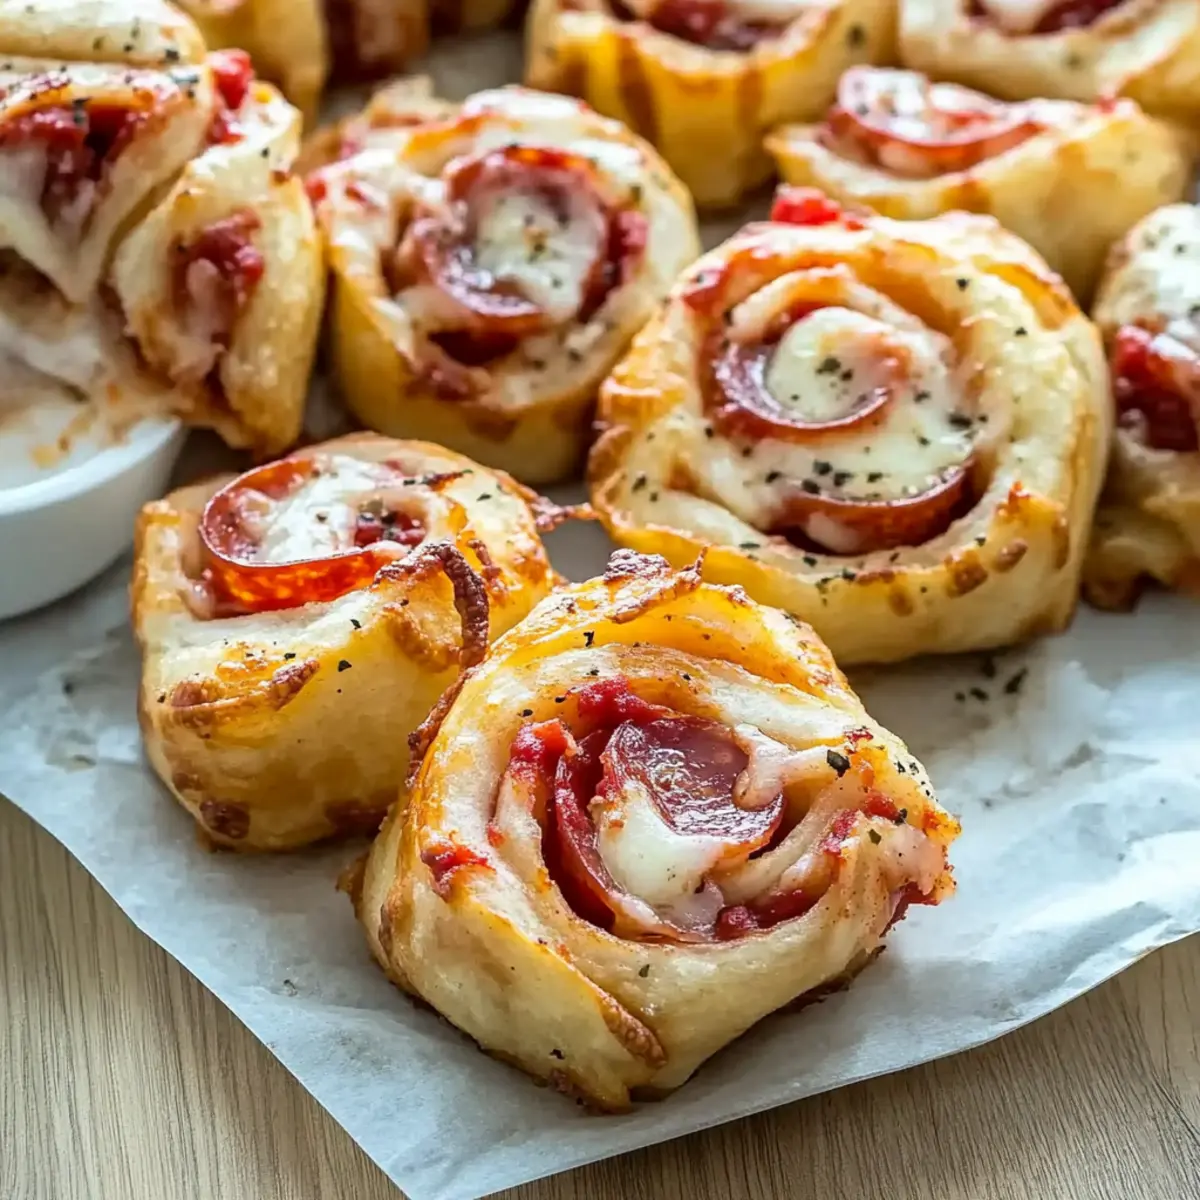
Melt-in-Your-Mouth Texture: Enjoy a crispy exterior that gives way to a melty, gooey cheese center. Each bite is a comforting reminder of pizza’s classic flavors.
Versatile Filling Options: Feel free to mix and match your favorite ingredients—swap out pepperoni for veggies or use different cheeses for a unique twist. You can even use for a hearty meal alongside a fresh salad.
Perfect for Dipping: Serve these rolls hot with marinara sauce to recreate that classic pizza experience, or try them with your favorite dipping sauces. For more delicious appetizers, check out Healthy Homemade Cranberry Sauce or Homemade Tiramisu Italian.
Homemade Pizza Rolls Ingredients
-
For the Dough
• Refrigerated Pizza Dough – Provides a buttery, flaky structure for the rolls; you can substitute with homemade pizza dough for a personal touch. -
For Flavoring
• Garlic Salt – Enhances flavor with a hint of garlic; feel free to adjust based on your taste preferences.
• Italian Seasoning – Adds a delightful blend of herbs that amplifies the pizza flavor; oregano can work as a substitute if needed. -
For the Filling
• Shredded Mozzarella Cheese – Creates that creamy, melty goodness; swap in Cheddar for a unique taste.
• Parmesan Cheese – Introduces a salty, nutty flavor that complements mozzarella beautifully.
• Sliced and Chopped Pepperoni – Gives a classic pizza punch; consider using diced sausage or veggies for a different kick. -
For Dipping
• Marinara Sauce – Offers the traditional pizza sauciness for dipping; a must-have to elevate these homemade pizza rolls!
Step‑by‑Step Instructions for Homemade Pizza Rolls
Step 1: Preheat the Oven
Begin by preheating your oven to 425°F (218°C). This ensures a perfectly baked crust for your homemade pizza rolls. While the oven heats up, gather your clean baking sheet and any tools you’ll need, like a rolling pin and a serrated knife.
Step 2: Prepare the Dough
Dust a clean surface with flour to prevent sticking, then roll out your refrigerated pizza dough into a large rectangle. Aim for about ¼-inch thickness, creating a smooth surface that will hold all your delicious fillings. This rectangle will serve as the foundation for your pizza rolls, so make sure it’s even.
Step 3: Season the Dough
Sprinkle garlic salt and Italian seasoning evenly across the surface of the rolled-out dough. Use your fingers to gently press the seasonings into the dough, ensuring every bite of your homemade pizza rolls is bursting with flavor. Don’t rush this process—it sets the stage for a mouthwatering experience!
Step 4: Add the Cheese and Pepperoni
Layer a generous amount of shredded mozzarella cheese and Parmesan cheese across the dough, leaving about ½ inch from the edges. Next, distribute the sliced and chopped pepperoni evenly on top of the cheese. These classic ingredients will melt together in your pizza rolls, creating a savory filling that everyone will love.
Step 5: Roll the Dough
Starting from one of the short ends of the rectangle, tightly roll the dough into a log shape, ensuring that the filling stays inside. Pinch the seam closed to seal the roll, preventing any cheesy goodness from escaping while baking. This step is crucial for ensuring your homemade pizza rolls maintain their shape.
Step 6: Slice the Rolls
Using a serrated knife or a pizza cutter, slice the rolled dough into 1-inch sections. Make clean cuts without compressing the rolls to keep your layers intact. This will give you perfectly sized pizza rolls that will bake evenly and look inviting on the plate.
Step 7: Arrange on Baking Sheet
Place the sliced pizza rolls on a lightly greased baking sheet, ensuring they are face side up. Leave a bit of space between each roll to allow for air circulation while baking. This will help them achieve a beautiful golden-brown hue as they cook in the oven.
Step 8: Bake to Perfection
Slide the baking sheet into your preheated oven and bake for 10–12 minutes. Keep an eye on them, watching for a lovely golden-brown color on the tops. Your homemade pizza rolls will be ready when they look crisp on the outside and are oozing cheesy goodness from the center!
Step 9: Serve and Enjoy
Once baked, remove the pizza rolls from the oven and let them cool slightly. Serve them warm with a side of marinara sauce for dipping. This final touch enhances the overall experience of your homemade pizza rolls, making them a hit at any gathering!

Homemade Pizza Rolls Variations & Substitutions
Feel free to explore these delightful tweaks to personalize your pizza rolls experience and ignite your culinary creativity!
-
Veggie Delight: Replace pepperoni with a mix of colorful bell peppers, onions, and mushrooms for a fresh twist. This variation is a great way to sneak in some healthy veggies!
-
Cheese Lovers: Combine mozzarella with provolone or asiago for a richer flavor profile. The melty goodness of multiple cheeses will take your rolls to the next level!
-
Spicy Kick: Add some sliced jalapeños or red pepper flakes to your pepperoni for a fiery touch. Spice is always nice, especially when shared at parties!
-
Herb Infusion: Swap garlic salt for fresh minced garlic and chopped basil, resulting in a fragrant twist that elevates these rolls to gourmet status. This twist brings a whole new aroma to your kitchen!
-
Meat Medley: For a heartier filling, mix in diced sausage or ham along with the pepperoni. Varied meats add texture and flavor depth, perfect for meat lovers!
-
Sweet & Savory: Try adding a layer of caramelized onions or a dollop of pesto for a sweet and herbal contrast to the savory ingredients. This whimsy can surprise and delight your guests!
-
Gluten-Free Option: Use gluten-free pizza dough to accommodate dietary restrictions without compromising on the fantastic taste. Everyone deserves to enjoy these tasty bites!
For more inspiration, consider pairing these with the delicious Espresso Cinnamon Rolls or complement them with a side of Healthy Homemade Cranberry Sauce for a perfect snack spread!
What to Serve with Homemade Pizza Rolls
Picture a vibrant gathering filled with laughter and the tantalizing aroma of baked snacks—these pizza rolls are just the beginning of your feast!
-
Fresh Garden Salad: A crisp garden salad with a light vinaigrette adds a refreshing balance to the rich, cheesy rolls. The crunch of fresh veggies is the perfect contrast to the gooey centers.
-
Buffalo Wings: Spicy, tangy buffalo wings complement the cheesy goodness of pizza rolls beautifully, creating a finger-licking game day spread that everyone will adore.
-
Vegetable Platter: Serve a colorful array of fresh vegetables like carrots, cucumbers, and bell peppers with a creamy dip. This provides a healthy crunch that contrasts wonderfully with the pizza rolls.
-
Garlic Breadsticks: Garlic breadsticks are a warm and comforting side that echoes the flavors of your pizza rolls. Dip them in marinara for an even more satisfying experience!
-
Beer or Craft Soda: Pair with chilled beers or craft sodas to wash down the cheesy rolls. The bubbles in these drinks help cleanse the palate between bites, enhancing the overall enjoyment.
-
Dessert Pizza: Keep the pizza theme going by ending the meal with dessert pizza topped with sweet cream cheese and fresh fruit. This delightful treat ties together the flavors of your pizza-inspired menu!
-
Cheesy Breadsticks: These buttery breadsticks, smothered in cheese, enhance the melty experience and keep the cheesy goodness flowing right through your meal, leaving everyone craving more.
Make Ahead Options
These homemade pizza rolls are ideal for busy weeknights and can be prepped in advance to save you time! You can prepare and roll the pizza dough, then slice it into sections up to 24 hours prior to baking. Simply cover the sliced rolls with plastic wrap and refrigerate to maintain freshness. For the best results, bake the rolls right before serving, ensuring they come out golden and gooey. If you have leftovers, store them in an airtight container in the fridge for up to 3 days, and just reheat in the oven to enjoy that crispy exterior once more. With these make-ahead options, you can enjoy delicious homemade pizza rolls with minimal fuss!
How to Store and Freeze Homemade Pizza Rolls
Fridge: Store leftover homemade pizza rolls in an airtight container for up to 3 days to maintain their freshness and flavor.
Freezer: For longer storage, wrap pizza rolls individually in plastic wrap and then transfer to a freezer-safe bag. They can be frozen for up to 2 months.
Reheating: To enjoy your pizza rolls again, reheat in a 350°F (175°C) oven for about 10 minutes, ensuring they’re warmed through and crispy.
Thawing: If frozen, allow pizza rolls to thaw in the fridge overnight before reheating to retain the best texture and flavor.
Expert Tips for Homemade Pizza Rolls
-
Ingredient Balance: Avoid overstuffing the rolls. Keep fillings modest to ensure easy rolling and prevent any spills during baking.
-
Sharp Knives Matter: Use a serrated knife for slicing. It helps you cut through the dough cleanly without compressing the pizza rolls, so they maintain that perfect shape.
-
Air Frying Adjustment: If you prefer air frying, lower the temperature by 25°F and keep a close eye on the cooking time. It may cook faster than in the oven.
-
Dough Variety: For a unique flavor, consider experimenting with different types of pizza dough, like whole wheat or gluten-free options, to find what suits your taste.
-
Season to Taste: Don’t hesitate to adjust the garlic salt and Italian seasoning according to your preference; these spices significantly enhance the taste of your homemade pizza rolls.

Homemade Pizza Rolls Recipe FAQs
How do I choose the best ingredients for my pizza rolls?
Absolutely! For the best flavor and texture, look for pizza dough that’s fresh and pliable. When selecting cheese, opt for high-quality mozzarella that melts beautifully, and choose pepperoni that’s flavorful, ensuring it has a good spice level. Garlic salt and Italian seasoning should also be fresh for maximum flavor.
How can I store leftover pizza rolls?
Very! Leftover homemade pizza rolls can be stored in an airtight container in the fridge for up to 3 days. It’s important to let them cool completely before sealing them to avoid moisture buildup, which can make them soggy.
Advertisement
Can I freeze homemade pizza rolls for later use?
Definitely! To freeze your pizza rolls, wrap each one individually in plastic wrap to prevent freezer burn. Then, place them in a freezer-safe bag, making sure to remove as much air as possible. They can be frozen for up to 3 months. When ready to enjoy, simply thaw in the fridge overnight and reheat in a preheated oven at 350°F (175°C) for about 10 minutes.
What should I do if my dough is too sticky to roll?
If your dough is too sticky, sprinkle a little more flour on your work surface and on the dough itself while rolling it out. Be cautious, though—too much flour can alter the texture of your pizza rolls. If you find that the dough is still uncooperative, try letting it rest for a few minutes, allowing the gluten to relax, which often makes it easier to work with.
Are there any dietary considerations I should keep in mind?
Of course! If you’re making these homemade pizza rolls for guests, be mindful of potential allergies. Offer gluten-free pizza dough for those with gluten sensitivities, and consider using dairy-free cheese for lactose-intolerant individuals. Always make sure to check the labels of your ingredients to avoid any allergens. It’s always best to communicate with your guests about their dietary preferences.
How should I reheat pizza rolls for the best texture?
To maintain that crispy exterior and gooey interior, reheat your homemade pizza rolls in a preheated oven at 350°F (175°C) for about 10 minutes. This method helps restore their original texture much better than using a microwave, which can make them soggy. If you’re reheating frozen rolls, allow them to thaw in the fridge overnight before reheating.
Remember, the key to homemade pizza rolls is flexibility, so feel free to have fun with different ingredients or dietary adaptations!
Irresistible Homemade Pizza Rolls for Game Day Snacking
Ingredients
Equipment
Method
- Preheat your oven to 425°F (218°C).
- Dust a clean surface with flour and roll out the pizza dough into a large rectangle, about ¼-inch thick.
- Sprinkle garlic salt and Italian seasoning evenly across the dough and gently press them in.
- Layer shredded mozzarella and Parmesan cheese across the dough, leaving ½ inch from the edges, then add pepperoni on top.
- Starting from the short end, tightly roll the dough into a log and pinch the seam to seal.
- Slice the rolled dough into 1-inch sections with a serrated knife or pizza cutter.
- Place sliced rolls on a lightly greased baking sheet and leave space between each.
- Bake for 10–12 minutes until golden brown and crispy.
- Allow to cool slightly before serving with marinara sauce for dipping.