
Introduction to Thai Volcano Chicken
Cooking has always been my way of connecting with family and friends. When I stumbled upon the recipe for Thai Volcano Chicken, it felt like a culinary adventure waiting to happen. This dish is not just about the heat; it’s a delightful blend of flavors that can turn any ordinary dinner into a memorable feast. Whether you’re looking for a quick solution for a busy weeknight or a dish to impress your loved ones, this spicy chicken recipe is sure to ignite your taste buds. Let’s dive into this fiery delight that’s as fun to make as it is to eat!
Why You’ll Love This Thai Volcano Chicken
This Thai Volcano Chicken is a game-changer for your dinner routine. It’s quick to prepare, taking just over an hour from start to finish, making it perfect for busy evenings. The combination of spicy, tangy, and savory flavors will have your taste buds dancing. Plus, it’s versatile enough to impress guests or satisfy a family craving. Trust me, once you try it, you’ll be hooked!
Ingredients for Thai Volcano Chicken
Gathering the right ingredients is the first step to creating this fiery masterpiece. Here’s what you’ll need:
- Bone-in, skin-on chicken thighs or drumsticks: These cuts are juicy and flavorful, perfect for roasting.
- Soy sauce: Adds a savory depth to the marinade, enhancing the chicken’s flavor.
- Oyster sauce: This brings a hint of sweetness and umami, balancing the dish beautifully.
- Fish sauce: A staple in Thai cuisine, it adds a salty, briny kick.
- Lime juice: Fresh lime juice brightens the flavors and adds a zesty tang.
- Sugar: Just a touch to balance the heat and acidity.
- Ground white pepper: Offers a subtle heat without overpowering the other flavors.
- Garlic powder: For a quick flavor boost, though fresh garlic is also used later.
- Neutral cooking oil: Helps the marinade stick and keeps the chicken moist during roasting.
- Fresh garlic: Minced garlic adds a punch of flavor to the volcano sauce.
- Thai bird’s-eye chilies: These little guys pack a serious punch; adjust the quantity based on your heat tolerance.
- Brown sugar: Adds a rich sweetness to the sauce, balancing the heat.
- Chicken broth: Keeps the sauce flavorful and adds moisture.
- Chili oil: Optional, but it can enhance the heat and flavor of the sauce.
- Cornstarch: Optional for thickening the sauce if you prefer a richer texture.
- Fresh cilantro and green onions: These herbs add freshness and color to the final dish.
- Thai basil: Optional, but it brings a unique flavor that complements the dish.
- Fresh red chilies: For garnish and an extra kick of heat.
- Lime wedges: Serve alongside for an extra burst of freshness.
- Cooked jasmine rice: A perfect base to soak up all that delicious sauce.
- Steamed broccoli or stir-fried vegetables: Optional sides that add color and nutrition.
For exact measurements, check the bottom of the article where you can find everything listed for easy printing!
How to Make Thai Volcano Chicken
Now that you have all your ingredients ready, let’s get cooking! This Thai Volcano Chicken recipe is straightforward and rewarding. Follow these steps, and you’ll have a delicious meal that’s sure to impress.
Step 1: Marinate the Chicken
Start by mixing the soy sauce, oyster sauce, fish sauce, lime juice, sugar, white pepper, garlic powder, and cooking oil in a large bowl. This marinade is the heart of the dish, so make sure everything is well combined.
Next, add the chicken thighs or drumsticks to the bowl. Use your hands to coat each piece thoroughly with the marinade. Cover the bowl with plastic wrap and let it sit in the fridge for at least 30 minutes. If you have time, marinating for up to 4 hours will deepen the flavors even more.
Step 2: Roast the Chicken
Preheat your oven to 400°F. While it heats up, arrange the marinated chicken pieces skin-side up in a baking dish or on a rimmed baking sheet. This positioning allows the skin to crisp up beautifully.
Roast the chicken for 35 to 45 minutes. You want the skin to turn golden brown and crispy, and the thickest part of the chicken should reach at least 165°F. For an extra crispy finish, broil the chicken for 2 to 3 minutes at the end. Keep an eye on it to avoid burning!
Step 3: Prepare the Volcano Sauce
While the chicken is roasting, it’s time to whip up the volcano sauce. In a small bowl, combine the fish sauce, lime juice, soy sauce, oyster sauce, brown sugar, and chicken broth. This mixture will be the fiery topping for your chicken.
Heat a small saucepan over medium heat and add the minced garlic and chopped Thai chilies. Sauté for about 30 to 60 seconds until fragrant. Then, pour in your sauce mixture and bring it to a gentle simmer. Cook for 2 to 3 minutes, stirring occasionally until the sugar dissolves and the sauce thickens slightly.
Step 4: Serve the Dish
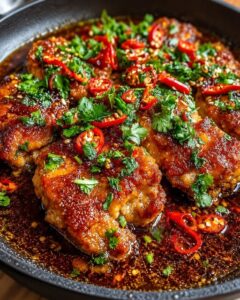
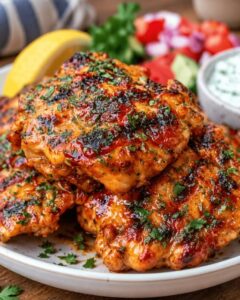
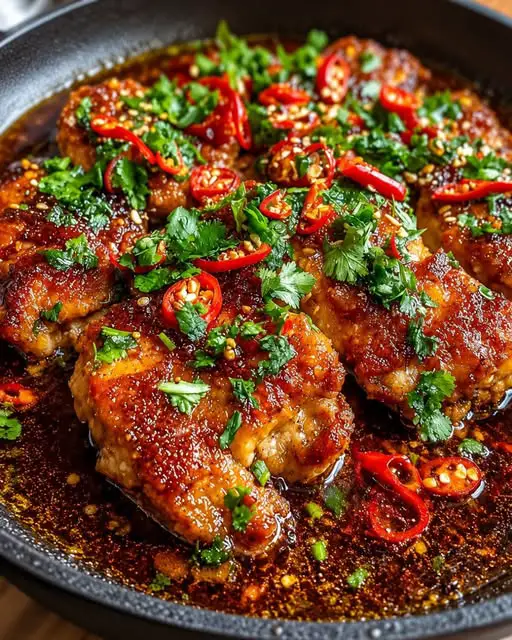
Once the chicken is perfectly roasted, it’s time to serve! Arrange the chicken on a serving platter and generously spoon the hot volcano sauce over the top. Don’t be shy; let that sauce flow!
Garnish with fresh cilantro, sliced green onions, and Thai basil if you’re using it. Add a few slices of fresh red chilies for an extra kick. Serve immediately with lime wedges and warm jasmine rice to soak up all that delicious sauce. Enjoy your fiery feast!
Tips for Success
- Adjust the heat to your liking by starting with fewer Thai chilies.
- For extra crispy skin, broil the chicken for a few minutes at the end.
- Use fresh lime juice for a brighter, more vibrant flavor.
- Let the chicken rest for a few minutes before serving to keep it juicy.
- Serve the sauce on the side for those who prefer milder flavors.
Equipment Needed
- Baking dish or rimmed baking sheet: A sturdy option for roasting the chicken.
- Mixing bowl: For combining the marinade; any large bowl will do.
- Small saucepan: Essential for preparing the volcano sauce.
- Meat thermometer: To ensure your chicken is cooked perfectly.
- Knife and cutting board: For chopping garlic and chilies.
Variations of Thai Volcano Chicken
- Vegetarian Option: Substitute chicken with firm tofu or tempeh. Marinate and roast as you would the chicken for a delicious plant-based version.
- Spicy Shrimp: Use large shrimp instead of chicken. Adjust cooking time to just a few minutes until they turn pink and opaque.
- Grilled Version: Instead of roasting, grill the marinated chicken for a smoky flavor. Just keep an eye on the heat to avoid flare-ups!
- Low-Sodium Adaptation: Use low-sodium soy sauce and fish sauce to reduce the overall sodium content without sacrificing flavor.
- Gluten-Free Option: Ensure all sauces used are gluten-free, or substitute with gluten-free alternatives for a safe meal.
Serving Suggestions for Thai Volcano Chicken
- Jasmine Rice: Serve with fluffy jasmine rice to soak up the delicious volcano sauce.
- Steamed Broccoli: Add a side of steamed broccoli for a nutritious crunch.
- Thai Iced Tea: Pair with a refreshing Thai iced tea to balance the spice.
- Presentation: Garnish with lime wedges and fresh herbs for a vibrant look.
FAQs about Thai Volcano Chicken
What is Thai Volcano Chicken?
Thai Volcano Chicken is a spicy and tangy dish featuring marinated chicken thighs or drumsticks topped with a fiery volcano sauce. It’s a delightful blend of flavors that brings the heat and excitement of Thai cuisine right to your dinner table.
Can I adjust the spice level?
Absolutely! You can start with fewer Thai bird’s-eye chilies for a milder flavor. Gradually increase the amount to suit your heat tolerance. Remember, the sauce can always be served on the side for those who prefer a less spicy experience.
How do I store leftovers?
Store any leftover Thai Volcano Chicken in an airtight container in the refrigerator for up to 3 days. Reheat in the oven or microwave, adding a splash of chicken broth to keep it moist.
Can I make this dish ahead of time?
Yes! You can marinate the chicken a few hours or even a day in advance. Just remember to roast it fresh before serving for the best texture and flavor.
What can I serve with Thai Volcano Chicken?
This dish pairs wonderfully with jasmine rice, steamed vegetables, or a fresh salad. For drinks, consider a refreshing Thai iced tea or a cold beer to complement the spice.
Final Thoughts
Cooking Thai Volcano Chicken is more than just preparing a meal; it’s about creating an experience that brings people together. The fiery sauce and tender chicken create a symphony of flavors that dance on your palate. Each bite is a reminder of the joy that comes from sharing good food with loved ones. Whether it’s a casual weeknight dinner or a special gathering, this dish is sure to impress. So, roll up your sleeves, embrace the heat, and let this recipe ignite your culinary passion. Trust me, once you serve it, everyone will be asking for seconds!
Advertisement
Thai Volcano Chicken: Discover This Fiery Recipe Today!
A spicy and tangy Thai-inspired chicken dish featuring marinated chicken thighs or drumsticks topped with a fiery volcano sauce.
- Prep Time: 30 minutes
- Cook Time: 45 minutes
- Total Time: 1 hour 15 minutes
- Yield: 4 servings 1x
- Category: Main Course
- Method: Roasting
- Cuisine: Thai
- Diet: Gluten Free
Ingredients
- 2 lbs bone-in, skin-on chicken thighs or drumsticks
- 1 tbsp soy sauce
- 1 tbsp oyster sauce
- 1 tbsp fish sauce
- 1 tbsp lime juice
- 1 tsp sugar
- 1 tsp ground white pepper
- 1 tsp garlic powder
- 1 tbsp neutral cooking oil
- 5 cloves garlic, finely minced
- 3–6 Thai bird’s-eye chilies, finely chopped
- 2 tbsp fish sauce
- 2 tbsp fresh lime juice
- 1 tbsp soy sauce
- 1 tbsp oyster sauce
- 1 tbsp brown sugar
- ½ cup chicken broth
- 1 tsp chili oil, optional
- 1 tsp cornstarch mixed with 1 tbsp cold water, optional for thickening
- ¼ cup chopped fresh cilantro
- 2 green onions, thinly sliced
- 2 tbsp chopped fresh Thai basil, optional
- 1–2 fresh red chilies, sliced
- Lime wedges, for serving
- 3–4 cups cooked jasmine rice
- Steamed broccoli or stir-fried vegetables, optional
Instructions
- In a large bowl, combine the soy sauce, oyster sauce, fish sauce, lime juice, sugar, white pepper, garlic powder, and cooking oil. Add the chicken and coat each piece thoroughly. Cover and refrigerate for 30 minutes, or up to 4 hours for deeper flavor.
- Preheat the oven to 400°F. Arrange the chicken pieces skin-side up in a baking dish or on a rimmed baking sheet. Roast for 35–45 minutes, until the skin is golden and crisp and the thickest part reaches at least 165°F. For extra-crispy skin, broil for 2–3 minutes at the end.
- While the chicken cooks, combine the fish sauce, lime juice, soy sauce, oyster sauce, brown sugar, and chicken broth in a small bowl. Heat a small saucepan over medium heat. Add minced garlic and chopped Thai chilies. Sauté for 30–60 seconds until fragrant. Pour in the sauce mixture and bring to a gentle simmer. Cook for 2–3 minutes, stirring until the sugar dissolves.
- Arrange the cooked chicken on a serving platter. Spoon the hot volcano sauce over the chicken, sprinkle with cilantro, green onions, Thai basil, and sliced red chilies. Serve immediately with lime wedges and warm jasmine rice.
Notes
- Adjust the heat: Start with 2–3 Thai chilies for moderate spice and add more for a fiery sauce.
- Keep the skin crisp: Pour most of the sauce over the chicken just before serving.
- Balance the flavors: Ensure spicy, sour, salty, and sweet flavors are balanced.
- Use fresh lime juice for a brighter flavor.
- Check the chicken temperature: Safe at 165°F; dark meat can be more tender at 175–185°F.
Nutrition
- Serving Size: 1 piece of chicken with sauce
- Calories: 350
- Sugar: 5g
- Sodium: 800mg
- Fat: 20g
- Saturated Fat: 5g
- Unsaturated Fat: 15g
- Trans Fat: 0g
- Carbohydrates: 10g
- Fiber: 1g
- Protein: 30g
- Cholesterol: 100mg