Introduction to Sticky Honey Garlic Chicken Thighs
Cooking can sometimes feel like a race against the clock, especially on those busy weeknights. That’s where my Sticky Honey Garlic Chicken Thighs come in, a dish that’s not only quick to whip up but also bursting with flavor. Imagine tender chicken thighs glazed in a sweet and savory sauce that makes your taste buds dance. This recipe is perfect for impressing your loved ones or simply treating yourself after a long day. With just a handful of ingredients and minimal prep, you’ll have a delicious meal on the table in no time!
Why You’ll Love This Sticky Honey Garlic Chicken Thighs
This recipe is a game-changer for anyone who craves a delicious meal without spending hours in the kitchen. The combination of sweet honey and savory garlic creates a flavor explosion that’s hard to resist. Plus, it’s a one-skillet wonder, making cleanup a breeze. Whether you’re cooking for family or hosting friends, these sticky honey garlic chicken thighs will leave everyone asking for seconds!
Ingredients for Sticky Honey Garlic Chicken Thighs
Gathering the right ingredients is the first step to culinary success. For these Sticky Honey Garlic Chicken Thighs, you’ll need:
- Boneless, skinless chicken thighs: Tender and juicy, they soak up the flavors beautifully.
- Salt and black pepper: Essential for seasoning, enhancing the chicken’s natural taste.
- Garlic powder: Adds a rich, savory depth without the fuss of fresh garlic.
- Paprika: A hint of smokiness and color that elevates the dish.
- Vegetable oil: Perfect for searing the chicken to a golden brown.
- Honey: The star of the show, providing that sticky sweetness we all love.
- Low-sodium soy sauce: Adds umami and balances the sweetness of the honey.
- Minced garlic: Fresh garlic brings a punch of flavor that’s hard to beat.
- Rice vinegar: A splash of acidity to brighten the sauce.
- Brown sugar: Enhances the caramelization and adds depth to the glaze.
- Toasted sesame oil: A nutty aroma that complements the other flavors.
- Grated fresh ginger: A zesty kick that pairs perfectly with garlic.
- Red pepper flakes (optional): For those who like a little heat in their dish.
- Water: Helps to adjust the sauce consistency.
- Cornstarch (optional): If you prefer a thicker glaze, this is your go-to.
- Cold water (optional): Used to mix with cornstarch for thickening.
- Cooked white rice: A perfect base to soak up that delicious sauce.
- Green onion: For garnish, adding a fresh crunch.
- Sesame seeds: A sprinkle for a touch of elegance.
- Fresh rosemary or parsley (optional): For a pop of color and flavor.
Exact measurements for these ingredients can be found at the bottom of the article, ready for you to print and take to the kitchen!
How to Make Sticky Honey Garlic Chicken Thighs
Now that you have all your ingredients ready, let’s dive into the cooking process. This is where the magic happens! Follow these simple steps to create a dish that will have everyone raving.
Step 1: Prepare the Chicken
Start by patting the chicken thighs dry with paper towels. This helps them sear beautifully. Next, season both sides with salt, black pepper, garlic powder, and paprika. These spices will enhance the flavor. Let the chicken sit for about 5 minutes. This short wait allows the seasonings to soak in, making every bite delicious.
Step 2: Sear the Chicken
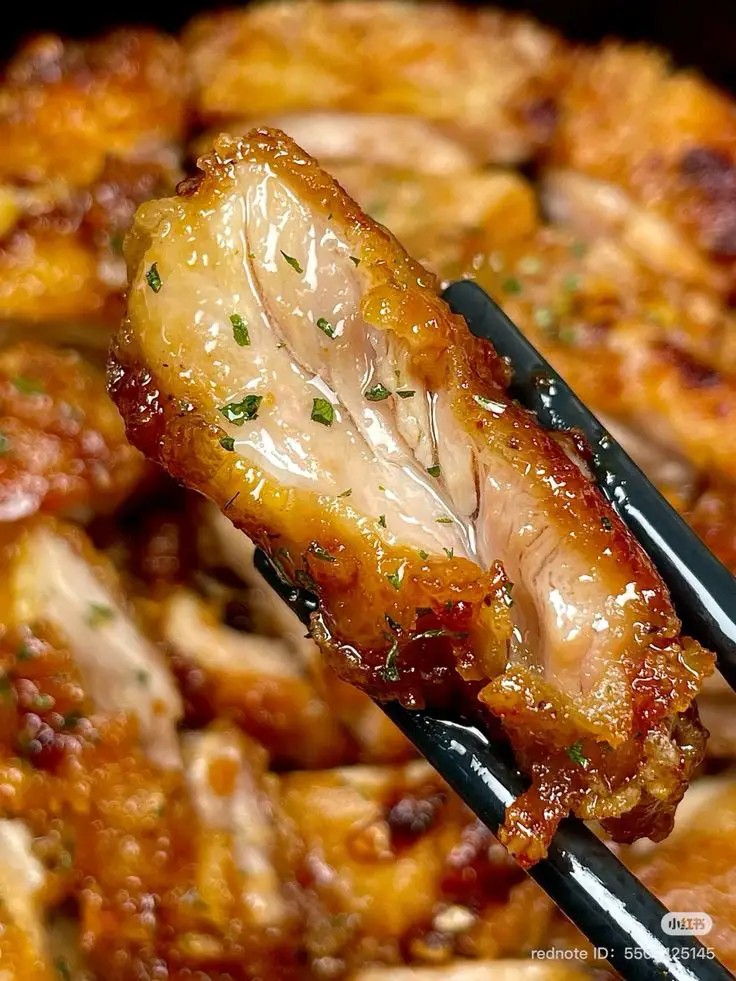
Heat a tablespoon of vegetable oil in a large skillet over medium-high heat. Once the oil is shimmering, add the chicken thighs. Cook them for about 5–6 minutes on each side. You want them to be deeply golden brown and almost cooked through. Once done, transfer the chicken to a plate to rest. This step is crucial for keeping the chicken juicy.
Step 3: Make the Sauce
In the same skillet, reduce the heat to medium. Add honey, low-sodium soy sauce, minced garlic, rice vinegar, brown sugar, toasted sesame oil, grated ginger, and water. Stir everything together and let it simmer for 2–3 minutes. This is where the flavors meld into a sticky glaze. If you prefer a thicker sauce, mix cornstarch with cold water and stir it in. Cook for another 1–2 minutes until it’s glossy and slightly thickened.
Step 4: Glaze the Chicken
Return the chicken to the skillet. Turn the pieces several times to coat them completely in that luscious sauce. Cook for another 5–7 minutes, spooning the glaze over the chicken frequently. The goal is to reach an internal temperature of 165°F at the thickest part. Allow the sauce to caramelize slightly around the chicken, but keep an eye on it to prevent burning.
Step 5: Serve
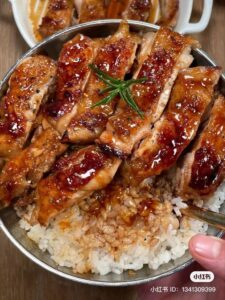
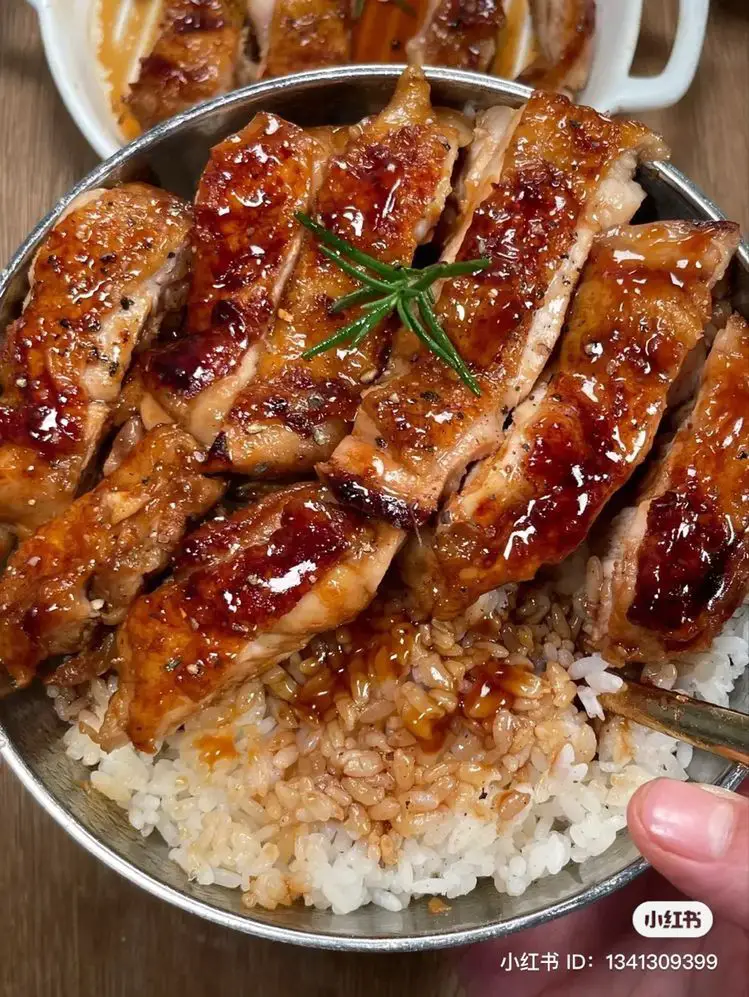
Once the chicken is cooked through, slice it into strips. This not only makes for a beautiful presentation but also allows the sauce to cling to each piece. Serve it over a bed of cooked white rice, and don’t forget to drizzle some of that sticky sauce on top!
Tips for Success
- Always pat the chicken dry before seasoning for a better sear.
- Let the chicken rest after cooking to keep it juicy.
- Adjust the sweetness by adding more or less honey to the sauce.
- For extra flavor, marinate the chicken in the sauce for an hour before cooking.
- Don’t rush the glazing process; let the sauce caramelize for the best flavor.
Equipment Needed
- Large skillet: A non-stick skillet works wonders, but any heavy-bottomed pan will do.
- Meat thermometer: Essential for checking the chicken’s doneness; a simple knife can also help.
- Cutting board: For slicing the chicken; a sturdy surface is key.
- Measuring cups and spoons: For accurate ingredient measurements; you can use standard kitchen cups if needed.
Variations
- Spicy Honey Garlic Chicken: Add more red pepper flakes or a splash of sriracha for an extra kick.
- Honey Mustard Twist: Mix in a tablespoon of Dijon mustard with the sauce for a tangy flavor.
- Vegetarian Option: Substitute chicken thighs with firm tofu or tempeh, marinating them in the same sauce.
- Herb-Infused: Add fresh herbs like thyme or basil to the sauce for a fragrant twist.
- Low-Carb Version: Serve the chicken over cauliflower rice instead of white rice for a healthier option.
Serving Suggestions
- Pair with steamed broccoli or green beans for a colorful plate.
- Serve with a side of crispy garlic bread to soak up the sauce.
- Complement with a chilled Asian-inspired salad for freshness.
- Enjoy with a light beer or a refreshing iced tea.
- Garnish with extra green onions and sesame seeds for a beautiful presentation.
FAQs about Sticky Honey Garlic Chicken Thighs
Can I use chicken breasts instead of thighs?
Absolutely! While chicken thighs are juicier, chicken breasts can work too. Just be mindful of cooking time, as they may cook faster.
How can I make this dish gluten-free?
To make Sticky Honey Garlic Chicken Thighs gluten-free, simply use gluten-free soy sauce or tamari. It will still deliver that delicious umami flavor!
Can I prepare the sauce in advance?
Yes! You can make the sauce ahead of time and store it in the fridge for up to a week. Just give it a good stir before using.
What can I serve with Sticky Honey Garlic Chicken Thighs?
These chicken thighs pair wonderfully with steamed rice, roasted vegetables, or a fresh salad. The sticky sauce complements a variety of sides!
How do I store leftovers?
Store any leftovers in an airtight container in the refrigerator for up to three days. Reheat gently in the microwave or on the stovetop to enjoy again!
Final Thoughts
Cooking Sticky Honey Garlic Chicken Thighs is more than just preparing a meal; it’s about creating moments. The aroma that fills your kitchen as the chicken sizzles is enough to make anyone’s mouth water. Each bite is a delightful balance of sweet and savory, making it a dish that brings smiles around the table. Whether you’re enjoying a quiet dinner at home or hosting friends, this recipe is sure to impress. Plus, the ease of preparation means you can focus on what really matters—sharing good food and great company. Dive in and savor the joy of cooking!
PrintSticky Honey Garlic Chicken Thighs: A Must-Try Recipe!
A delicious and easy recipe for sticky honey garlic chicken thighs that are perfect for any occasion.
- Prep Time: 10 minutes
- Cook Time: 25 minutes
- Total Time: 35 minutes
- Yield: 4 servings 1x
- Category: Main Dish
- Method: Skillet
- Cuisine: Asian
- Diet: Gluten Free
Ingredients
- 1½ pounds boneless, skinless chicken thighs
- 1 teaspoon salt
- ½ teaspoon black pepper
- 1 teaspoon garlic powder
- ½ teaspoon paprika
- 1 tablespoon vegetable oil
- ⅓ cup honey
- ¼ cup low-sodium soy sauce
- 4 cloves garlic, minced
- 1 tablespoon rice vinegar
- 1 tablespoon brown sugar
- 1 teaspoon toasted sesame oil
- ½ teaspoon grated fresh ginger
- ¼ teaspoon red pepper flakes, optional
- 2 tablespoons water
- 1 teaspoon cornstarch (optional)
- 1 tablespoon cold water (optional)
- 4 cups cooked white rice (for serving)
- 1 green onion, thinly sliced (for serving)
- 1 teaspoon sesame seeds (for serving)
- Fresh rosemary or parsley, optional (for serving)
Instructions
- Pat the chicken thighs dry with paper towels. Season both sides with salt, black pepper, garlic powder, and paprika. Let sit for about 5 minutes.
- Heat the oil in a large skillet over medium-high heat. Add the chicken thighs and cook for 5–6 minutes per side, until deeply golden brown and almost cooked through. Transfer the chicken to a plate.
- Reduce the heat to medium. Add the honey, soy sauce, garlic, rice vinegar, brown sugar, sesame oil, ginger, red pepper flakes, and water to the same skillet. Stir and simmer for 2–3 minutes. If you want a thicker glaze, mix the cornstarch with cold water and stir it into the sauce. Cook for another 1–2 minutes, until glossy and slightly thickened.
- Return the chicken to the skillet. Turn the pieces several times to coat them completely in the sauce. Cook for another 5–7 minutes, spooning the glaze over the chicken frequently. The chicken should reach an internal temperature of 165°F at the thickest part. Allow the sauce to caramelize slightly around the chicken without letting it burn.
- Slice the chicken into strips, just like in the photo.
Notes
- For a spicier version, add more red pepper flakes.
- Serve with steamed vegetables for a complete meal.
- Leftovers can be stored in an airtight container in the refrigerator for up to 3 days.
Nutrition
- Serving Size: 1 serving
- Calories: 350
- Sugar: 20g
- Sodium: 600mg
- Fat: 10g
- Saturated Fat: 1.5g
- Unsaturated Fat: 8.5g
- Trans Fat: 0g
- Carbohydrates: 40g
- Fiber: 1g
- Protein: 25g
- Cholesterol: 100mg