Introduction to Seven-Layer Taco Dip
Gathering around a table with friends and family is one of life’s simple pleasures. The laughter, the stories, and of course, the food! That’s where my go-to dish, Seven-Layer Taco Dip, comes into play. This vibrant, colorful dip is not just a feast for the eyes; it’s a quick solution for those busy days when you want to impress without the fuss. With layers of flavor and texture, it’s perfect for parties, game days, or just a cozy night in. Trust me, once you serve this dip, you’ll be the star of the show!
Why You’ll Love This Seven-Layer Taco Dip
This Seven-Layer Taco Dip is a game-changer for any gathering. It’s incredibly easy to whip up, taking just 15 minutes of prep time. The vibrant layers not only look stunning but also deliver a burst of flavors in every bite. Plus, it’s a crowd-pleaser, satisfying both the picky eaters and the adventurous foodies alike. You’ll love how it brings everyone together, making every occasion a little more special.
Ingredients for Seven-Layer Taco Dip
Creating the perfect Seven-Layer Taco Dip starts with gathering the right ingredients. Each layer adds its own unique flavor and texture, making this dip a delightful experience. Here’s what you’ll need:
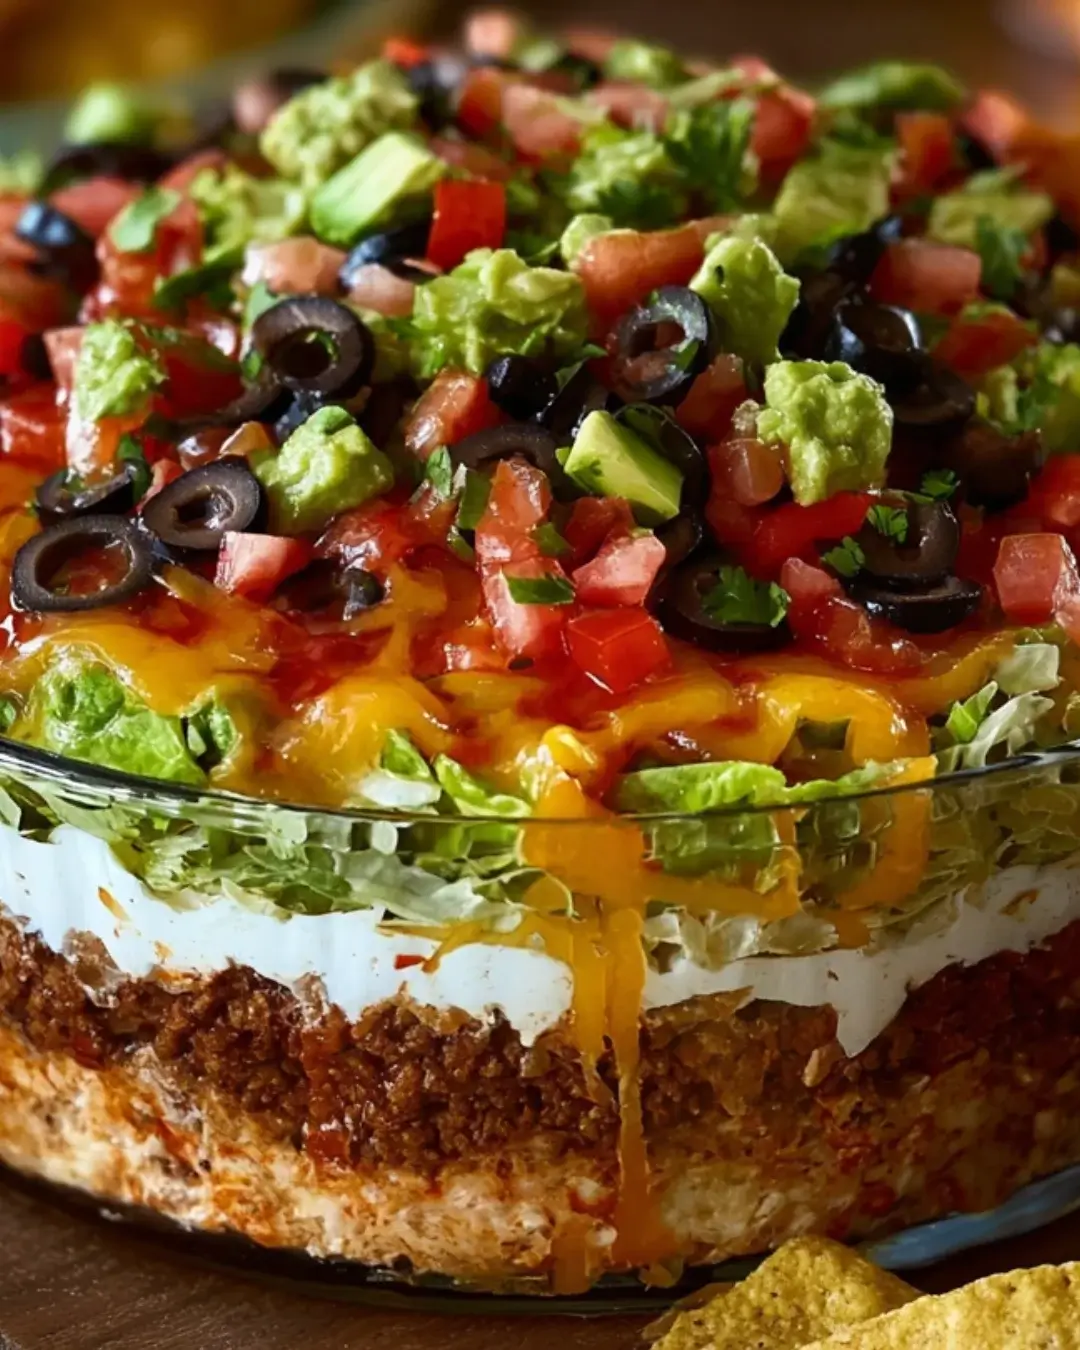
- Refried Beans: The base layer that adds creaminess and a hearty texture. You can use canned or homemade for convenience.
- Sour Cream: This adds a cool, tangy flavor that balances the spices. For a healthier twist, consider Greek yogurt.
- Guacamole: Creamy and rich, it brings a fresh taste. You can make your own or buy pre-made for ease.
- Salsa: A zesty layer that adds a kick. Choose mild or spicy based on your preference.
- Shredded Cheddar Cheese: This melty goodness adds depth and richness. Feel free to mix it up with pepper jack for extra heat.
- Diced Tomatoes: Fresh and juicy, they add a burst of color and flavor. Use canned if fresh isn’t available.
- Sliced Black Olives: These provide a salty contrast and a nice pop of flavor. If you’re not a fan, feel free to skip them.
- Chopped Green Onions: A fresh finish that adds a mild onion flavor. You can substitute with chives if you prefer.
- Tortilla Chips: The perfect vehicle for scooping up all those delicious layers. Choose your favorite brand or make your own!
For exact measurements, check the bottom of the article where you can find everything listed for easy printing. Now, let’s get ready to layer up some deliciousness!
How to Make Seven-Layer Taco Dip
Creating this Seven-Layer Taco Dip is as easy as pie, or should I say, as easy as dip? Each step builds on the last, layering flavors that will have your guests coming back for more. Let’s dive into the deliciousness!
Step 1: Spread the Refried Beans
Start by grabbing your 9×13 inch baking dish. Open that can of refried beans and spread them evenly across the bottom. Use a spatula to smooth it out. This creamy base sets the stage for all the other layers. Trust me, it’s the heart of the dip!
Step 2: Layer the Sour Cream
Next up, take your sour cream and dollop it over the beans. Smooth it out gently with your spatula. This layer adds a cool, tangy flavor that perfectly balances the richness of the beans. It’s like a refreshing breeze on a hot day!
Step 3: Add the Guacamole
Now, it’s time for the guacamole. Spread it over the sour cream layer, making sure to cover it completely. The creaminess of the guacamole adds a delightful richness. If you’re feeling adventurous, you can even add a sprinkle of lime juice for an extra zing!
Step 4: Pour the Salsa
Pour the salsa over the guacamole, ensuring it covers the entire layer. This is where the flavor really starts to pop! Choose your favorite salsa—mild or spicy, it’s up to you. Just remember, the more colorful, the better!
Step 5: Sprinkle the Cheddar Cheese
Time to add some cheesy goodness! Sprinkle the shredded cheddar cheese evenly on top of the salsa. This melty layer adds depth and richness. If you want to kick it up a notch, consider mixing in some pepper jack cheese for a spicy twist!
Step 6: Add the Diced Tomatoes
Next, toss on those diced tomatoes. They add a fresh burst of flavor and a pop of color. If you’re using canned tomatoes, make sure to drain them well to avoid excess moisture. We want our dip to stay nice and firm!
Step 7: Top with Black Olives
Now, it’s time for the black olives. Scatter them over the tomatoes for a salty contrast. If olives aren’t your thing, feel free to skip this step. The dip will still be delicious without them!
Step 8: Finish with Green Onions
Finally, sprinkle the chopped green onions on top. This fresh finish adds a mild onion flavor that brightens up the dip. If you’re a fan of chives, they make a great substitute too!
Step 9: Chill and Serve
Once all the layers are in place, cover the dish with plastic wrap and chill it in the refrigerator for at least 30 minutes. This allows the flavors to meld beautifully. When you’re ready to serve, grab those tortilla chips and dig in. Enjoy the cheers from your guests!
Tips for Success
- Use room temperature ingredients for easier spreading.
- Layer ingredients carefully to maintain the dip’s structure.
- Chill the dip for at least 30 minutes to enhance flavors.
- Customize with your favorite toppings like jalapeños or corn.
- For a healthier option, swap sour cream with Greek yogurt.
Equipment Needed
- 9×13 inch baking dish: Essential for layering your dip. A glass or ceramic dish works great.
- Spatula: Perfect for spreading and smoothing out layers. A large spoon can work in a pinch.
- Mixing bowls: Handy for prepping ingredients like guacamole and salsa.
- Plastic wrap: To cover the dip while it chills in the fridge.
Variations of Seven-Layer Taco Dip
- Spicy Kick: Add diced jalapeños or a layer of spicy salsa for an extra heat boost.
- Meat Lover’s Delight: Layer in some seasoned ground beef or shredded chicken for a heartier dip.
- Vegetarian Twist: Swap out the refried beans for black beans or add corn for a different texture.
- Cheesy Bliss: Mix in a layer of cream cheese with herbs for a rich, creamy addition.
- Low-Carb Option: Serve with cucumber slices or bell pepper strips instead of tortilla chips for a fresh crunch.
Serving Suggestions for Seven-Layer Taco Dip
- Pair with crispy tortilla chips for the ultimate scoop.
- Serve alongside fresh veggies like carrot sticks and bell pepper strips for a crunchy contrast.
- Complement with a refreshing margarita or cold beer.
- Garnish with extra green onions or cilantro for a pop of color.
FAQs about Seven-Layer Taco Dip
Can I make Seven-Layer Taco Dip ahead of time?
Absolutely! You can prepare the dip a day in advance. Just layer it up, cover it tightly, and store it in the fridge. This allows the flavors to meld beautifully, making it even tastier!
What can I substitute for sour cream in this recipe?
If you’re looking for a healthier option, Greek yogurt works wonderfully as a substitute. It maintains that creamy texture while adding a bit of tang!
How do I store leftovers of Seven-Layer Taco Dip?
Store any leftovers in an airtight container in the fridge. It should last for about 2-3 days. Just keep in mind that the layers may blend together a bit, but it will still taste delicious!
Can I customize the layers in my Seven-Layer Taco Dip?
<pDefinitely! Feel free to get creative. You can add layers like corn, diced bell peppers, or even a layer of cream cheese for extra richness. The possibilities are endless!
Is Seven-Layer Taco Dip suitable for vegetarians?
<pYes, this dip is vegetarian-friendly! With layers of beans, cheese, and veggies, it’s a satisfying option for everyone at the table.
Final Thoughts
There’s something magical about sharing a dish like Seven-Layer Taco Dip. It’s more than just a recipe; it’s a way to bring people together, to spark laughter and conversation. Each layer tells a story, from the creamy refried beans to the zesty salsa. Whether it’s game day or a casual get-together, this dip is sure to impress. Plus, it’s so easy to make that you’ll find yourself whipping it up time and again. So grab those tortilla chips, gather your friends, and enjoy the delicious moments that this vibrant dip creates!
Advertisement
Seven-Layer Taco Dip: Easy Recipe to Impress Guests!
A delicious and colorful Seven-Layer Taco Dip that is perfect for parties and gatherings.
- Prep Time: 15 minutes
- Cook Time: 0 minutes
- Total Time: 45 minutes
- Yield: 8 servings 1x
- Category: Appetizer
- Method: No-cook
- Cuisine: Mexican
- Diet: Vegetarian
Ingredients
- 1 can (15 ounces) refried beans
- 1 cup sour cream
- 1 cup guacamole
- 1 cup salsa
- 1 cup shredded cheddar cheese
- 1 cup diced tomatoes
- 1/2 cup sliced black olives
- 1/4 cup chopped green onions
- Tortilla chips for serving
Instructions
- In a 9×13 inch baking dish, spread the refried beans evenly across the bottom.
- Layer the sour cream over the refried beans, smoothing it out with a spatula.
- Next, spread the guacamole over the sour cream layer.
- Pour the salsa over the guacamole, ensuring it covers the entire layer.
- Sprinkle the shredded cheddar cheese evenly on top of the salsa.
- Add the diced tomatoes as the next layer, followed by the sliced black olives.
- Finally, top with chopped green onions for a fresh finish.
- Chill in the refrigerator for at least 30 minutes before serving to allow the flavors to meld. Serve with tortilla chips.
Notes
- For a spicier dip, add diced jalapeños or a layer of spicy salsa.
- Substitute Greek yogurt for sour cream for a healthier option without sacrificing creaminess.
Nutrition
- Serving Size: 1/8 of the dip
- Calories: 220
- Sugar: 2g
- Sodium: 400mg
- Fat: 15g
- Saturated Fat: 7g
- Unsaturated Fat: 8g
- Trans Fat: 0g
- Carbohydrates: 12g
- Fiber: 3g
- Protein: 6g
- Cholesterol: 30mg