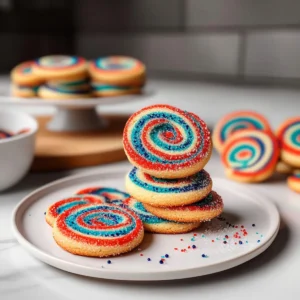
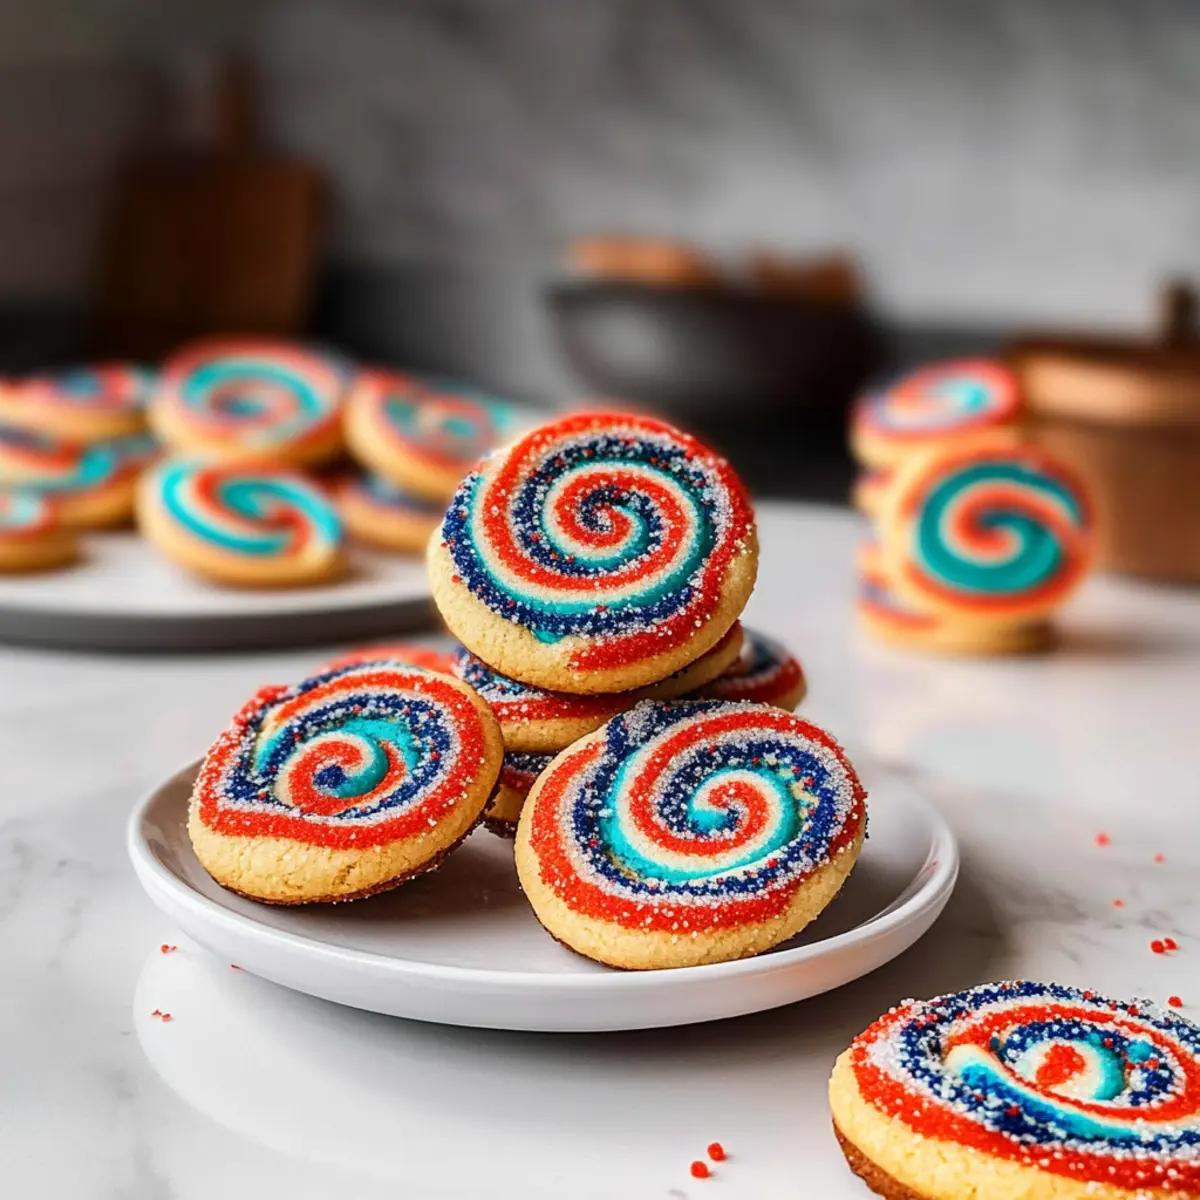
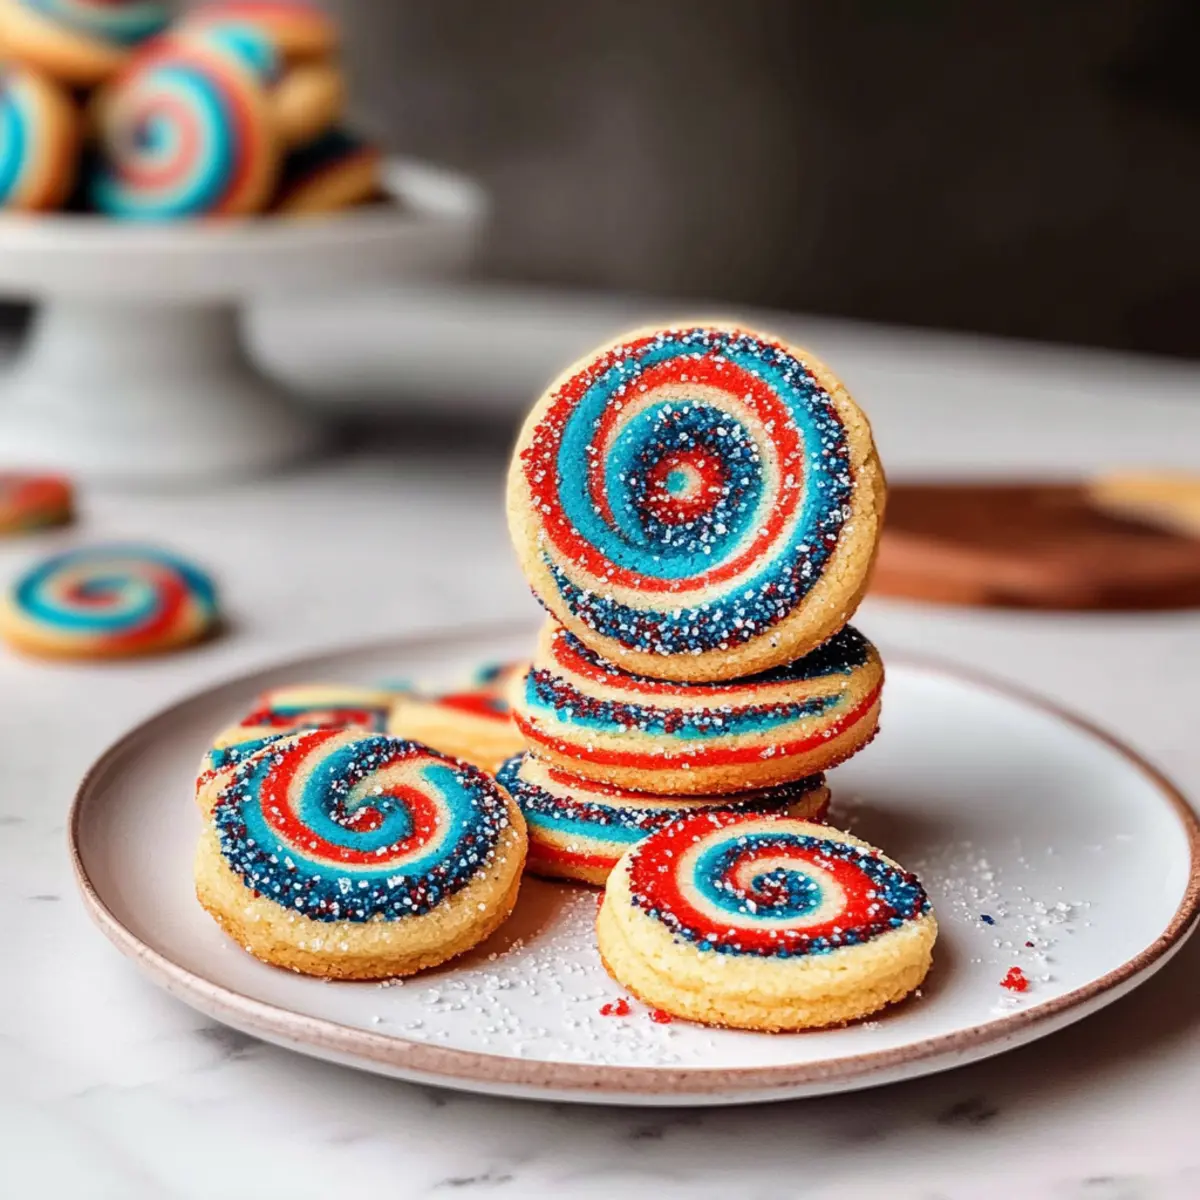
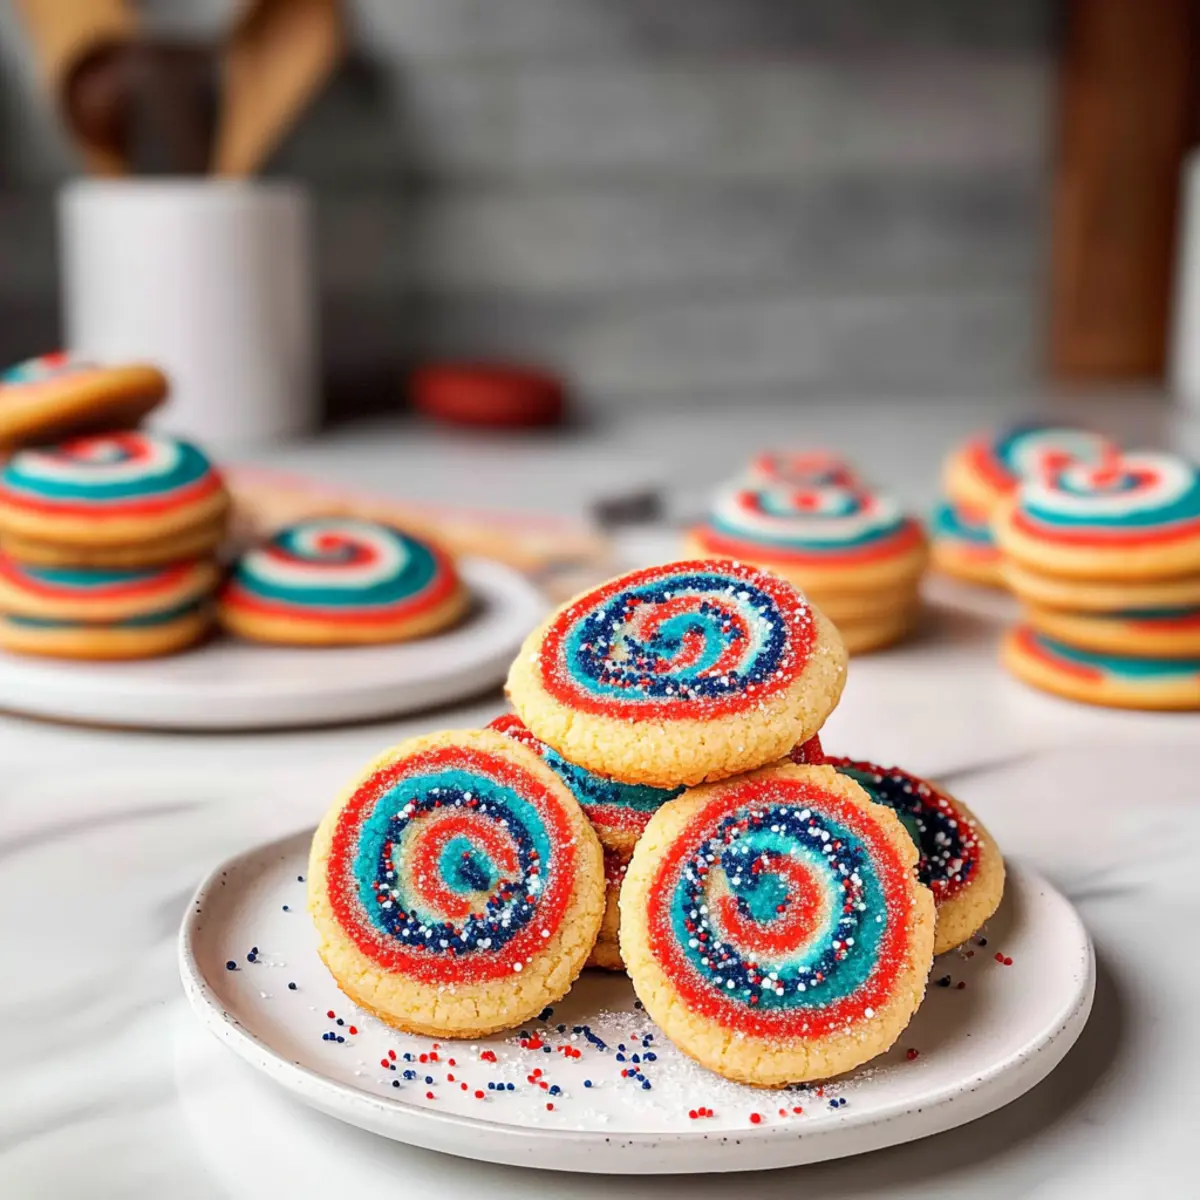
As I sifted through my pantry, preparing for a fun baking day, it struck me how a simple swirl of red, white, and blue can transform an ordinary afternoon into a festive occasion. These Red White and Blue Pinwheel Cookies are not just a treat; they’re a vibrant tribute to summer celebrations and patriotic gatherings. With their buttery softness and enchanting spirals, they’re a breeze to whip up, making them perfect for beginner bakers and seasoned pros alike. Plus, they bring a delightful pop of color to your dessert table while remaining budget-friendly! Whether you’re celebrating Independence Day, hosting a backyard BBQ, or just indulging your creative side, these cookies will be an unforgettable addition. Ready to dive into a swirl of taste and festivity? Let’s get baking!
Why are these cookies a celebration favorite?
Festive Vibes: These Red White and Blue Pinwheel Cookies instantly elevate any gathering with their eye-catching colors and playful design.
Easy to Make: Perfect for beginner bakers, the straightforward steps ensure that even those new to baking can proudly create these delightful treats.
Deliciously Buttery: With a soft and chewy texture, every bite bursts with a rich buttery flavor that everyone will love.
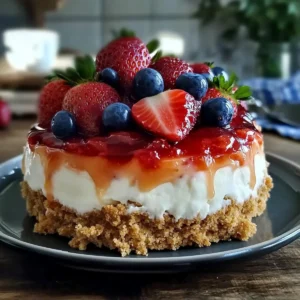
Versatile Options: Feel free to customize with festive sprinkles or unique flavorings, making them perfect for different holidays. Consider exploring my Cheesecake Stuffed Cookies for another crowd-pleasing option!
Budget-Friendly Fun: Using simple ingredients, these cookies won’t break the bank while delivering enormous satisfaction.
Perfect for Sharing: Bake a batch, and watch as they disappear at parties, BBQs, or family events—they’re a guaranteed hit!
Red White and Blue Cookies Ingredients
• Get ready to bake a festive treat!
For the Cookie Dough
- All-purpose flour – Provides structure and body to the cookies; no substitution necessary for the intended texture.
- Baking powder – Acts as a leavening agent for lightness; ensure freshness for optimal rise.
- Salt – Enhances the sweetness and flavor balance; can be omitted for low-sodium diets.
- Unsalted butter – Adds richness and a buttery flavor; can substitute with margarine or vegan butter for dairy-free options.
- Granulated sugar – Sweetener that contributes to the texture; brown sugar can be used for added moisture and flavor.
- Large eggs – Binds ingredients and aids in the rise; egg substitutes like flaxseed can be used for vegan options.
- Vanilla extract – Provides a warm, sweet flavor; almond extract can be used for a unique twist.
For Coloring the Dough
- Red gel food coloring – Used to tint one portion of the dough; gel coloring is preferred for vivid colors without altering texture.
- Blue gel food coloring – Similar purpose as red; always opt for gel food coloring for the best results.
For Topping
- Coarse sugar/Sprinkles (optional) – Decorative topping for added sweetness and visual appeal; consider using colored sanding sugar for festivity.
These deliciously fun Red White and Blue Cookies are sure to bring excitement to your next celebration!
Step‑by‑Step Instructions for Festive Red White and Blue Pinwheel Cookies
Step 1: Prepare Dry Ingredients
In a medium bowl, whisk together 2 cups of all-purpose flour, 1 teaspoon of baking powder, and ¼ teaspoon of salt until well combined. This ensures that your dry ingredients are evenly distributed, which is essential for the perfect texture. Set the bowl aside as you move on to the next step of creating the dough.
Step 2: Make Dough
In a large mixing bowl, using a hand mixer or stand mixer, cream together ½ cup of unsalted butter and ¾ cup of granulated sugar until the mixture is light and fluffy—about 3 to 5 minutes. Once fluffy, blend in 1 large egg and 1 teaspoon of vanilla extract, mixing until smooth. This creamy base is the foundation for your Red White and Blue Cookies.
Step 3: Combine Ingredients
Gradually add the dry mixture to the wet ingredients, mixing on low speed until just combined. Be careful not to overmix, as the dough should remain soft and cohesive. Once your dough comes together, it’s ready for the exciting part—dividing and coloring!
Step 4: Divide and Color Dough
With clean hands, split the dough into three equal portions. Leave one portion uncolored; add red gel food coloring to the second and blue gel food coloring to the last. Knead each piece separately until the colors are vibrant and well incorporated. Now, you have your beautiful red, white, and blue dough ready for shaping!
Step 5: Chill Dough
Shape each portion of dough into a rectangle approximately 8 inches long and 4 inches wide. Wrap each rectangle tightly in plastic wrap and refrigerate for at least 30 minutes. Chilling the dough helps firm it up and makes rolling easier, ensuring your festive Red White and Blue Pinwheel Cookies maintain their lovely shape.
Step 6: Roll Dough
On a lightly floured surface, roll out each colored dough into rectangles measuring about 10×8 inches. Stack them in the order of red, white, and blue, pressing gently to adhere. The vibrant layers create the stunning pinwheel effect, making these cookies a feast for the eyes as well as the taste buds.
Step 7: Form Logs
Starting from the short edge of the stacked dough, carefully roll it tightly into a log shape. Wrap the log in plastic wrap and refrigerate for at least 2 hours or overnight if time allows. A well-chilled log helps achieve perfectly neat slices that will showcase the fun colors in your cookies.
Step 8: Preheat Oven
When you’re ready to bake, preheat your oven to 375°F (190°C). While the oven heats, line two baking sheets with parchment paper to prepare for your sliced cookies. This step is crucial to prevent sticking and ensures an easy cleanup after making your delightful Red White and Blue Cookies.
Step 9: Slice and Bake
Remove the chilled log from the refrigerator, and using a sharp knife, slice it into ¼-inch thick cookies. If desired, roll the edges in coarse sugar or sprinkles for an extra festive touch. Place the sliced cookies on the prepared baking sheets and bake for 8-10 minutes, until the edges are set and the centers remain soft and chewy.
Step 10: Cool
Once baked, allow the cookies to cool on the baking sheets for about 5 minutes. Afterward, transfer them to a wire rack to cool completely. This final step is essential as it allows your Red White and Blue Pinwheel Cookies to set, making them ready to impress at your next celebration.
Make Ahead Options
These Red White and Blue Pinwheel Cookies are perfect for meal prep enthusiasts! You can prepare the cookie dough up to 24 hours in advance, simply wrap each colored portion tightly in plastic wrap and refrigerate. For even greater convenience, form the log of dough and refrigerate it for up to 3 days. This ensures that the dough remains fresh and maintains its vibrant colors. When you’re ready to bake, slice the chilled log into cookies and follow the baking instructions as normal. This way, you can have delightful homemade cookies without the last-minute rush, ensuring they’re just as delicious as if made fresh!
What to Serve with Festive Red White and Blue Pinwheel Cookies
These colorful cookies aren’t just delightful on their own; they’re the perfect centerpiece for a festive gathering, calling for a variety of delicious accompaniments.
-
Creamy Milkshakes: Thick and rich, milkshakes add a chilly contrast to the soft texture of the cookies, making each bite even more indulgent.
-
Fresh Berry Salad: A light and vibrant salad bursting with strawberries, blueberries, and raspberries, it brings a refreshing brightness that balances the sweetness of the cookies.
-
Lemonade Spritzers: With a zesty fizz, these drinks enhance the celebratory atmosphere and complement the buttery notes of the cookies beautifully.
-
Chocolate Dipping Sauce: Rich and velvety, a warm chocolate sauce to dip the cookies creates a fun and decadent experience that satisfies sweet-tooth cravings.
-
Whipped Cream Topping: An airy dollop of whipped cream adds a smooth texture that pairs nicely with the vibrant pinwheel cookies, enhancing their festive appeal.
-
Ice Cream Sandwiches: Use two cookies to sandwich your favorite ice cream flavor; the contrast of creaminess against the chewy cookies is a surefire crowd-pleaser.
-
Sparkling Fruit Punch: This fruity, fizzy drink combines seasonal flavors and adds a cheerful note to any celebration, complementing the cookies’ festive colors.
-
Patriotic Yogurt Parfaits: Layer yogurt, granola, and berries in a glass to echo the red, white, and blue colors of your cookies—an appealing and healthy addition!
-
Vanilla Cake Slices: A slice of moist vanilla cake can elevate your dessert table, balancing its airy flavor with the cookies’ delightful sweetness.
Tips for the Best Red White and Blue Cookies
- Chill Well: Ensure the dough is well-chilled before slicing to maintain the defined pinwheel shape during baking, preventing spreading.
- Gel Coloring Only: Use gel food coloring for bright colors; liquid food coloring can alter texture and result in dull hues.
- Don’t Overmix: When combining wet and dry ingredients, mix until just combined to keep the cookies soft and chewy—avoid overworking the dough.
- Even Slices: Use a sharp knife for cutting the logs to maintain a clean edge; uneven slices can lead to inconsistent baking results.
- Store Properly: Keep baked cookies in an airtight container for optimal freshness up to 4 days. Unbaked logs can be frozen for 2 months—slice and bake when ready!
Red White and Blue Cookies Variations
Feel free to sprinkle a little creativity into these cookies, making them truly your own with delightful twists!
-
Dairy-Free: Substitute unsalted butter with vegan butter or margarine for a lactose-free option. Enjoy the same buttery flavor without the dairy!
-
Add Sprinkles: Mix festive sprinkles into the dough for a fun pop of color throughout the cookies. This enhances the celebratory feel for any occasion.
-
Nuts & Chocolate: Fold in some chopped nuts or white chocolate chips for added texture and richness. The crunch perfectly complements the soft cookie.
-
Almond Extract: Swap vanilla extract for almond extract to give your cookies an interesting flavor profile; it adds warmth and depth to every bite.
-
Color Celebrations: Experiment with different food colorings to match any holiday theme. Pastels for spring or vibrant orange and black for Halloween makes these cookies versatile.
-
Sugar Coating: Try rolling the cookies in colored sugar or sanding sugar before baking for extra sparkle! This simple step elevates your cookies into a show-stopping dessert.
-
Spiced Variation: Introduce a dash of cinnamon or nutmeg into the dough for a warm, spiced twist that’s perfect for festive gatherings.
Explore these variations while enjoying your Red White and Blue Cookies, and consider making them for gatherings where a sweet indulgence is craved. And if you’re eager for more delicious sweets, don’t miss out on my Cheesecake Stuffed Cookies or Blueberry White Chocolate treats that are sure to impress!
How to Store and Freeze Red White and Blue Cookies
Room Temperature: Store cookies in an airtight container at room temperature for up to 4 days to maintain their deliciously soft texture.
Freezer: Unbaked cookie logs can be wrapped tightly in plastic wrap and frozen for up to 2 months. Slice and bake them straight from the freezer for fresh cookies anytime!
Reheating: If you have leftover baked cookies, gently warm them in the microwave for 5-10 seconds for a freshly baked feel. Enjoy their vibrant flavors and festive spirit!
Advertisement
Red White and Blue Pinwheel Cookies Recipe FAQs
What should I look for when selecting ingredients?
Absolutely! When choosing ingredients, pay special attention to the freshness of your baking powder and eggs, as these are essential for the cookies’ rise and texture. For the butter, make sure it’s unsalted and at room temperature for easier creaming with sugar. Also, use gel food coloring instead of liquid for the best vibrant results without changing the dough’s consistency.
How should I store the baked cookies?
Very! Store your Red White and Blue Pinwheel Cookies in an airtight container at room temperature, where they’ll remain fresh for up to 4 days. For longer storage, keep them in the fridge or check if you can divide them into smaller batches to share with friends and family!
Can I freeze unbaked cookie dough logs?
Yes, you can! To freeze your unbaked logs, wrap them tightly in plastic wrap and then place them in a resealable freezer bag. They’ll be good for up to 2 months! When you’re ready to bake, slice the logs straight from the freezer and bake as directed—you’ll have fresh cookies in no time!
What if my dough is too sticky?
No problem! If your dough becomes sticky while working with it, it might be helpful to chill it for an additional 15-30 minutes. This will firm it up and make it easier to roll out. If you find it’s still too sticky after chilling, trying a light dusting of flour on your working surface can assist without compromising the final texture.
Are there any dietary considerations for these cookies?
Absolutely! If you’re baking for someone with allergies, you might want to consider using egg substitutes, like flaxseed or applesauce, to make these cookies vegan. Also, for those avoiding dairy, vegan butter or margarine can easily replace the unsalted butter. Just check the sprinkles and any additional toppings to ensure they’re allergy-friendly.

Deliciously Fun Red White and Blue Cookies for Any Celebration
Ingredients
Equipment
Method
- Prepare Dry Ingredients: In a medium bowl, whisk together flour, baking powder, and salt until combined. Set aside.
- Make Dough: In a large bowl, cream together butter and sugar until light and fluffy. Blend in the egg and vanilla.
- Combine Ingredients: Gradually add dry mixture to wet ingredients, mixing until just combined.
- Divide and Color Dough: Split the dough into three portions. Leave one uncolored and color the others with red and blue gel food coloring.
- Chill Dough: Shape each portion into rectangles, wrap in plastic wrap, and refrigerate for at least 30 minutes.
- Roll Dough: Roll out each colored dough into rectangles, stack red, white, and blue.
- Form Logs: Roll the stacked dough tightly into a log shape, wrap in plastic wrap, and refrigerate for 2 hours or overnight.
- Preheat Oven: Preheat oven to 375°F (190°C) and line baking sheets with parchment paper.
- Slice and Bake: Slice the chilled log into 1/4-inch thick cookies, bake for 8-10 minutes.
- Cool: Cool on the sheets for 5 minutes, then transfer to a wire rack to cool completely.