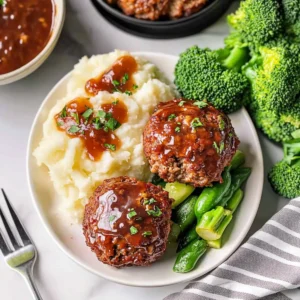
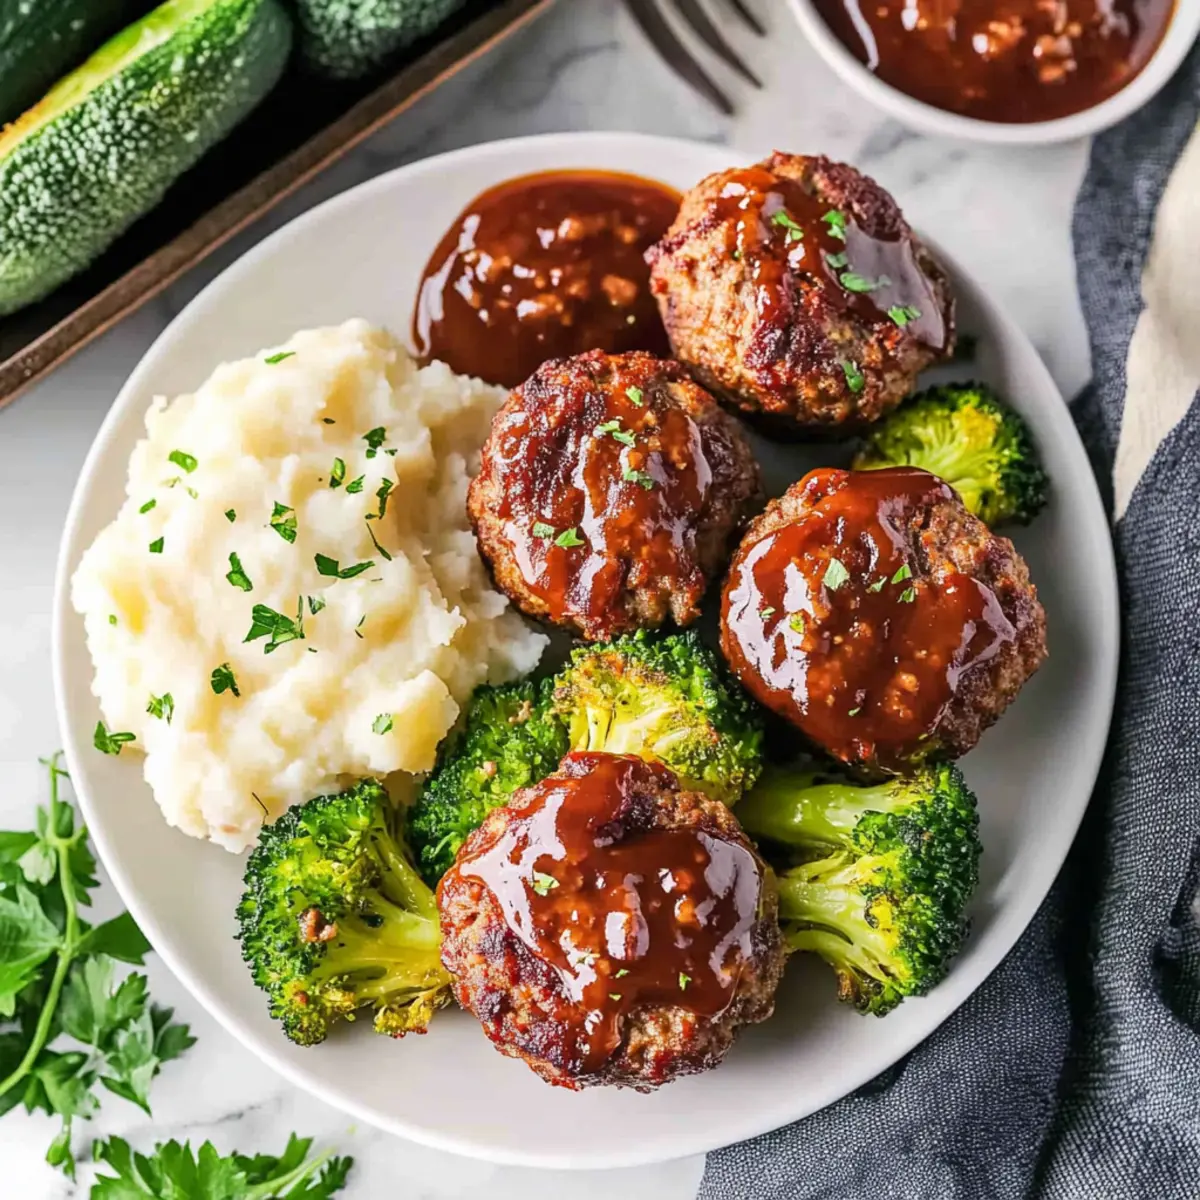
As I rummaged through my kitchen, searching for a quick and satisfying meal, I stumbled upon the perfect solution: Mini Meatloaf Muffins! These little wonders not only bring back nostalgic flavors of classic meatloaf but also add a fun twist with their muffin-sized servings. Perfectly baked in a muffin tin, these mini meatloafs are juicy and flavorful, making them an ideal choice for everything from cozy family dinners to entertaining friends. With a simple prep and short baking time, they can easily become your new go-to comfort food. Plus, they’re versatile enough to serve solo as appetizers or as part of a hearty meal alongside mashed potatoes and veggies. Who could resist a meal that’s both tasty and hassle-free? What surprises will you discover when you dive into these delectable bites?
Why Choose Mini Meatloaf Muffins?
Versatile Delight: Mini Meatloaf Muffins shine in any setting—whether you’re hosting a dinner party or enjoying a quiet night in.
Quick Prep: With minimal prep time and easy cleanup, these muffins fit seamlessly into your busy lifestyle.
Nostalgic Flavor: They capture the comforting essence of classic meatloaf, delivering heartwarming flavors that everyone loves.
Unique Presentation: Their muffin shape makes for a fun and creative twist on traditional meatloaf, perfect for impressing guests.
Kid-Friendly: These bite-sized treats are appealing to kids and adults alike—great for picky eaters!
Consider pairing them with sides like mashed potatoes or steamed veggies or check out our Andes Mint Mini for a sweet finish. Enjoy experimenting with variations, such as a cheesy stuffed version for an extra layer of flavor!
Mini Meatloaf Ingredients
• Get ready to create these juicy, flavorful bites of heaven!
For the Meat Mixture
- Ground Beef – This is your main protein source; opt for lean ground beef for a healthier option.
- White Onion – Adds moisture and flavor; finely minced for even distribution.
- Eggs – Binds everything together, providing structure to the mini meatloaf.
- Breadcrumbs – Adds texture and stability; for a lower-carb option, swap with pork panko.
- Worcestershire Sauce – Enhances the flavor with delightful umami notes.
- Pepper – Provides seasoning; adjust to your preference.
- Seasoning Salt – Adds a great base layer of flavor.
- Garlic Powder – Adds depth of flavor; feel free to use fresh garlic for a stronger taste.
- Ketchup – Both in the meat mixture and as a glaze, it contributes sweetness and moisture.
For the Glaze
- Brown Sugar – Balances the acidity in the ketchup while adding sweetness.
- Mustard – Provides a tangy depth that elevates the glaze to another level.
These Mini Meatloaf ingredients will surely infuse each bite with comfort and warmth, making them perfect for any occasion!
Step‑by‑Step Instructions for Mini Meatloaf
Step 1: Preheat Oven
Begin by preheating your oven to 350°F (175°C). While it warms, grab a muffin tin and generously spray it with nonstick cooking spray to ensure easy removal of the mini meatloaf muffins later on. This preparation helps achieve that perfect golden crust as they bake.
Step 2: Mix Ingredients
In a large mixing bowl, combine 1 pound of lean ground beef, finely minced white onion, two eggs, breadcrumbs, Worcestershire sauce, pepper, seasoning salt, and garlic powder. Mix these ingredients thoroughly until everything is evenly distributed, ensuring that each muffin will be packed with the delicious flavors of your Mini Meatloaf. Adding ½ cup of ketchup at this stage will enhance moisture and flavor.
Step 3: Fill Muffin Tin
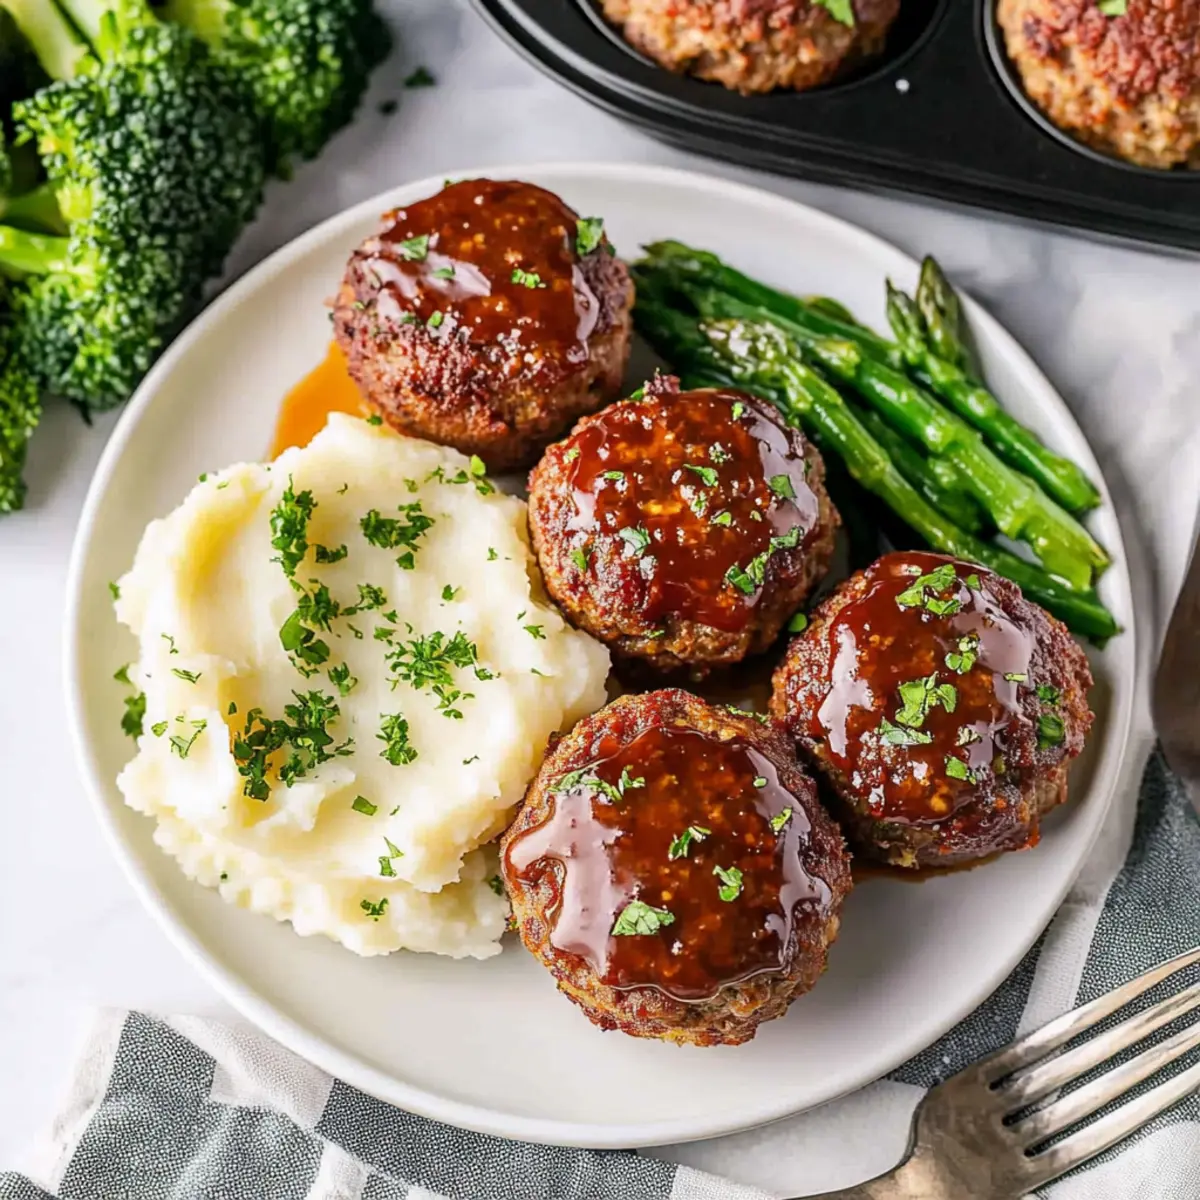
Once your meat mixture is ready, gently scoop it into the prepared muffin tin, filling each cup about three-quarters full. This allows room for the mini meatloaf to rise a bit. Use a spoon or your hands to pat them down lightly, ensuring they hold their shape during baking and create that inviting, dome-like appearance.
Step 4: Prepare the Glaze
In a separate small bowl, mix together the remaining ¼ cup of ketchup, brown sugar, and a tablespoon of mustard. Stir until smooth, creating a luscious glaze that will top your Mini Meatloaf. This glaze adds a sweet and tangy flavor that perfectly complements the savory meatloaf.
Step 5: Bake
Carefully spoon the prepared glaze over each mini meatloaf, making sure to cover the tops generously. Place the muffin tin in the oven and bake for 30 minutes. Keep an eye on them toward the end; they should be nicely browned on top. To ensure they’re fully cooked, use a meat thermometer to check that the internal temperature reaches 160°F (70°C).
Step 6: Cool and Serve
After baking, remove the muffin tin from the oven and allow the Mini Meatloaf to cool for about 5 minutes. This resting time makes it easier to remove them from the tin without breaking. Serve warm, either as delightful appetizers or as part of a hearty meal alongside mashed potatoes and steamed veggies.
Make Ahead Options
These Mini Meatloaf Muffins are perfect for meal prep enthusiasts! You can prepare the meat mixture and refrigerate it up to 24 hours ahead of time, ensuring that all the flavors meld beautifully. Mix together the ground beef, minced onion, eggs, breadcrumbs, Worcestershire sauce, and seasonings, then cover and store it in an airtight container. On the day you plan to serve them, simply scoop the mixture into the muffin tin, prepare the glaze, and bake! If you prefer, you can also freeze the uncooked mini meatloafs for up to 3 months; just ensure they’re tightly wrapped to prevent freezer burn. When ready to cook, bake them straight from the freezer, adding a few extra minutes to the cooking time. Enjoy the time-saving benefits of these delicious Mini Meatloaf Muffins, making mealtime stress-free!
Mini Meatloaf Variations & Substitutions
Invite your taste buds on a delightful adventure by customizing your Mini Meatloaf Muffins!
- Stuffed Meatloaf: Add a luscious cube of mozzarella in the center for a gooey, cheesy surprise that melts beautifully.
- Chicken Meatloaf: Swap beef for ground chicken for a lighter, delightful alternative that still packs in the flavor.
- Turkey Meatloaf: Use lean ground turkey as a healthier option, making your muffins equally delicious without sacrificing flavor.
- Spicy Kick: Mix in diced jalapeños or a splash of hot sauce to your meat mixture for an exciting heat boost that’s perfect for spice lovers.
- BBQ Twist: Replace ketchup in the glaze with barbecue sauce for a tangy, smoky finish that’s perfect for summer gatherings.
- Vegetarian Option: Substitute ground beef with a plant-based meat alternative or lentils for a hearty, delicious vegetarian twist on this classic.
- Herb-Infused: Add fresh or dried herbs like rosemary or thyme to the meat mixture to elevate the flavor profile with aromatic notes.
For dessert lovers, consider whipping up some Mini Creme Brulee to round out your meal with a sweet touch! Enjoy experimenting and make these Mini Meatloaf Muffins uniquely yours!
Expert Tips for Mini Meatloaf
- Moisture Matters: Avoid overmixing the meat mixture, as this can lead to dry mini meatloafs. Mix just until combined for that tender, juicy bite.
- Freezing for Later: Flash freeze uncooked mini meatloafs in the muffin tin; transfer them to a freezer bag afterward for a quick meal solution anytime!
- Cheesy Surprise: For a delightful twist, consider adding a small cube of cheese to the center of each mini meatloaf, creating a gooey, flavorful surprise.
- Glaze Variation: Don’t hesitate to experiment with the glaze! Try adding a splash of hot sauce for a spicy kick or a dash of smoked paprika for a unique depth.
- Temperature Check: Always use a meat thermometer to ensure your mini meatloaf reaches the safe internal temperature of 160°F (70°C). This guarantees deliciously cooked meat every time.
Storage Tips for Mini Meatloaf
Fridge: Store cooked mini meatloafs in an airtight container in the refrigerator for up to 3 days. This keeps them fresh and flavorful for your quick meals!
Freezer: For longer storage, freeze baked mini meatloafs in a single layer on a baking sheet; once frozen, transfer to a freezer-safe bag for up to 3 months.
Reheating: Reheat in the oven at 350°F (175°C) for about 15-20 minutes until heated through, or microwave for 1-2 minutes, ensuring they remain juicy and delicious.
Storage Tip: Label your freezer bags with the date and contents to keep track of your homemade Mini Meatloaf additions!
What to Serve With Mini Meatloaf Muffins?
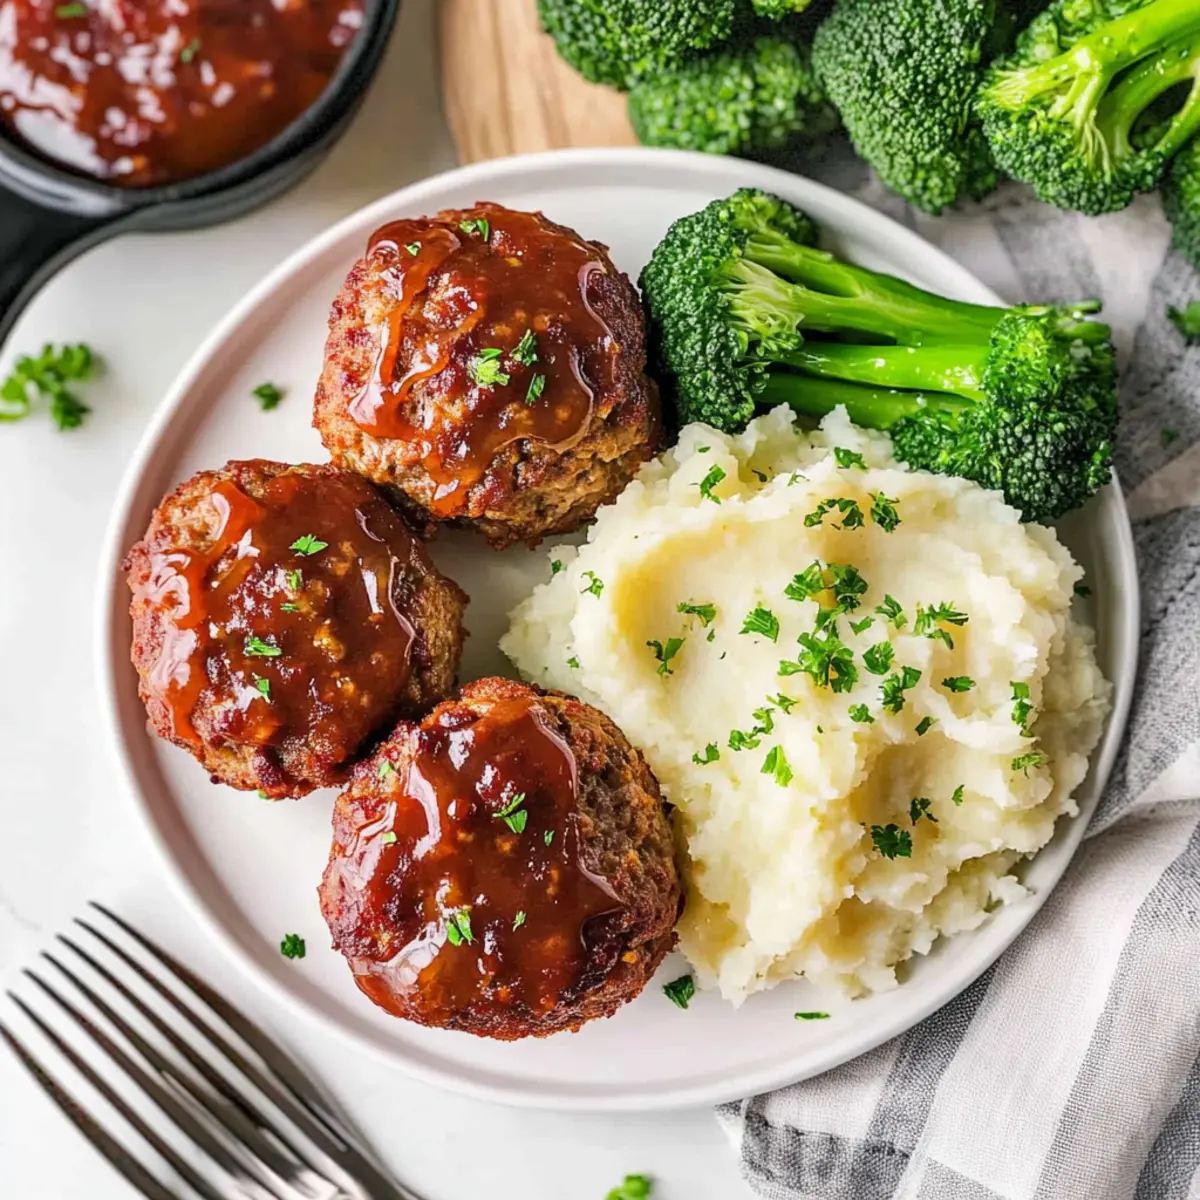
Pairing these delightful mini meatloaf muffins with the right sides creates a full, satisfying meal that everyone will love!
-
Creamy Mashed Potatoes: Their smooth texture and buttery flavor perfectly complement the savory richness of the meatloaf.
-
Steamed Green Beans: The crispness of fresh green beans adds a refreshing balance, making each bite a delightful experience.
-
Garlic Bread: Buttery, garlic-infused slices provide a wonderfully crispy texture that’s perfect for soaking up any leftover glaze.
-
Coleslaw: A tangy coleslaw brings a zesty crunch that lights up your palate, enhancing the heartiness of the mini meatloaf.
-
Roasted Carrots: Sweet, caramelized carrots add a pop of color and a hint of natural sweetness that pairs beautifully with a savory bite.
-
Balsamic Glazed Brussels Sprouts: Their slightly bitter flavor contrasts nicely, offering a sophisticated touch that elevates the meal.
-
Corn on the Cob: Juicy, sweet corn creates a playful, nostalgic element and brings sweet summer vibes to your table.
-
A Glass of Merlot: For a warm finish, a glass of Merlot complements the rich flavors of the meatloaf, making for a cozy dining experience.
With these pairing ideas, your mini meatloaf muffins will shine as a star-studded meal!
Mini Meatloaf Recipe FAQs
What kind of ground beef should I use for mini meatloaf muffins?
Absolutely! Opt for lean ground beef to keep your mini meatloaf muffins flavorful yet healthier. Look for beef that is around 90% lean to ensure a good balance of taste and fat.
Advertisement
How should I store leftover mini meatloaf muffins?
Very! Store your cooked mini meatloaf muffins in an airtight container in the refrigerator for up to 3 days. This helps preserve their moisture and flavor, making them perfect for quick meals during the week.
Can I freeze mini meatloaf muffins? If so, how?
Yes, you can freeze them! To freeze uncooked mini meatloaf muffins, fill the muffin tin and place it in the freezer. After about an hour, when they’re slightly firm, transfer them to a freezer bag. They can be stored for up to 3 months. Just bake from frozen, adding an extra 5-10 minutes to the cooking time.
What should I do if my mini meatloaf muffins turn out dry?
Oh no! If your mini meatloaf muffins are dry, it could be a mixing issue. Avoid overmixing when combining ingredients, which can lead to a tougher texture. If you think they’re too dry after cooking, try adding a dollop of gravy or ketchup on top to moisten and enhance flavor when serving.
Can my pets eat mini meatloaf muffins?
Good question! While the ingredients in mini meatloaf muffins are not toxic to pets, it’s best to avoid giving them human food regularly. If you want to share, ensure there are no harmful spices or ingredients (like onions, which are dangerous for pets) present.
How can I tell when my mini meatloaf muffins are done cooking?
Great inquiry! The most reliable method is to use a meat thermometer—check that the internal temperature reaches 160°F (70°C) for safe consumption. The tops should be nicely browned, and they should feel firm to the touch. If you don’t have a thermometer, you can cut one open to check that the center is no longer pink.

Mini Meatloaf Magic: Juicy Muffins for Every Occasion
Ingredients
Equipment
Method
- Preheat your oven to 350°F (175°C) and spray a muffin tin with nonstick cooking spray.
- In a large bowl, combine ground beef, onion, eggs, breadcrumbs, Worcestershire sauce, pepper, seasoning salt, garlic powder, and ketchup. Mix well.
- Scoop the meat mixture into the muffin tin, filling each cup about three-quarters full.
- In a small bowl, mix together ketchup, brown sugar, and mustard to create the glaze.
- Spoon the glaze over each mini meatloaf and bake for 30 minutes.
- Remove from oven and let cool for 5 minutes before serving.