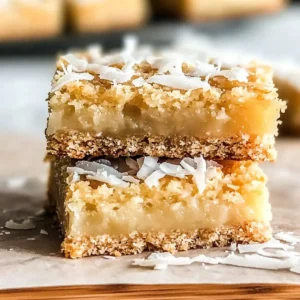
The first time I tasted milk mochi, a delightful Japanese dessert, it was like discovering a hidden treasure. This simple and chewy treat combines the richness of whole milk with glutinous rice flour, creating a creamy texture that melts in your mouth. What I love most is that this milk mochi requires no fancy techniques or special equipment—just a non-stick pan and a handful of ingredients. It’s an easy win for those busy weeknights when you crave something sweet and satisfying. Plus, it’s gluten-free, making it accessible to everyone at the table! So, are you ready to bring a touch of Japan into your kitchen and impress your friends and family with this treat? Let’s dive in!
Why is Milk Mochi a Must-Try?
Simplicity: With just a few ingredients and minimal equipment, this recipe is perfect for both novice and experienced cooks alike.
Chewy Delight: The unique texture is reminiscent of soft gummy candies, making each bite a gooey indulgence.
Versatile: Experiment by swapping whole milk for coconut milk or adding fun fillings like red bean paste for a twist on the classic.
Crowd-Pleaser: Serve this dairy treat at your next gathering, and watch it disappear as guests rave about its delightful flavor and fun texture, just like with my popular Buttermilk Pancakes Soft!
Quick to Prepare: In about 30 minutes, you have a delicious dessert ready to enjoy, making it a fantastic option for last-minute cravings or special occasions.
Milk Mochi Ingredients
To create this delightful milk mochi, gather these simple ingredients!
For the Dough
- Glutinous Rice Flour – This provides the chewy texture that makes milk mochi a favorite.
- Cornstarch – Helps improve the texture, making the mochi less sticky and easier to handle.
- Sugar – Adjust the sweetness to your liking; it’s essential for the flavor profile of the milk mochi.
- Corn Oil – Adds moisture and richness, enhancing the overall flavor of the dough.
- Whole Milk – The star ingredient that brings creaminess; try using a dairy-free alternative if needed!
For Dusting
- Roasted Soybean Flour – A traditional coating that lends a nutty flavor and helps prevent sticking.
- Powdered Sugar – An optional sweet dusting for those who prefer an extra touch of sweetness on their milk mochi.
Gather these ingredients, and you’ll be on your way to making a smooth, chewy batch of milk mochi that everyone will love!
Step‑by‑Step Instructions for Milk Mochi
Step 1: Prepare the Mixture
In a large mixing bowl, combine 150g glutinous rice flour, 30g cornstarch, 25g sugar, 20g corn oil, and 290g whole milk. Whisk the mixture until it’s smooth and well combined, ensuring no lumps remain. If desired, strain the mixture through a fine sieve for extra smoothness. This will be the base for your delicious milk mochi, which can seamlessly blend flavors and textures.
Step 2: Pour into the Pan
Now, pour the prepared liquid mixture into a non-stick pan. Ensure the pan is evenly coated to avoid sticking; using a damp paper towel can help. Spread the mixture evenly within the pan for consistent cooking. This step sets the stage for a tender and chewy texture, letting the milk mochi come together beautifully during cooking.
Step 3: Cook the Mixture
Place the pan over low heat and gently stir the mixture using a silicone spatula. Continue to stir for approximately 25 minutes, or until the mixture thickens and forms a cohesive, dense mass that begins to pull away from the sides of the pan. You’ll know it’s ready when it slightly clumps together and has a glossy sheen, promising that the milk mochi will have a delightful chew.
Step 4: Cool and Knead
Once fully cooked, carefully remove the pan from the heat and let the mixture cool for a few minutes. Once it’s slightly warm, use gloved hands to knead the dough for about 5 minutes. Kneading will help develop elasticity, crucial for achieving that signature chewy texture in your milk mochi. Pass this step with care so you don’t burn your hands while forming a smooth, pliable dough.
Step 5: Shape the Dough
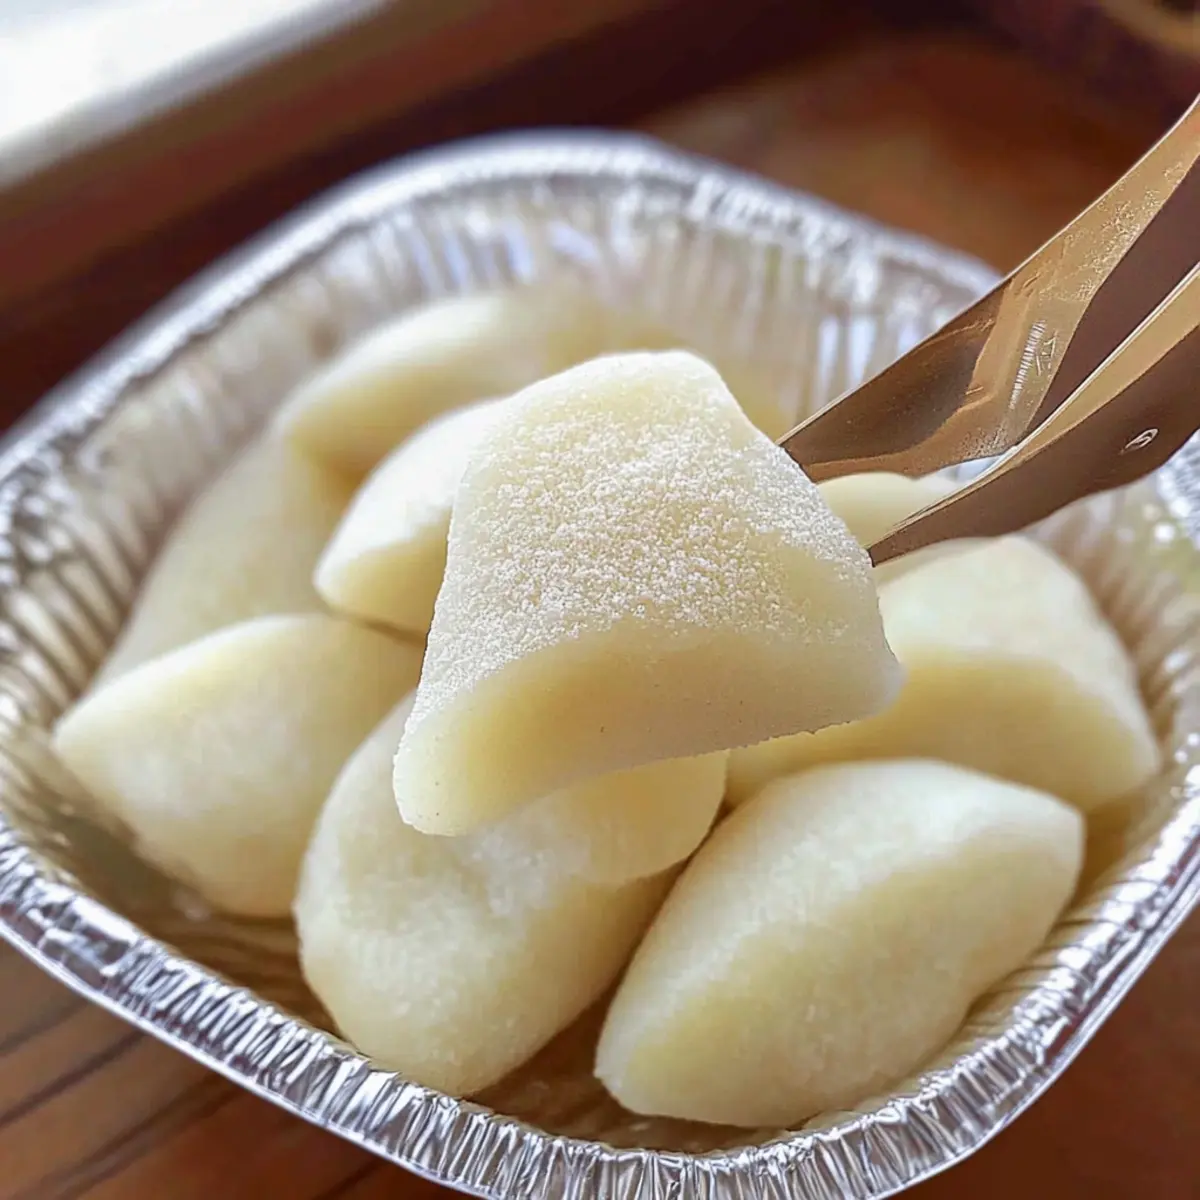
Now that the dough is kneaded, roll it out into a long strip with your hands on a dusted surface. Cut the dough into your desired shapes—squares or rectangular pieces work great. Use a knife or dough cutter for clean edges. This is an exciting step where your delicious milk mochi begins to take its final form, ready to be dusted and cherished.
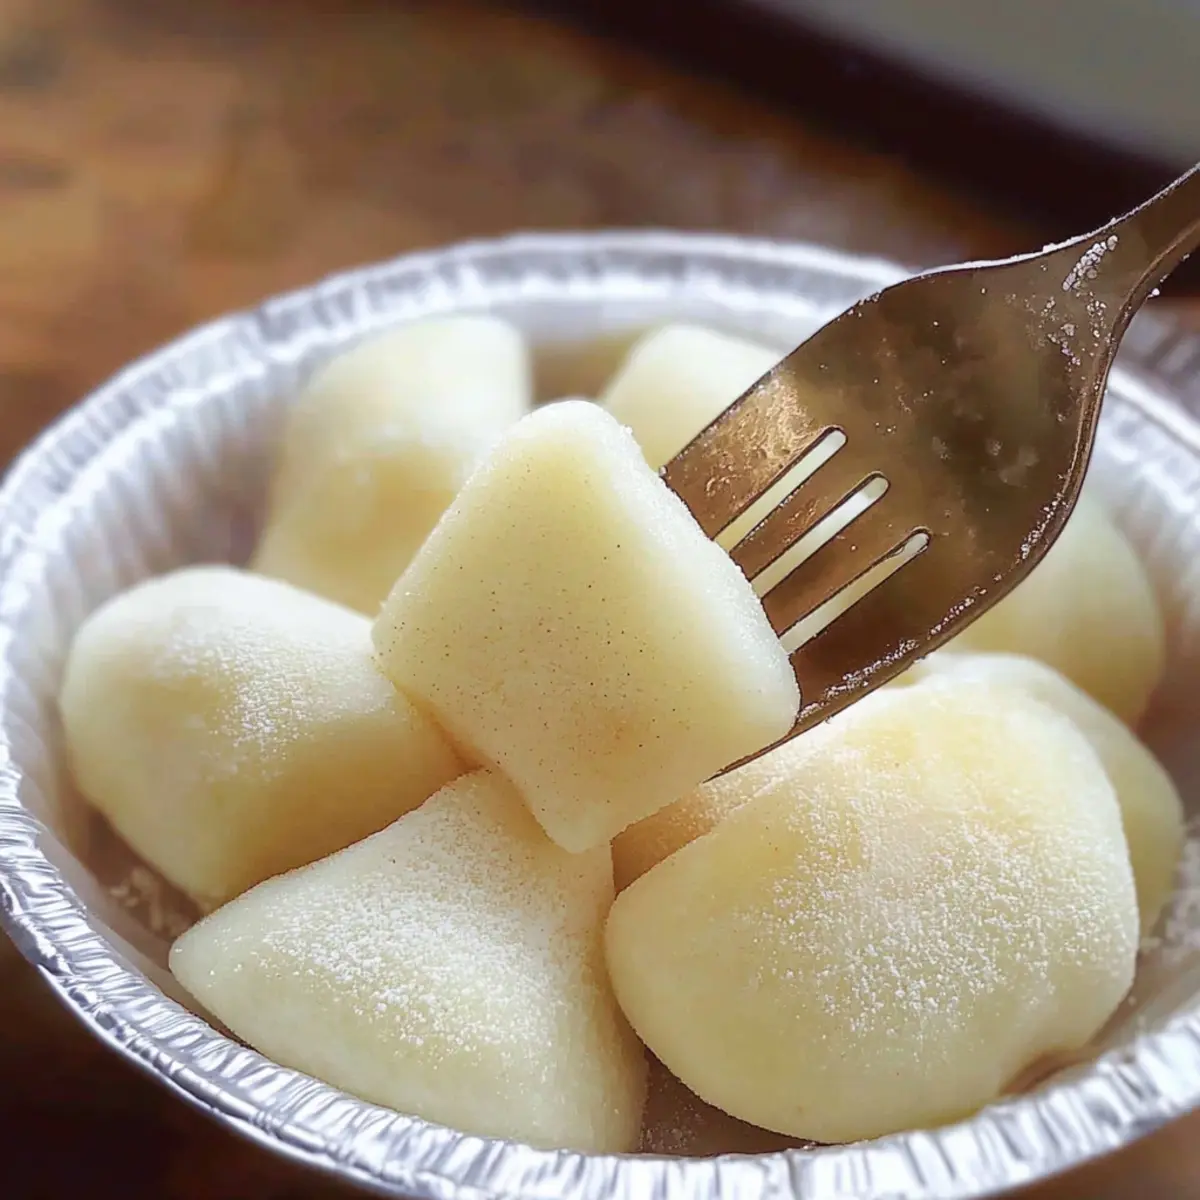
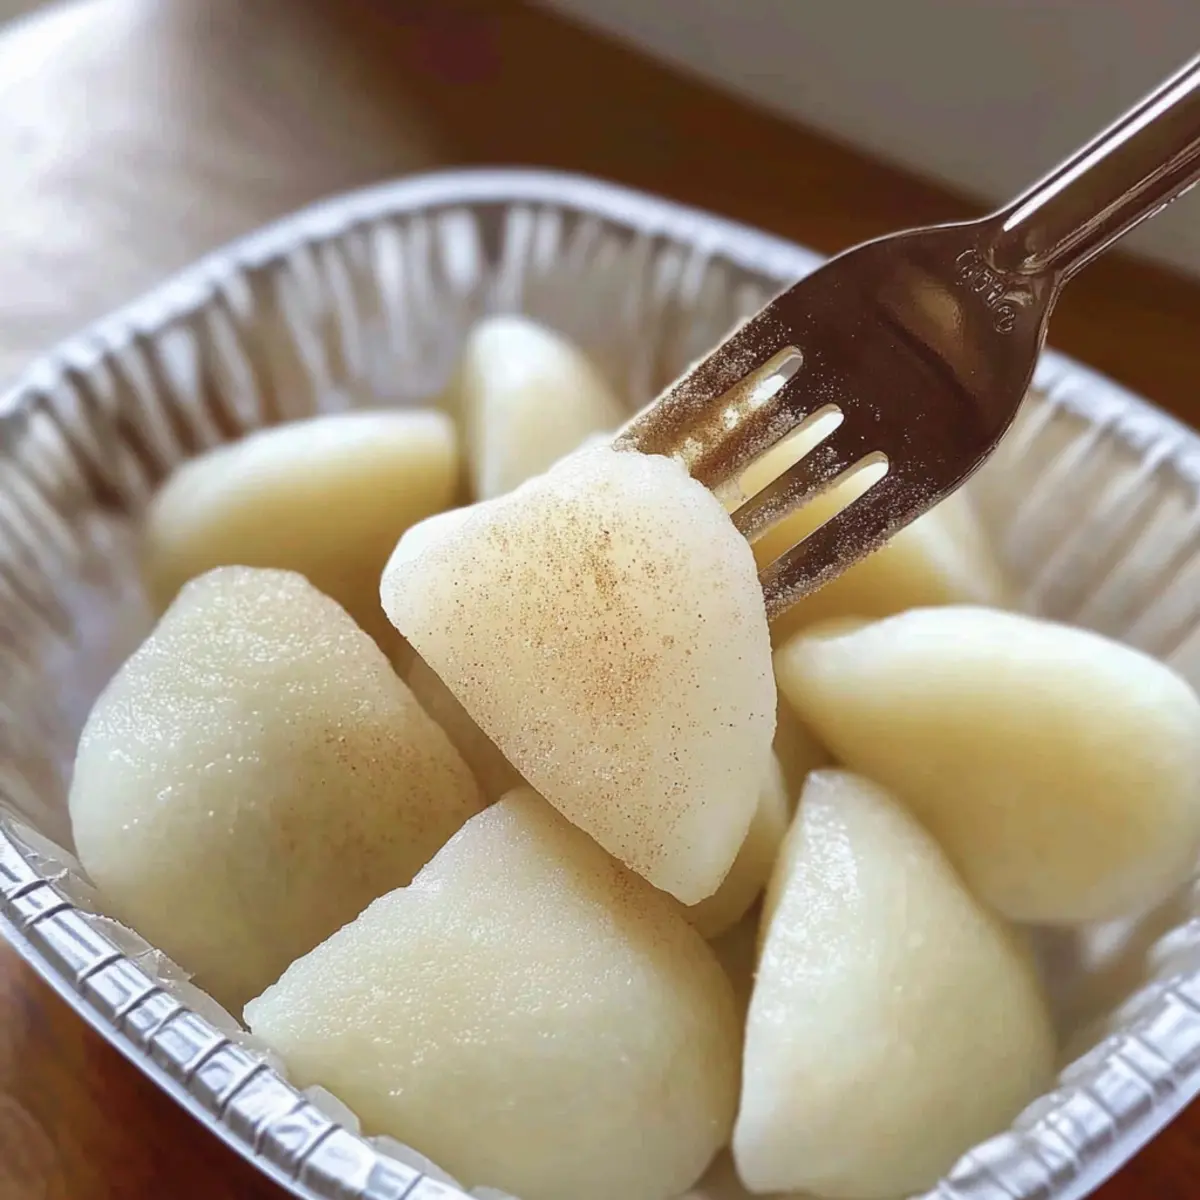
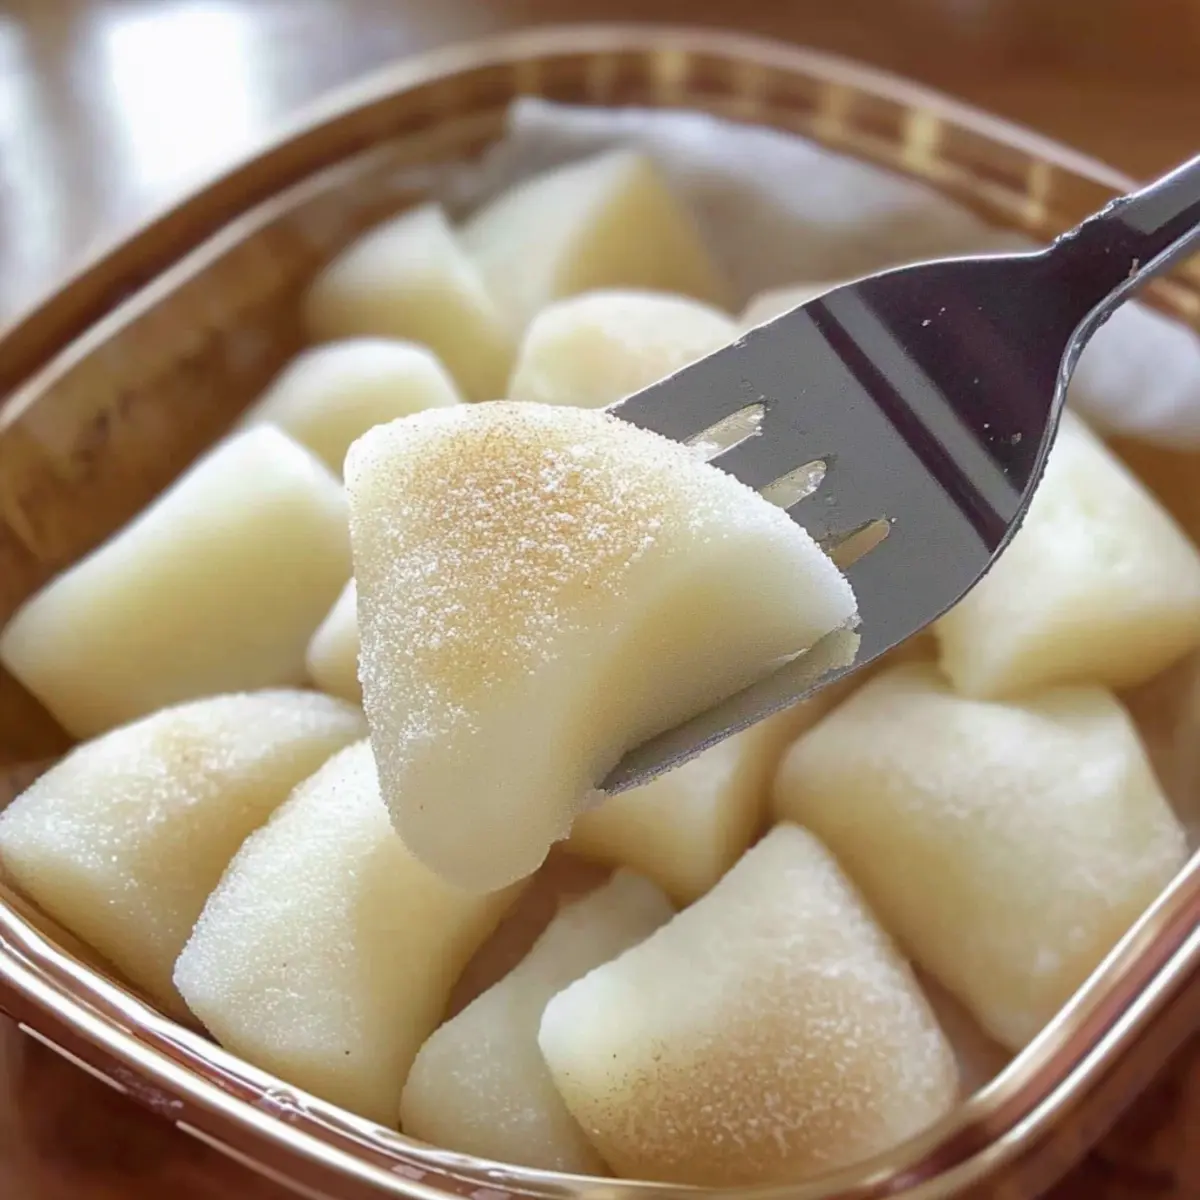
Step 6: Coat and Serve
Lastly, generously coat the cut pieces of milk mochi in roasted soybean flour to prevent sticking and to enhance flavor. You can also use powdered sugar for a sweet finish if preferred. Once coated, the milk mochi is ready to serve. Present it chilled or at room temperature, revealing that delectable chewy texture and inviting flavor that everyone will adore!
Make Ahead Options
These Milk Mochi are perfect for busy home cooks looking to save time! You can prepare the dough up to 24 hours in advance. After kneading and shaping the mochi, simply dust the pieces with roasted soybean flour or powdered sugar and store them in an airtight container at room temperature. To maintain their delightful chewiness, avoid refrigerating them, as this can change the texture. When you’re ready to serve, just plate them up and enjoy. With these make-ahead options, you can easily have a batch of sweet, chewy Milk Mochi on hand, ready to delight at any gathering or as a quick dessert fix during a busy week!
How to Store and Freeze Milk Mochi
Room Temperature: Store milk mochi in an airtight container at room temperature for up to 3 days to preserve its delightful chewiness.
Fridge: While refrigeration is not recommended to maintain texture, if you must, place milk mochi in an airtight container for up to 2 days—just make sure to allow it to come back to room temperature before serving.
Freezer: For longer storage, wrap pieces individually in plastic wrap and place them in a freezer-safe container. Milk mochi can be frozen for up to 1 month; thaw overnight in the fridge before enjoying.
Reheating: If desired, reheat milk mochi in the microwave for about 10-15 seconds to restore its soft texture. Enjoy this chewy treat fresh for the best experience!
Expert Tips for Milk Mochi
-
Kneading Matters: Thoroughly knead the dough until it becomes elastic. This step is crucial for achieving that perfect chewy texture in your milk mochi.
-
Keep It Low: Always cook over low heat to prevent burning and promote even cooking. Stir gently to maintain the mixture’s smooth consistency.
-
Avoid Sticking: Instead of regular flour, consider using cooked glutinous rice flour for dusting the surface. This prevents sticking and adds flavor.
-
Cooling Time: Let the mixture cool slightly before kneading. Hot dough can burn your hands while kneading, so give it a few minutes to come down in temperature.
-
Experiment with Flavors: Feel free to swap out the whole milk with coconut milk or almond milk for a different flavor profile while keeping it gluten-free!
Milk Mochi: Exciting Variations!
Feel free to mix things up with these delightful substitutions and twists that elevate your milk mochi experience!
-
Coconut Milk: Swap out whole milk for coconut milk to infuse a tropical flavor that adds richness and sweetness.
You’ll love how the coconut milk makes each bite a creamy escape to the beach! -
Sweet Fillings: Add red bean paste, custard, or fresh fruits like strawberries inside the mochi for a fruity surprise in every bite.
These fillings not only enhance taste but also create a lovely textural contrast, making it a truly memorable treat. -
Nutty Flavor: Incorporate a touch of almond extract into the dough for an aromatic twist that complements the sweetness beautifully.
Just a teaspoon will elevate your mochi to a new flavor level, making every chew satisfying. -
Dairy-Free: Substitute whole milk with almond milk or oat milk for a dairy-free option that everyone can enjoy.
This makes it perfect for those with dietary restrictions while still ensuring a delicious treat. -
Chocolate Delight: Add cocoa powder to the mixture for a chocolaty variation, or roll finished pieces in cocoa powder instead of soybean flour.
Chocolate lovers will rejoice at this decadent twist, transforming your classic milk mochi into a sweet dream. -
Matcha Sensation: Mix in matcha powder to incorporate a unique earthy flavor and vibrant color, giving your mochi a distinct character.
This twist not only pleases the eyes but also gives it an exciting flavor profile that pairs perfectly with tea! -
Crispy Coating: Dust with crushed nuts or toasted coconut instead of roasted soybean flour for a delightful crunchy texture.
This variation adds a delightful contrast to the chewy mochi, making it an even more tempting treat. -
Heat It Up: For a spicy kick, add a hint of chili powder to the dough or atop the final coated pieces.
This unexpected heat can surprise your palate and create a truly adventurous dessert experience!
Whichever variation you choose, your milk mochi will shine brighter than ever, ensuring it becomes a crowd favorite, just like my sweet and aromatic Cherry Earl Grey treat!
What to Serve with Simple and Chewy Milk Mochi?
Pair your delightful milk mochi with these mouthwatering sides to create a full meal experience.
-
Fresh Fruit Salad: A vibrant mix of seasonal fruits balances the sweetness of the mochi and adds a refreshing crunch.
-
Matcha Tea: The earthy notes of matcha enhance the creamy texture of milk mochi while providing a soothing contrast.
-
Sweet Red Bean Soup: This warm, sweet soup brings a comforting warmth, pairing beautifully with the chewy texture of the mochi.
For a delightful summer twist, add cold desserts like shaved ice or fruity sorbets. They bring a refreshing element that complements the creamy richness of milk mochi wonderfully.
- Coconut Ice Cream: This will add a tropical flair and creamy contrast, further enriching your dessert experience.
Lastly, consider offering a chilled sparkling beverage. The bubbles bring a fun effervescence, perfect for washing down this chewy, sweet delight!
Milk Mochi Recipe FAQs
What type of glutinous rice flour should I use?
Absolutely! Make sure to select glutinous rice flour, as regular rice flour won’t provide the desired chewy texture. You can typically find it in Asian grocery stores or in the international aisle of your supermarket.
Advertisement
How should I store leftover milk mochi?
To maintain its delightful chewiness, store milk mochi in an airtight container at room temperature for up to 3 days. Avoid refrigeration to prevent it from becoming firm. If you must refrigerate, place it in an airtight container and let it return to room temperature before serving.
Can I freeze milk mochi?
Yes, you can! For freezing, wrap each piece of milk mochi in plastic wrap and place them in a freezer-safe container. This will maintain its texture. When you’re ready to enjoy, simply thaw in the fridge overnight. It can be stored for up to 1 month, making it an excellent treat for later.
What should I do if the mochi is too sticky?
If you find your milk mochi too sticky after kneading, work in a little more cornstarch during the kneading process. A light dusting of cornstarch on your hands and the surface can also help prevent sticking while shaping. Remember, kneading well is key for achieving the perfect chewy texture!
Is milk mochi safe for those with dietary restrictions?
Yes, milk mochi is gluten-free as it uses glutinous rice flour. If you’re lactose intolerant, you can substitute whole milk with a dairy-free alternative, such as coconut milk or almond milk. Just ensure that any additional ingredients you use remain gluten-free as well.
What can I use instead of roasted soybean flour for dusting?
If you don’t have roasted soybean flour, powdered sugar works beautifully for a sweeter finish! You might also try using cornstarch, but keep in mind that it won’t add flavor—only prevent sticking. Feel free to get creative and have fun with your toppings!
Delicious Milk Mochi: Your New Favorite Easy Dessert Treat
Ingredients
Equipment
Method
- In a large mixing bowl, combine glutinous rice flour, cornstarch, sugar, corn oil, and whole milk. Whisk until smooth.
- Pour the mixture into a non-stick pan, ensuring the pan is evenly coated.
- Cook over low heat, stirring for about 25 minutes until thickened.
- Remove from heat, let cool slightly, then knead the dough for about 5 minutes.
- Roll the kneaded dough into a strip and cut into desired shapes.
- Coat pieces in roasted soybean flour or powdered sugar before serving.