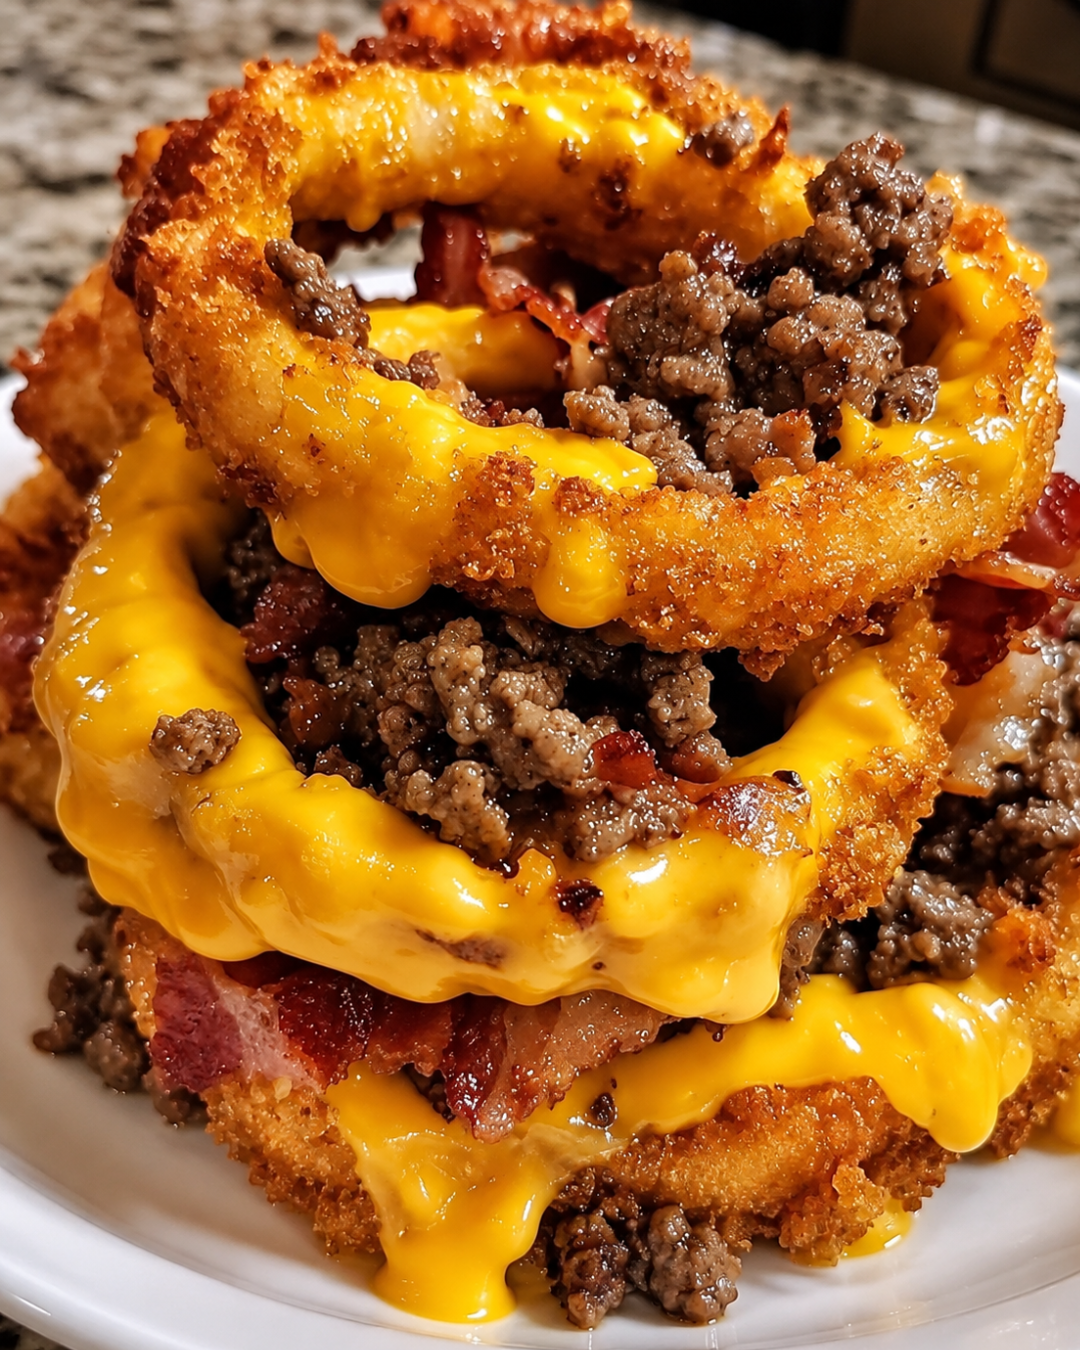
Introduction to Loaded Bacon Cheeseburger Onion Rings
There’s something magical about the combination of crispy onion rings and the savory goodness of a cheeseburger. Loaded Bacon Cheeseburger Onion Rings bring that magic right to your kitchen. Whether you’re hosting a game night or just craving a tasty snack, these rings are a crowd-pleaser. They’re not just delicious; they’re a fun way to elevate your appetizer game. Plus, they’re surprisingly easy to whip up, making them perfect for busy evenings or when you want to impress your friends. Let’s dive into this delightful recipe that’s sure to become a favorite!
Why You’ll Love This Loaded Bacon Cheeseburger Onion Rings
These Loaded Bacon Cheeseburger Onion Rings are a game-changer for any gathering. They combine the best of both worlds: the crunch of onion rings and the rich flavors of a cheeseburger. Plus, they’re quick to prepare, making them a fantastic option for busy weeknights or last-minute parties. With every bite, you’ll experience a burst of flavor that’s sure to satisfy your cravings and impress your guests!
Ingredients for Loaded Bacon Cheeseburger Onion Rings
Gathering the right ingredients is the first step to creating these mouthwatering Loaded Bacon Cheeseburger Onion Rings. Here’s what you’ll need:
- Large sweet onions: These provide the perfect balance of sweetness and crunch, making them ideal for onion rings.
- Ground beef: The star of the show! Choose a good quality beef for a rich flavor.
- Bacon: Cooked and crumbled, bacon adds a smoky, savory kick that elevates the dish.
- Shredded cheddar cheese: This melty goodness binds everything together and adds that classic cheeseburger flavor.
- Garlic powder: A sprinkle of this enhances the overall taste, giving it a savory depth.
- Onion powder: This amplifies the onion flavor, making every bite irresistible.
- Smoked paprika: Adds a subtle smokiness that complements the bacon beautifully.
- Salt and black pepper: Essential for seasoning, these bring out the flavors of the other ingredients.
- All-purpose flour: This is used for coating the onion rings, helping them achieve that crispy texture.
- Eggs: Beaten eggs act as a binder, ensuring the breadcrumbs stick well.
- Panko breadcrumbs: These provide an extra crunch, making your onion rings delightfully crispy.
- Paprika: A little extra for the breadcrumb mixture adds color and flavor.
- Cooking spray or oil: Necessary for frying, choose your favorite oil for a crispy finish.
For those looking to customize, feel free to add your favorite burger toppings like jalapeños or pickles. You can find the exact quantities for each ingredient at the bottom of the article, ready for printing!
How to Make Loaded Bacon Cheeseburger Onion Rings
Creating these Loaded Bacon Cheeseburger Onion Rings is a fun and rewarding process. Follow these simple steps, and you’ll have a delicious appetizer that will wow your friends and family!
Prepare the Onions
Start by peeling the large sweet onions. Cut them into 1/2-inch thick rings. This thickness is key for a perfect crunch. Once cut, gently separate the rings. Look for pairs where a smaller ring fits snugly inside a larger one. This will create the perfect vessel for your cheesy filling.
Cook the Beef Mixture
In a skillet over medium-high heat, cook the ground beef until it’s browned. As it cooks, sprinkle in the garlic powder, onion powder, smoked paprika, salt, and black pepper. These spices will infuse the beef with flavor. Once cooked, drain any excess grease. Stir in the crumbled bacon and shredded cheddar cheese while the beef is still warm. This helps the cheese melt slightly, making it easier to pack into the onion rings.
Assemble the Onion Rings
Now comes the fun part! Take a smaller onion ring and place it inside a larger one. Carefully pack the beef-cheese mixture into the space between the rings. Press firmly to ensure it holds together. This step is crucial for keeping everything intact during cooking. Repeat this process until all your onion rings are filled.
Chill the Stuffed Rings
To help the stuffed onion rings firm up, chill them in the refrigerator for 20 to 30 minutes. This makes them easier to handle when you’re ready to bread them. Plus, it helps the filling stay put while frying or baking.
Bread the Onion Rings
Set up your breading station with three bowls. In the first, place all-purpose flour. In the second, beat the eggs. In the third, mix panko breadcrumbs with a bit of paprika for extra flavor. Carefully coat each stuffed onion ring in flour, then dip it into the egg, and finally press it into the panko until fully covered. This triple coating ensures a crispy exterior.
Fry or Bake the Rings
Heat oil in a deep pan to 350°F. Fry the onion rings in batches for 2 to 3 minutes per side, until they’re golden brown and crispy. If you prefer a healthier option, you can bake them instead. Place the breaded rings on a greased baking sheet, spray lightly with oil, and bake at 425°F for 20 to 25 minutes, flipping halfway through. Either way, you’ll end up with a delicious treat!
Tips for Success
- Use sweet onions for a perfect balance of flavor and crunch.
- Chill the stuffed rings to help them hold their shape during cooking.
- Don’t rush the frying; cook in batches for even crispiness.
- Experiment with different cheeses or toppings to customize your rings.
- For a healthier twist, opt for baking instead of frying.
Equipment Needed
- Sharp knife: For slicing the onions. A good chef’s knife works wonders.
- Cutting board: Essential for safe and easy chopping.
- Skillet: A non-stick skillet is great for cooking the beef.
- Deep pan or fryer: Needed for frying the onion rings; a Dutch oven can work too.
- Three mixing bowls: For the breading station; any bowls will do!
Variations
- Spicy Kick: Add diced jalapeños or a splash of hot sauce to the beef mixture for a fiery twist.
- Cheesy Delight: Swap out cheddar for pepper jack or blue cheese for a different flavor profile.
- Vegetarian Option: Replace ground beef with black beans or lentils, and add your favorite veggies.
- Gluten-Free: Use gluten-free breadcrumbs and flour to make this dish suitable for gluten-sensitive friends.
- Herb Infusion: Mix in fresh herbs like parsley or chives into the beef mixture for added freshness.
Serving Suggestions
- Dipping Sauces: Serve with burger sauce, ranch, or spicy ketchup for an extra flavor boost.
- Side Dishes: Pair with crispy fries or a fresh salad to balance the richness.
- Presentation: Arrange on a platter with colorful garnishes like parsley for a vibrant touch.
- Drink Pairing: Enjoy with a cold beer or a classic soda for a nostalgic feel.
FAQs about Loaded Bacon Cheeseburger Onion Rings
Can I make Loaded Bacon Cheeseburger Onion Rings ahead of time?
Absolutely! You can prepare the stuffed onion rings and freeze them before frying. Just make sure to separate them with parchment paper to prevent sticking. When you’re ready to enjoy, fry them straight from the freezer!
What dipping sauces pair well with these onion rings?
These Loaded Bacon Cheeseburger Onion Rings are fantastic with a variety of dipping sauces. Try classic burger sauce, ranch dressing, or even spicy ketchup for a flavorful kick. The options are endless!
Can I bake the onion rings instead of frying them?
Yes, baking is a great alternative! Just place the breaded onion rings on a greased baking sheet, spray them lightly with oil, and bake at 425°F for 20 to 25 minutes, flipping halfway through for even crispiness.
What can I substitute for ground beef?
If you’re looking for alternatives, ground turkey or chicken works well. For a vegetarian option, consider using black beans or lentils mixed with your favorite veggies. The flavor will still be delicious!
How do I store leftovers?
Store any leftover Loaded Bacon Cheeseburger Onion Rings in an airtight container in the fridge for up to 3 days. Reheat them in the oven to maintain their crispiness!
Final Thoughts
Creating Loaded Bacon Cheeseburger Onion Rings is more than just cooking; it’s about bringing joy to your table. Each bite is a delightful crunch, bursting with the flavors of a classic cheeseburger. Whether you’re sharing them with friends during a game night or enjoying them solo on a cozy evening, these rings are sure to elevate your snacking experience. Plus, the satisfaction of making something so delicious from scratch is unbeatable. So, roll up your sleeves, gather your ingredients, and let the aroma of these tasty treats fill your kitchen. You won’t regret it!
Advertisement
Loaded Bacon Cheeseburger Onion Rings: A Tasty Delight!
Loaded Bacon Cheeseburger Onion Rings are a delicious twist on a classic appetizer, combining the flavors of a cheeseburger with crispy onion rings.
- Prep Time: 30 minutes
- Cook Time: 15 minutes
- Total Time: 45 minutes
- Yield: 4 servings 1x
- Category: Appetizer
- Method: Frying/Baking
- Cuisine: American
- Diet: Gluten Free
Ingredients
- 2 large sweet onions
- 1 lb ground beef
- 6 slices bacon, cooked and crumbled
- 1 cup shredded cheddar cheese
- 1/2 tsp garlic powder
- 1/2 tsp onion powder
- 1/2 tsp smoked paprika
- 1/2 tsp salt
- 1/4 tsp black pepper
- 1 cup all-purpose flour
- 2 large eggs
- 1 1/2 cups panko breadcrumbs
- 1/2 tsp paprika
- Cooking spray or oil, for frying
Instructions
- Peel the onions and cut them into 1/2-inch thick rings. Separate the rings and choose pairs that fit inside one another with enough space for filling.
- Cook the ground beef in a skillet over medium-high heat. Add garlic powder, onion powder, smoked paprika, salt, and pepper. Cook until browned, then drain excess grease.
- Stir the cooked bacon and shredded cheddar into the warm beef mixture.
- Place a smaller onion ring inside a larger ring. Pack the beef-cheese mixture into the space between the rings, pressing firmly so it holds together.
- Chill the stuffed onion rings for 20–30 minutes to help them firm up.
- Set up three bowls: flour in the first, beaten eggs in the second, and panko mixed with paprika in the third.
- Carefully coat each stuffed onion ring in flour, dip into the egg, then press into the panko until completely covered.
- Heat oil to 350°F. Fry the onion rings in batches for 2–3 minutes per side, until crisp and golden.
- Transfer to a paper-towel-lined plate or wire rack.
- Serve hot with burger sauce, ranch, ketchup, or your favorite dipping sauce.
- Baking option: Place the breaded rings on a greased baking sheet, spray lightly with oil, and bake at 425°F for 20–25 minutes, flipping halfway through.
Notes
- For a healthier option, consider baking instead of frying.
- Feel free to customize the filling with your favorite burger toppings.
- These onion rings can be made ahead of time and frozen before frying.
Nutrition
- Serving Size: 2 onion rings
- Calories: 350
- Sugar: 2g
- Sodium: 800mg
- Fat: 22g
- Saturated Fat: 8g
- Unsaturated Fat: 10g
- Trans Fat: 0g
- Carbohydrates: 30g
- Fiber: 2g
- Protein: 15g
- Cholesterol: 60mg