Have you ever plucked the perfect garlic bulb from your kitchen, feeling the magic of home cooking? This Homemade Garlic Aioli Sauce is your key to transforming everyday meals into something spectacular. With its creamy, velvety texture and intense garlic flavor, this versatile condiment elevates sandwiches, veggies, and even meat dishes into gourmet delights. Not only is it quick and simple to whip up, but it’s also free from preservatives—you can tailor it to your taste buds, adding more garlic or spice as you see fit. Plus, if you’re exploring dietary options, I’ll share how to make it vegan-friendly. Curious to get your taste buds tingling? Let’s dive into this delectable recipe!
Why Do You Need Garlic Aioli Sauce?
Irresistible Flavor: Prepare to indulge in the rich, creamy taste of garlic aioli that transforms any dish from mundane to magnificent.
Versatile Customization: With simple variations, from adding smoked paprika to a hint of cayenne, you can tailor this sauce to suit every palate.
Quick and Easy: You’ll love how fast and straightforward this recipe is, taking only minutes to prepare with minimal fuss!
Diet-Friendly: Catering to different dietary needs? This aioli can be made vegan-friendly using plant-based mayonnaise, ensuring everyone can enjoy it.
Crowd-Pleasing: Serve it as a dip for fries or as a sandwich spread, and watch it disappear at gatherings—it’s a guaranteed hit!
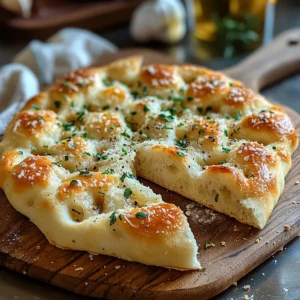
If you’re looking for more delightful garlic-infused recipes, don’t miss out on my Garlic Butter Chicken or Garlic Parmesan Crusted Chicken. Bring that gourmet touch to your meals!
Garlic Aioli Sauce Ingredients
For the Base
- Mayonnaise – The creamy base that gives the aioli its luscious texture; opt for high-quality or homemade for better flavor.
- Garlic – The star player; use 4-6 cloves, finely minced or blended into a paste for a smoother consistency.
- Lemon Juice – Freshly squeezed adds brightness and balances the richness; don’t skimp on this!
- Olive Oil – Extra virgin provides the best flavor and smoothness; it elevates the overall richness.
For the Seasoning
- Salt – Essential for enhancing the savory flavors; adjust according to your taste preference.
- Black Pepper – Freshly ground offers depth and warmth; use it to season to your liking.
- Cayenne Pepper – An optional touch for heat; spice it up or leave it out based on your taste.
- Dijon Mustard – Adds a tangy twist that complements the garlic; a delightful optional enhancement.
For Garnishing (Optional)
- Fresh Herbs (Parsley/Chives) – These add pops of color and freshness; sprinkle them on top before serving.
Explore the world of flavors and textures with your homemade Garlic Aioli Sauce; it’s a culinary gem that transforms every dish it touches!
Step‑by‑Step Instructions for Garlic Aioli Sauce
Step 1: Mince the Garlic
Start by peeling 4-6 cloves of fresh garlic, ensuring they are free from any brown spots. Finely mince the garlic with a sharp knife; for a smoother consistency, sprinkle a pinch of salt on the minced garlic and use the side of the knife to create a paste. This will intensify the flavor and help blend it seamlessly into your Garlic Aioli Sauce.
Step 2: Combine the Base Ingredients
In a medium mixing bowl, add 1 cup of high-quality mayonnaise, the minced garlic, and 1 tablespoon of freshly squeezed lemon juice. Drizzle in 2 tablespoons of extra virgin olive oil, which will enrich the sauce. Use a spatula or whisk to gently fold these ingredients together until fully combined, creating a creamy base for your garlic aioli.
Step 3: Season the Mixture
Next, flavor your aioli by adding ½ teaspoon of salt, ¼ teaspoon of freshly ground black pepper, and a pinch of cayenne pepper if you like a bit of heat. Stir the mixture well, ensuring the seasonings are evenly distributed throughout the sauce. Take a moment to enjoy the fresh aroma—it’s the heart of your Garlic Aioli Sauce!
Step 4: Whisk Until Smooth
Using a whisk, blend the aioli thoroughly while ensuring no lumps remain. This should take about 1-2 minutes of vigorous whisking, resulting in a silky, creamy consistency. You want your sauce to be beautifully smooth, just like you’d find in a gourmet restaurant. This is the perfect base for elevating your homemade dishes.
Step 5: Taste and Adjust Flavors
Now it’s time for a taste test! Scoop a small amount of the Garlic Aioli Sauce with a spoon and sample it. Add more lemon juice or minced garlic if you prefer a brighter flavor or stronger garlic punch. Blend any adjustments well into the mixture to create the perfect balance that suits your palate.
Step 6: Add Optional Ingredients
If you wish to experiment, stir in 1 teaspoon of Dijon mustard and a handful of chopped fresh herbs, like parsley or chives, for a flavor twist. These additions can enhance the depth of your Garlic Aioli Sauce and give it a delightful pop of color. Mix everything well to integrate the new flavors seamlessly.
Step 7: Chill the Aioli
To allow the flavors to meld beautifully, cover the bowl with plastic wrap and place it in the refrigerator for at least 30 minutes. This chilling time enhances the taste, making your Garlic Aioli Sauce even more vibrant. It also thickens slightly, maintaining the luscious texture you desire in a truly unforgettable dip or spread.
Storage Tips for Garlic Aioli Sauce
Fridge: Store your homemade garlic aioli in an airtight container in the refrigerator for up to 3-4 days. This keeps it fresh and flavorful, ready for your next culinary creation.
Freezer: If you want to make a bigger batch, garlic aioli can be frozen for up to 2 months. Transfer it to a freezer-safe container, leaving some space for expansion due to freezing.
Thawing: To enjoy frozen garlic aioli, thaw it in the fridge overnight and give it a good stir before using. You may need to adjust the texture with a drizzle of olive oil or lemon juice.
Make-Ahead: Prepare your garlic aioli ahead of time to let the flavors meld—this enhances the taste and makes it even more delicious when you’re ready to serve!
What to Serve with Homemade Garlic Aioli Sauce
Elevate your meals with vibrant pairings that create a feast for the senses.
-
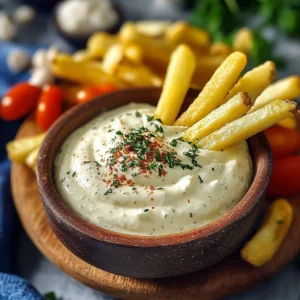
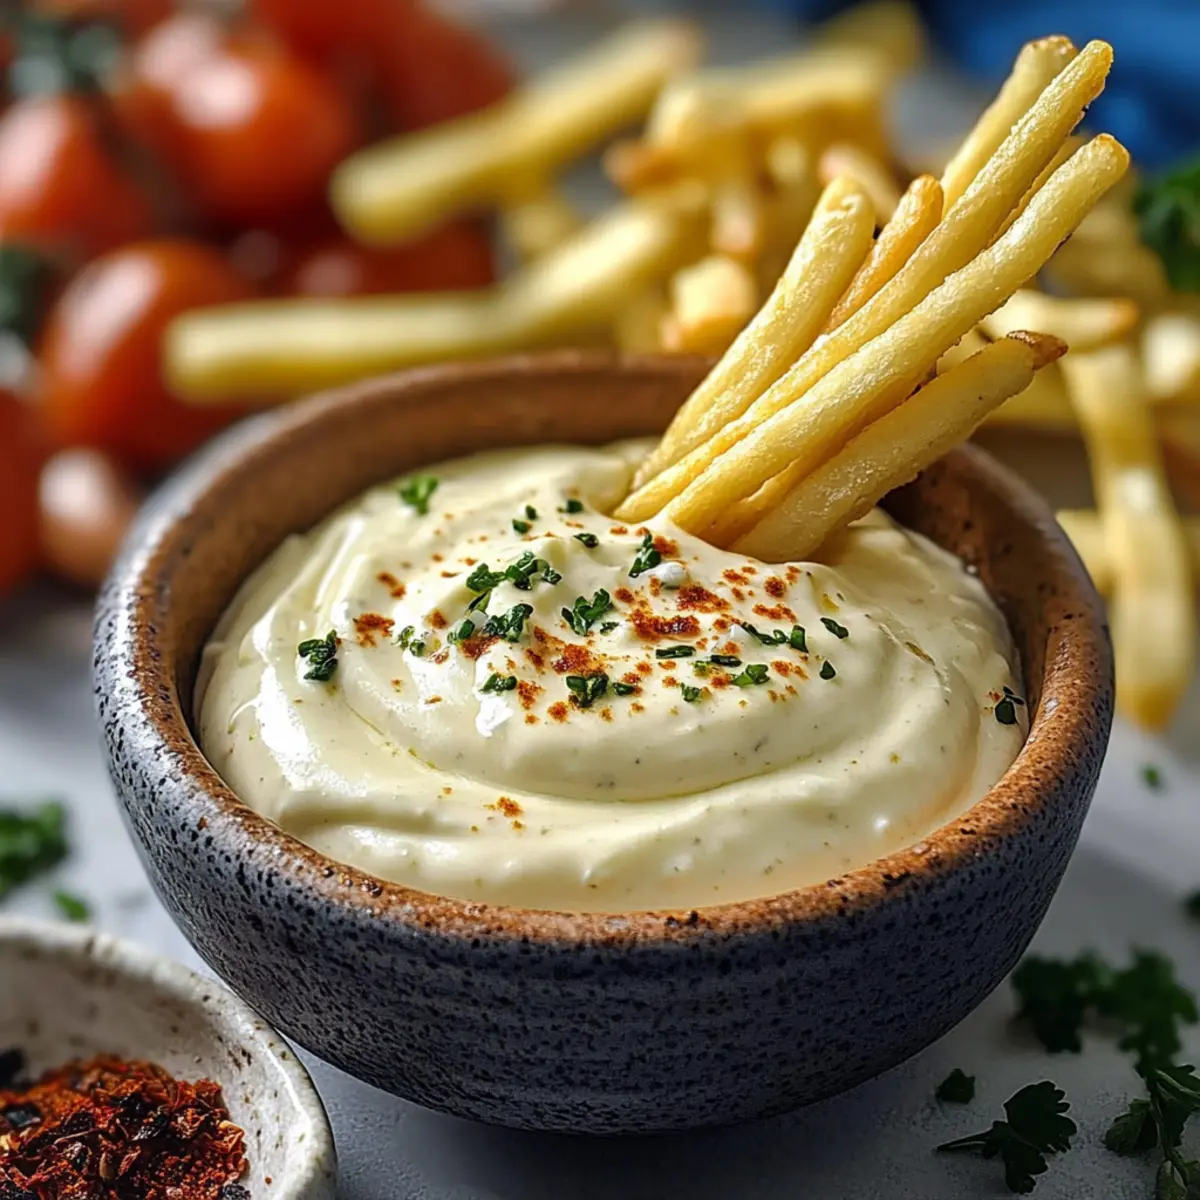
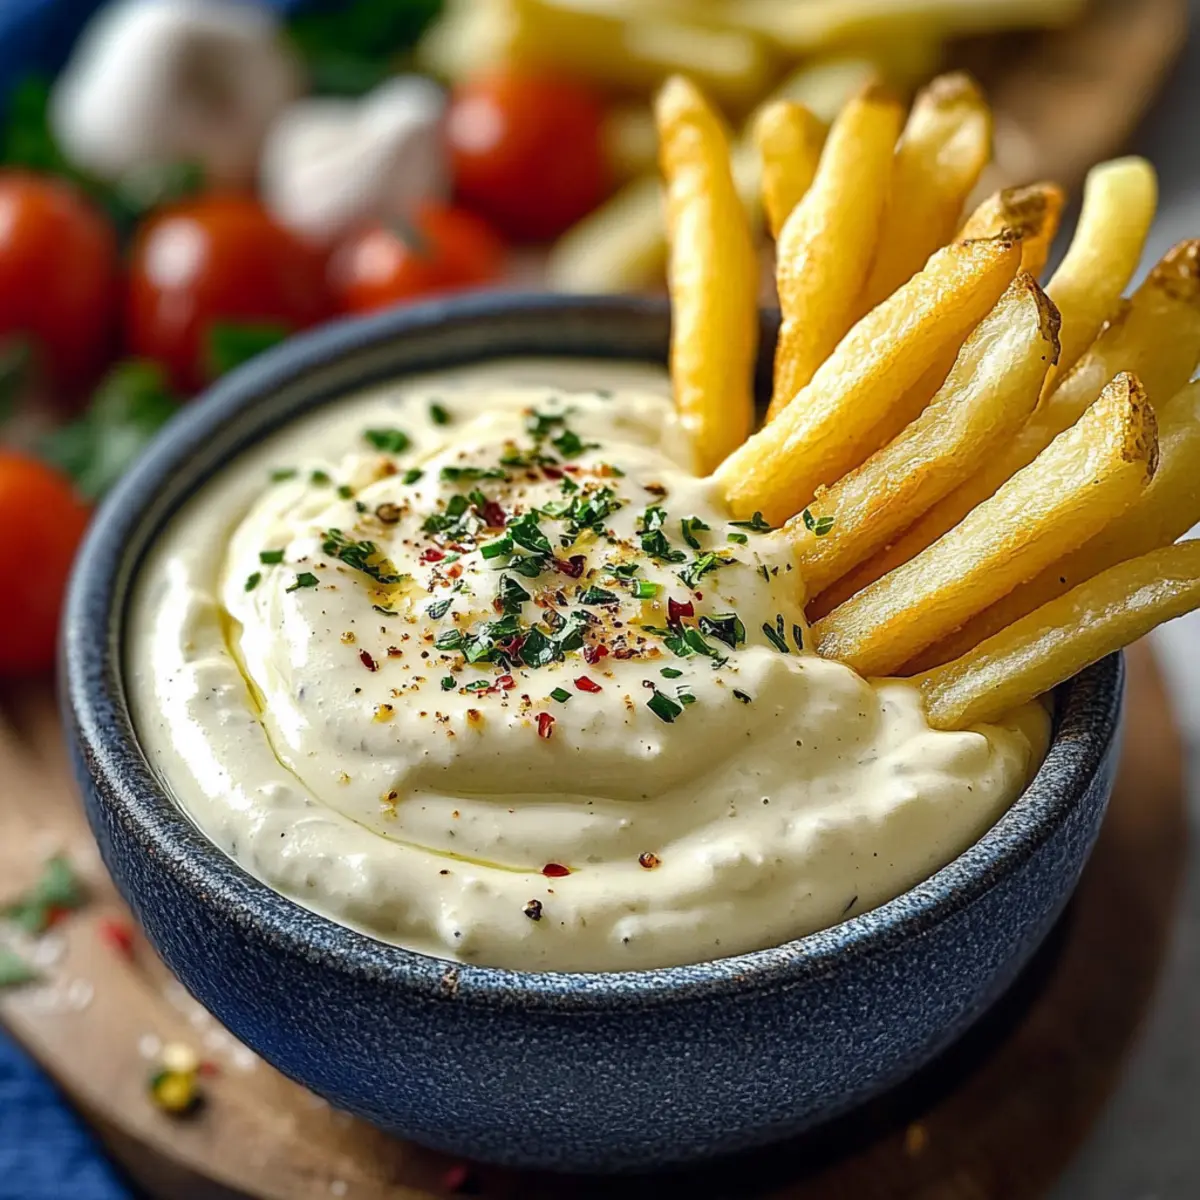
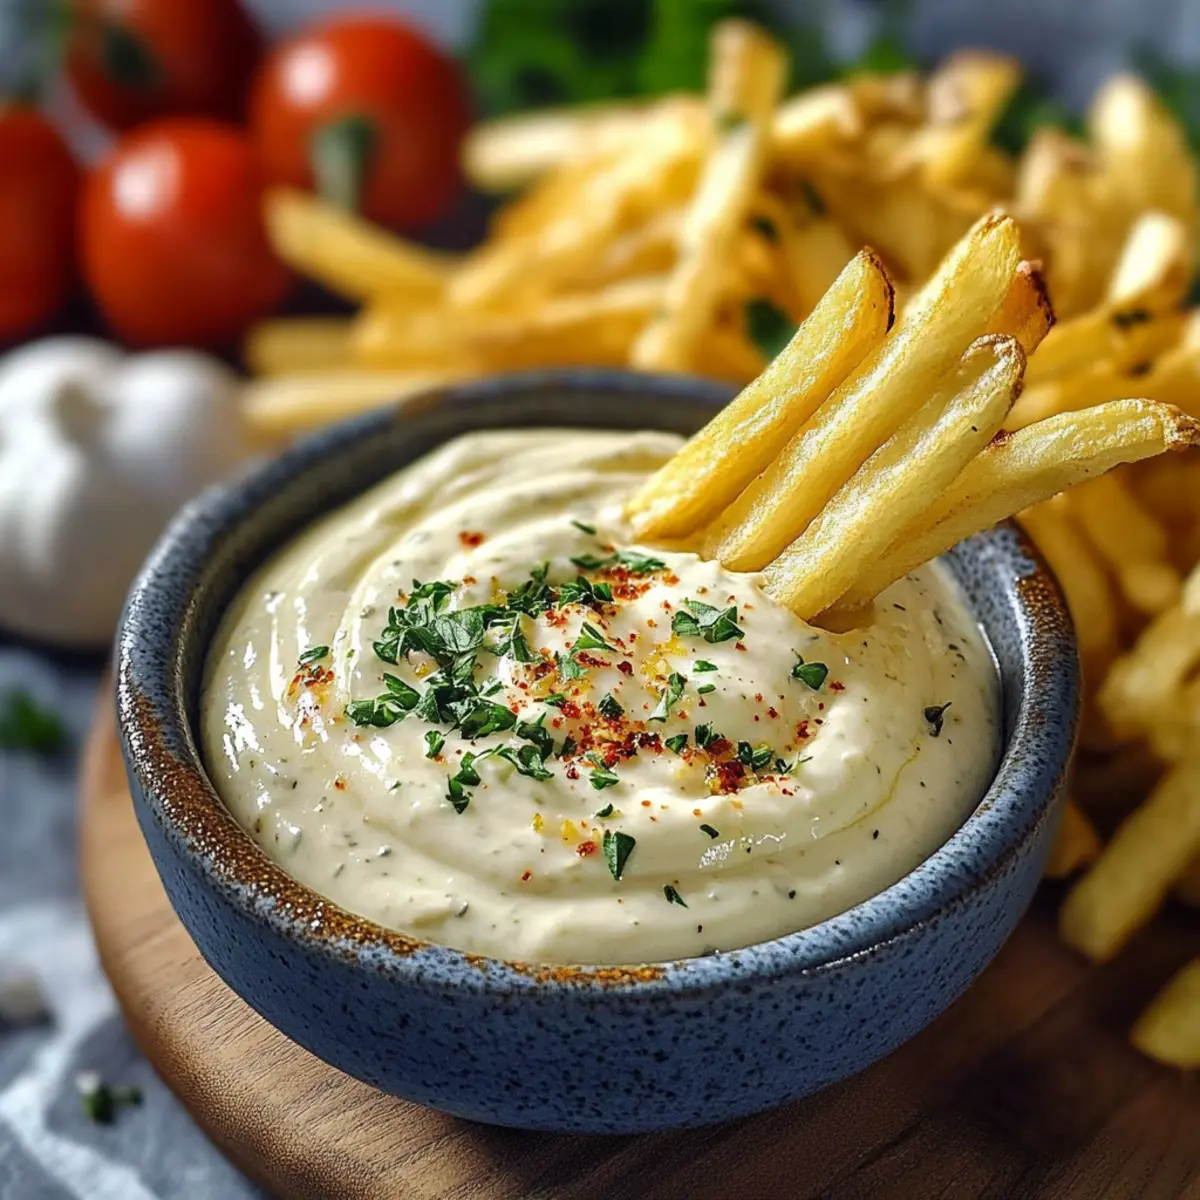
Crispy French Fries: The saltiness and crunch of fries make for a perfect contrast to the creamy, garlicky aioli. Dip each fry and enjoy the flavor explosion!
-
Grilled Veggies: Zucchini, bell peppers, and asparagus drizzled with olive oil and grilled bring out their natural sweetness, balancing the aioli’s richness beautifully.
-
Savory Chicken Wings: Whether baked or fried, chicken wings slathered in this aioli offer a delightful twist on a classic favorite—perfect for gatherings and game days!
-
Fresh Veggie Platter: Serve a colorful array of carrots, cucumbers, and cherry tomatoes alongside the aioli. The fresh crunch and coolness are refreshing companions to the rich sauce.
-
Sandwiches or Wraps: Spread the aioli generously on sandwiches or wraps, adding depth and a flavor boost that takes your lunch to gourmet heights.
-
Fish Tacos: Drizzle this zesty aioli over grilled fish tacos for a kick of flavor; the garlic notes elevate the entire dish. You might find it’s your new taco night favorite!
-
Light Salads: Toss together mixed greens with a lemon vinaigrette and serve with a side of garlic aioli for dipping. This adds a creamy element that enhances each bite.
-
Charcuterie Board: Incorporating aioli into a charcuterie spread introduces sophistication. Use it as a dipping sauce for cured meats and artisan cheeses for a delightful experience.
-
Craft Beer: Pair your garlic aioli snacks with a refreshing craft beer. The bitterness of hops complements the richness of the aioli, balancing each taste perfectly.
-
Lemon Sorbet: End on a sweet note—serving a scoop of lemon sorbet offers a refreshing, palate-cleansing finish to your meal while harmonizing with the tangy aioli.
Make Ahead Options
These Garlic Aioli Sauce preparations are perfect for busy home cooks looking to save time! You can make the entire aioli up to 3 days in advance. Simply follow the recipe through to chilling the aioli; after preparing, store it in an airtight container in the refrigerator. This chilling time actually enhances the flavors, creating an even more delicious condiment. To maintain the quality, ensure the aioli is well-sealed to prevent air exposure, which can dull its vibrant taste. When you’re ready to serve, just give it a good stir and, if desired, add a splash more lemon juice for brightness. You’ll enjoy the convenience of having this gourmet sauce ready for dipping or spreading!
Expert Tips for Garlic Aioli Sauce
-
Quality Matters: Use high-quality mayonnaise for a deliciously creamy texture. A homemade version can elevate the flavor even more!
-
Garlic Precision: Avoid garlic presses to prevent bitterness; finely mince or create a paste for a smoother, richer garlic flavor in your aioli.
-
Adjust Thickness: If your garlic aioli sauce is too thick, add a splash of lemon juice or olive oil to thin it. If too thin, simply stir in more mayonnaise.
-
Taste Test: Don’t skip the tasting step! Adjust the acidity with lemon juice or the garlic intensity based on your personal preference for the perfect balance.
-
Chill for Flavor: Allowing the aioli to chill for at least 30 minutes helps the flavors meld together, creating a more robust and delicious garlic aioli sauce.
-
Custom Variations: Feel free to experiment! Add smoked paprika for a twist or try roasted garlic for a sweeter, caramelized flavor in your aioli.
Garlic Aioli Sauce Variations
Feel free to unleash your creativity in the kitchen and customize your aioli to suit your taste!
-
Vegan Choice: Substitute mayonnaise with a plant-based alternative to create a creamy, dairy-free aioli that everyone can enjoy.
-
Roasted Garlic: For a sweeter, mellow flavor, roast garlic cloves until golden, then mash and mix into the aioli base. This twist adds a delightful depth.
-
Herb-Infused: Stir fresh herbs like basil, dill, or chives into your aioli for added freshness and a pop of color. Each herb brings its unique charm!
-
Spicy Kick: Add diced jalapeños or a dash of sriracha to give your aioli a fiery punch. The heat compliments the creamy texture beautifully!
-
Smoky Essence: Mix in smoked paprika for a rich, smoky flavor—perfect for adding complexity to your dipping sauce. It’s like a fiesta in a jar!
-
Citrusy Twist: Brighten things up by adding zest from one lemon or lime; this little touch elevates the aioli, making it oh-so-refreshing.
-
Tomato Burst: Blend in sun-dried tomatoes or roasted red peppers for a sweet, tangy flavor that transforms your aioli into a vibrant condiment.
As you experiment, don’t forget to pair your garlic aioli with some delicious options like my Garlic Parmesan Crusted Chicken or try it on your next burger—it’s sure to be a hit!
Advertisement
Garlic Aioli Sauce Recipe FAQs
Can I use any type of mayonnaise for the garlic aioli?
Absolutely! For the best flavor, I recommend using high-quality or homemade mayonnaise. If you choose store-bought, look for a brand with minimal preservatives for a fresher taste that enhances your garlic aioli sauce.
How long can I store leftover garlic aioli?
You can store your homemade garlic aioli in an airtight container in the refrigerator for up to 3-4 days. Just remember to keep it chilled, and you’ll enjoy its rich flavors throughout the week!
Can I freeze garlic aioli, and how do I do it?
Yes! Garlic aioli can be frozen for up to 2 months. Transfer your aioli into a freezer-safe container, leaving a bit of space for expansion as it freezes. When you’re ready to enjoy it, simply thaw it overnight in the refrigerator and stir well before serving. You might need to adjust the texture with a splash of olive oil or lemon juice for that perfect creaminess.
What can I do if my garlic aioli is too thick?
If your garlic aioli sauce turns out too thick, don’t worry! Just whisk in a little extra lemon juice or olive oil until you reach your desired consistency. Start with a tablespoon at a time, blending well until it’s just right.
Is garlic aioli suitable for people with dietary restrictions?
Definitely! You can make this garlic aioli sauce vegan-friendly by substituting regular mayonnaise with a plant-based alternative. Additionally, this recipe is free from gluten and dairy, making it a versatile condiment for those with various dietary preferences. Always double-check labels to ensure all ingredients meet your personal dietary needs!

Garlic Aioli Sauce: Make It Creamy, Dreamy, and Homemade
Ingredients
Equipment
Method
- Mince the garlic by peeling cloves and finely chopping them, creating a paste if desired.
- Combine the base ingredients in a bowl: mayonnaise, minced garlic, lemon juice, and olive oil.
- Season the mixture with salt, black pepper, and cayenne pepper; stir well.
- Whisk until smooth, ensuring no lumps remain for a creamy texture.
- Taste and adjust flavors with more lemon juice or garlic as needed.
- Add optional ingredients: Dijon mustard and fresh herbs for added flavor and color.
- Chill the aioli for at least 30 minutes to allow flavors to meld together.