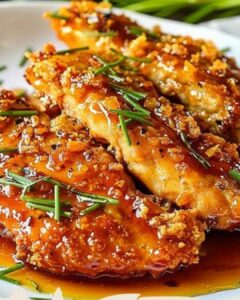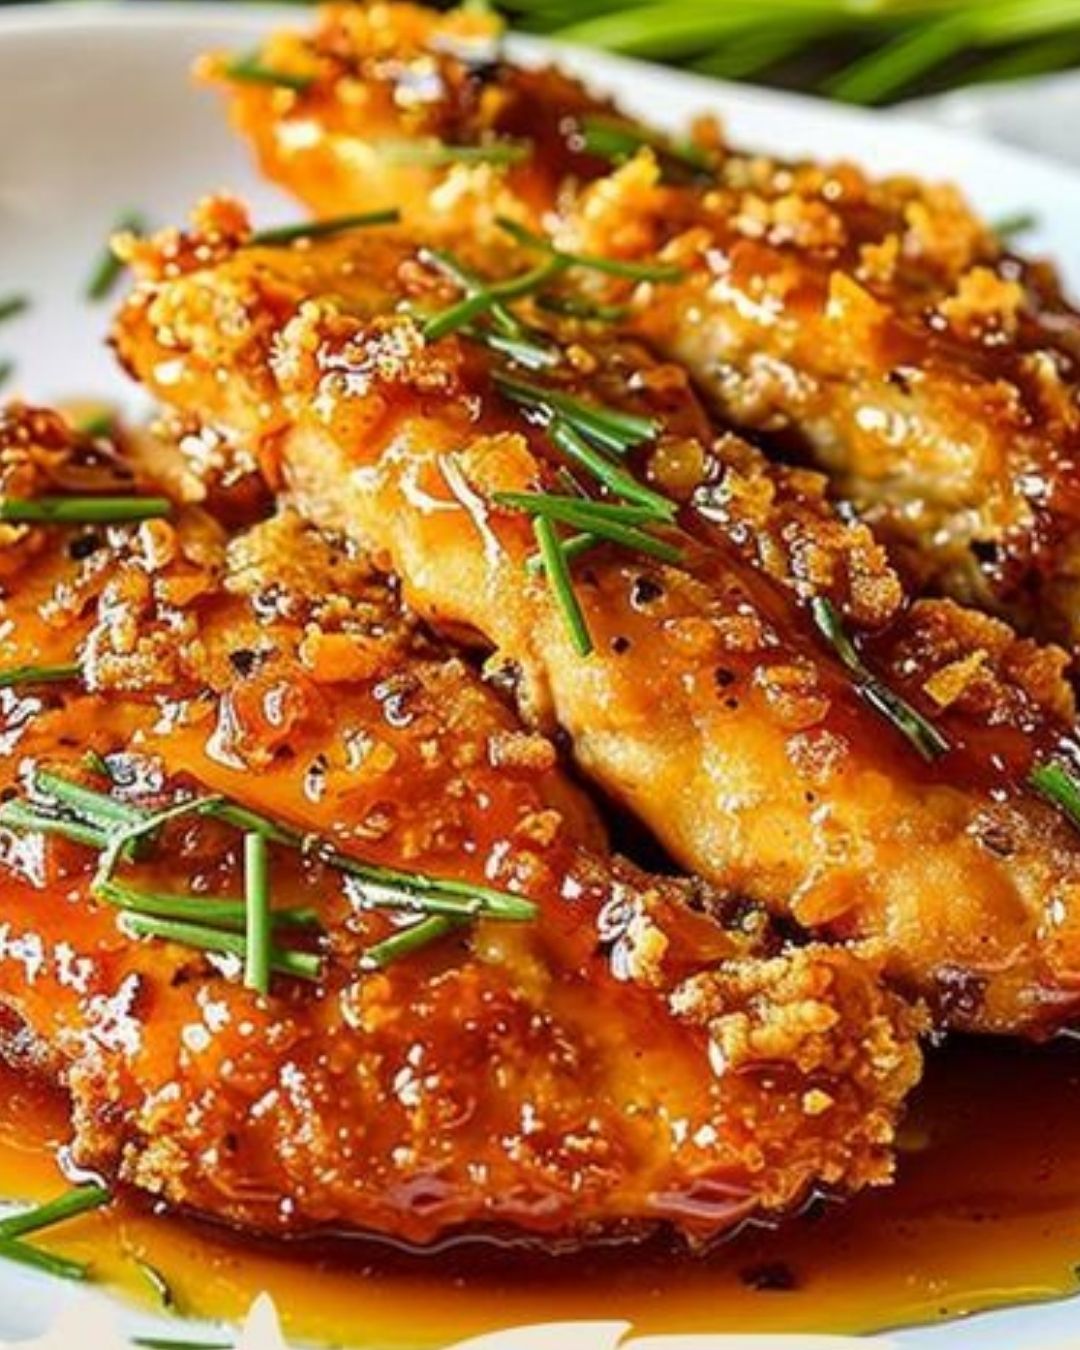
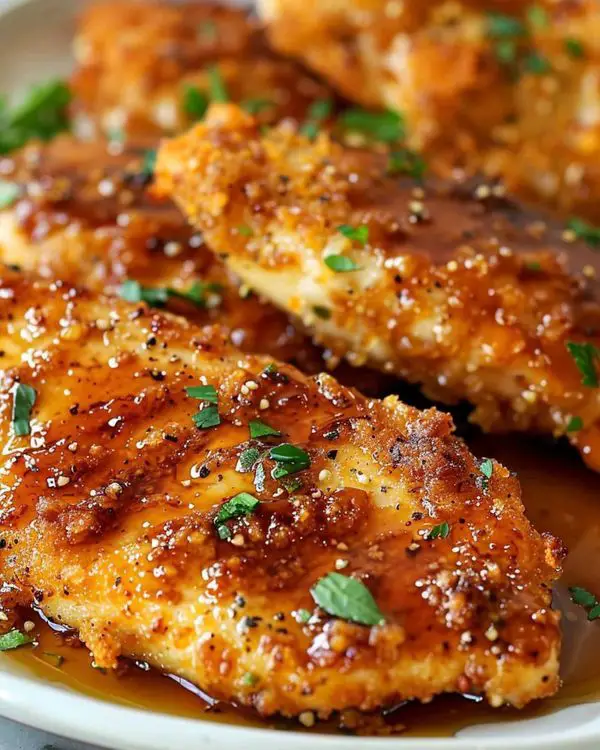
Introduction to Double Crunch Honey Garlic Chicken Breast
There’s something magical about the combination of honey and garlic that brings a dish to life.
When I first tried making Double Crunch Honey Garlic Chicken Breast, I was instantly hooked.
This recipe is not just about flavor; it’s about creating a meal that feels special without taking hours in the kitchen.
Whether you’re looking to impress your family or just want a quick solution for a busy weeknight, this dish has you covered.
With its crispy exterior and sweet-savory sauce, it’s bound to become a favorite at your dinner table.
Why You’ll Love This Double Crunch Honey Garlic Chicken Breast
This Double Crunch Honey Garlic Chicken Breast is a game-changer for busy nights.
It’s quick to prepare, taking just 40 minutes from start to finish.
The crispy coating adds a satisfying crunch, while the honey garlic sauce delivers a flavor explosion that will have everyone asking for seconds.
Plus, it’s versatile enough to please picky eaters, making it a perfect family meal.
You’ll love how easy it is to whip up this delicious dish!
Ingredients for Double Crunch Honey Garlic Chicken Breast
To create this mouthwatering Double Crunch Honey Garlic Chicken Breast, you’ll need a mix of simple yet flavorful ingredients.
Here’s what you’ll gather:
- Boneless, skinless chicken breasts: The star of the show, tender and juicy, perfect for frying.
- Plain flour: This helps create a light coating that adheres well to the chicken.
- Cornflour (cornstarch): Adds extra crunch to the coating, making it irresistibly crispy.
- Baking powder: A little lift for the coating, ensuring it’s light and airy.
- Salt and black pepper: Essential seasonings that enhance the chicken’s natural flavor.
- Paprika: Adds a hint of smokiness and a beautiful color to the dish.
- Garlic powder: For that rich garlic flavor without the fuss of fresh garlic.
- Large eggs: They help bind the coating, giving it that perfect crunch.
- Buttermilk: Tenderizes the chicken and adds a slight tanginess to the flavor.
- Hot sauce (optional): A dash of heat for those who like a spicy kick.
- Panko breadcrumbs: These Japanese-style breadcrumbs create an ultra-crispy texture.
- Honey: The sweet star of the sauce, balancing the savory elements beautifully.
- Soy sauce: Adds depth and umami to the honey garlic sauce.
- Fresh garlic: Minced for a robust garlic flavor in the sauce.
- Apple cider vinegar: A touch of acidity that brightens the sauce.
- Brown sugar: Enhances the sweetness and adds a hint of caramel flavor.
- Sesame oil: A fragrant oil that brings an Asian flair to the dish.
- Fresh ginger: Adds warmth and a zesty kick to the sauce.
- Cornflour and water: Used to thicken the sauce, giving it a glossy finish.
- Chili flakes (optional): For those who enjoy a bit of heat in their dishes.
- Vegetable oil: Essential for frying, ensuring that the chicken gets that golden-brown color.
- Spring onions and sesame seeds: For garnish, adding a pop of color and crunch.
For exact measurements, check the bottom of the article where you can find everything listed for easy printing.
How to Make Double Crunch Honey Garlic Chicken Breast
Making Double Crunch Honey Garlic Chicken Breast is a straightforward process that yields delicious results.
Follow these simple steps, and you’ll have a crispy, flavorful dish that everyone will love.
Prepare the Chicken
Start by slicing each chicken breast horizontally into thinner cutlets.
This helps them cook evenly and quickly.
If needed, pound the cutlets to an even thickness of about 1–1.5 cm.
This step ensures that every bite is tender and juicy.
Make the Dry Mixture
In a large bowl, combine plain flour, cornflour, baking powder, salt, black pepper, paprika, and garlic powder.
This dry mixture is the foundation for that crunchy coating.
Mix it well to ensure all the flavors are evenly distributed.
Prepare the Wet Mixture
In another bowl, whisk together the eggs, buttermilk, and hot sauce if you’re feeling adventurous.
This wet mixture will help the dry ingredients stick to the chicken, creating that perfect crunch.
Create the Crunchy Coating
In a third bowl, mix panko breadcrumbs, flour, salt, paprika, garlic powder, and black pepper.
This is where the magic happens!
The panko breadcrumbs will give your chicken that irresistible crunch.
Double-Coat the Chicken
Now, it’s time to double-coat the chicken.
First, dip each piece into the dry mixture, ensuring it’s fully coated.
Next, move it to the wet mixture, letting any excess drip off.
Finally, press it into the panko mixture, making sure to cover every inch.
For extra crunch, repeat the egg dip and panko coating.
Rest the Coated Chicken
Place the coated chicken on a wire rack and let it rest for about 10 minutes.
This resting period helps the coating adhere better during frying, ensuring that crispy texture you crave.
Fry the Chicken
Heat about 1–2 cm of vegetable oil in a large skillet over medium-high heat.
Carefully add the chicken in batches, frying for about 3–5 minutes per side.
You want them to be deeply golden and cooked through, reaching an internal temperature of 74°C.
Once done, transfer the chicken to a wire rack to drain excess oil, keeping the bottom crispy.
Make the Honey Garlic Sauce
In a saucepan, combine honey, soy sauce, minced garlic, apple cider vinegar, brown sugar, sesame oil, ginger, and chili flakes.
Bring this mixture to a gentle simmer for 2–3 minutes.
To thicken the sauce, mix cornflour with water to create a slurry, then whisk it into the sauce.
Cook for another 1–2 minutes until it’s glossy and slightly thickened.
Serve the Chicken
For the grand finale, drizzle the hot honey garlic sauce over the crispy chicken just before serving.
You can also toss the chicken briefly for a sticky coating.
Garnish with sliced spring onions and sesame seeds for that extra flair.
Now, dig in and enjoy the delightful crunch and flavor of your Double Crunch Honey Garlic Chicken Breast!
Tips for Success
- Ensure the chicken is pounded to an even thickness for consistent cooking.
- Let the coated chicken rest on a wire rack for 10 minutes before frying to enhance crunchiness.
- Use a thermometer to check the internal temperature; it should reach 74°C for safety.
- Experiment with spices in the coating for a personalized flavor twist.
- Don’t overcrowd the pan while frying; this helps maintain the oil temperature for crispiness.
Equipment Needed
- Large skillet: A heavy-bottomed pan works best for frying.
- Wire rack: Essential for resting the chicken; a baking sheet can substitute.
- Mixing bowls: Use any size; just ensure they’re deep enough for mixing.
- Whisk: A fork can work in a pinch for mixing wet ingredients.
- Meat thermometer: Handy for checking chicken doneness; a simple knife can also help.
Variations
- Spicy Kick: Add more hot sauce or chili flakes to the coating and sauce for an extra spicy version.
- Herb Infusion: Mix dried herbs like oregano or thyme into the dry mixture for a fragrant twist.
- Gluten-Free Option: Substitute regular flour and panko with gluten-free alternatives for a gluten-free dish.
- Honey Mustard Sauce: Swap honey for honey mustard in the sauce for a tangy flavor profile.
- Vegetable Variation: Use the same coating technique on vegetables like zucchini or eggplant for a vegetarian option.
Serving Suggestions
- Steamed Rice: Serve the chicken over a bed of fluffy steamed rice to soak up the delicious sauce.
- Fresh Salad: Pair with a crisp green salad for a refreshing contrast to the crispy chicken.
- Cold Beer: Enjoy with a cold beer or iced tea for a perfect meal.
- Presentation: Garnish with extra sesame seeds and spring onions for a vibrant look.
FAQs about Double Crunch Honey Garlic Chicken Breast
Can I make Double Crunch Honey Garlic Chicken Breast ahead of time?
Absolutely! You can prepare the chicken and coat it in advance. Just store it in the fridge until you’re ready to fry. This way, you can enjoy a quick meal on busy nights.
What can I serve with Double Crunch Honey Garlic Chicken Breast?
This dish pairs wonderfully with steamed rice, fresh salads, or even crispy fries. The honey garlic sauce complements a variety of sides, making it a versatile choice for dinner.
How do I store leftovers?
Store any leftover chicken in an airtight container in the fridge for up to three days. Reheat in the oven to maintain that crispy texture, or enjoy it cold in a salad!
Can I use chicken thighs instead of breasts?
Definitely! Chicken thighs will add extra juiciness and flavor. Just adjust the cooking time slightly, as thighs may take a bit longer to cook through.
Is this recipe suitable for meal prep?
Yes! The Double Crunch Honey Garlic Chicken Breast is perfect for meal prep. Just cook a batch and portion it out for the week. It reheats beautifully and stays delicious!
Advertisement
Final Thoughts
Cooking the Double Crunch Honey Garlic Chicken Breast is more than just preparing a meal; it’s about creating moments.
The aroma of garlic mingling with honey fills the kitchen, inviting everyone to gather around the table.
Each crispy bite delivers a satisfying crunch, followed by a burst of sweet and savory flavors that dance on your palate.
This dish is perfect for family dinners or casual gatherings with friends.
It’s a recipe that brings joy, laughter, and a sense of accomplishment.
So roll up your sleeves, embrace the process, and enjoy the delicious rewards of your culinary adventure!
PrintDouble Crunch Honey Garlic Chicken Breast: A Tasty Recipe!
A delicious and crispy Double Crunch Honey Garlic Chicken Breast recipe that combines the sweetness of honey with the savory flavor of garlic, perfect for a family meal.
- Prep Time: 20 minutes
- Cook Time: 20 minutes
- Total Time: 40 minutes
- Yield: 4 servings 1x
- Category: Main Course
- Method: Frying
- Cuisine: Asian
- Diet: Gluten Free
Ingredients
- 600 g boneless, skinless chicken breasts
- 120 g plain flour
- 60 g cornflour (cornstarch)
- 1 tsp baking powder
- 1 tsp salt
- ½ tsp black pepper
- 1 tsp paprika
- 1 tsp garlic powder
- 2 large eggs
- 120 ml buttermilk
- 1 tsp hot sauce, optional
- 150 g panko breadcrumbs
- 60 g plain flour
- ½ tsp salt
- ½ tsp paprika
- ½ tsp garlic powder
- ¼ tsp black pepper
- 100 g honey
- 60 ml soy sauce
- 4 cloves garlic, finely minced
- 1 tbsp apple cider vinegar
- 1 tbsp brown sugar
- 1 tsp sesame oil
- 1 tsp grated fresh ginger
- 1 tbsp cornflour
- 2 tbsp water
- ½ tsp chilli flakes, optional
- Vegetable oil, for frying
- 2 spring onions, sliced
- 1 tbsp sesame seeds
Instructions
- Prepare the chicken by slicing each breast horizontally into thinner cutlets and pounding to an even thickness of about 1–1.5 cm if needed.
- In a bowl, combine flour, cornflour, baking powder, salt, pepper, paprika, and garlic powder to prepare the dry mixture.
- In another bowl, whisk together the eggs, buttermilk, and hot sauce to prepare the wet mixture.
- In a third bowl, mix the panko breadcrumbs, flour, salt, paprika, garlic powder, and black pepper to prepare the crunchy coating.
- Double-coat the chicken by dipping each piece into the dry mixture, then the egg mixture, followed by the panko mixture, pressing the coating firmly onto the chicken.
- For extra crunch, dip it back into the egg mixture and then once more into the panko mixture.
- Rest the coated chicken on a wire rack for 10 minutes to help the coating adhere during frying.
- Heat about 1–2 cm of oil in a large skillet over medium-high heat and fry the chicken in batches for approximately 3–5 minutes per side until deeply golden and cooked through, reaching an internal temperature of 74°C.
- Transfer the chicken to a wire rack to drain, keeping the bottom crispy.
- In a saucepan, combine honey, soy sauce, garlic, apple cider vinegar, brown sugar, sesame oil, ginger, and chilli flakes to make the Honey Garlic Sauce, bringing it to a gentle simmer for 2–3 minutes.
- Mix cornflour with water to make a slurry and whisk it into the sauce, cooking for another 1–2 minutes until glossy and slightly thickened.
- For maximum crunch, drizzle the hot honey garlic sauce over the crispy chicken immediately before serving or toss briefly for a sticky coating. Garnish with spring onions and sesame seeds.
Notes
- Ensure the chicken is pounded to an even thickness for even cooking.
- Let the coated chicken rest before frying to enhance the crunchiness.
- Adjust the amount of hot sauce and chilli flakes according to your spice preference.
Nutrition
- Serving Size: 1 piece
- Calories: 450
- Sugar: 15 g
- Sodium: 800 mg
- Fat: 20 g
- Saturated Fat: 3 g
- Unsaturated Fat: 15 g
- Trans Fat: 0 g
- Carbohydrates: 45 g
- Fiber: 2 g
- Protein: 30 g
- Cholesterol: 150 mg