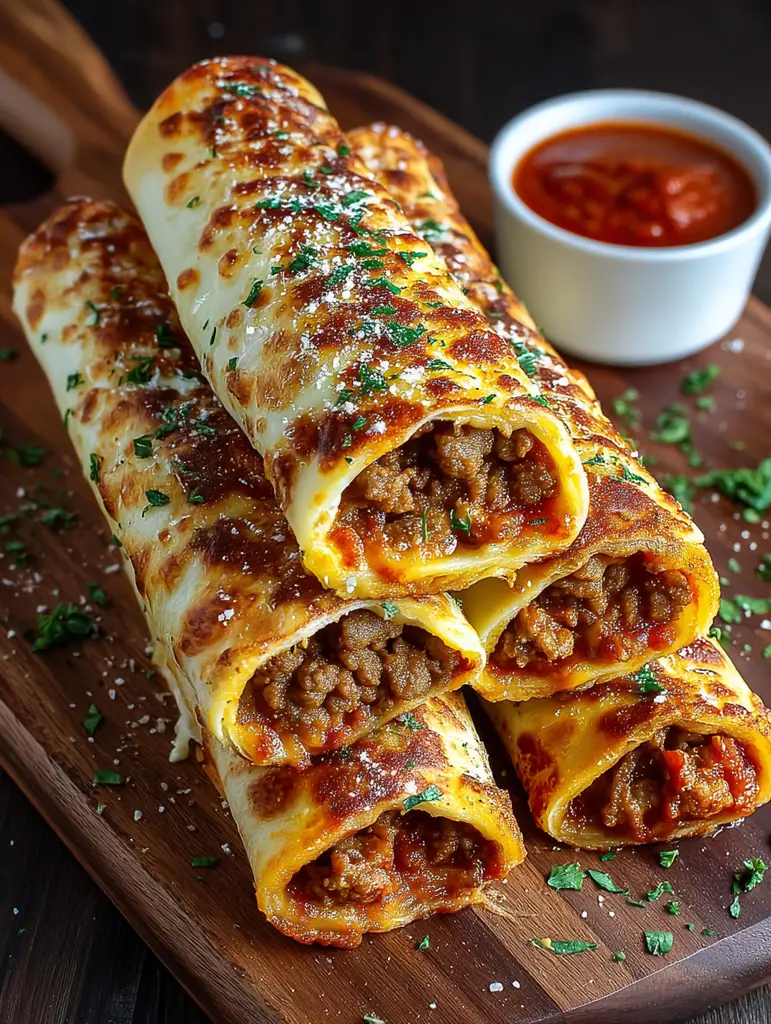
Introduction to Cheesy Taco Breadsticks
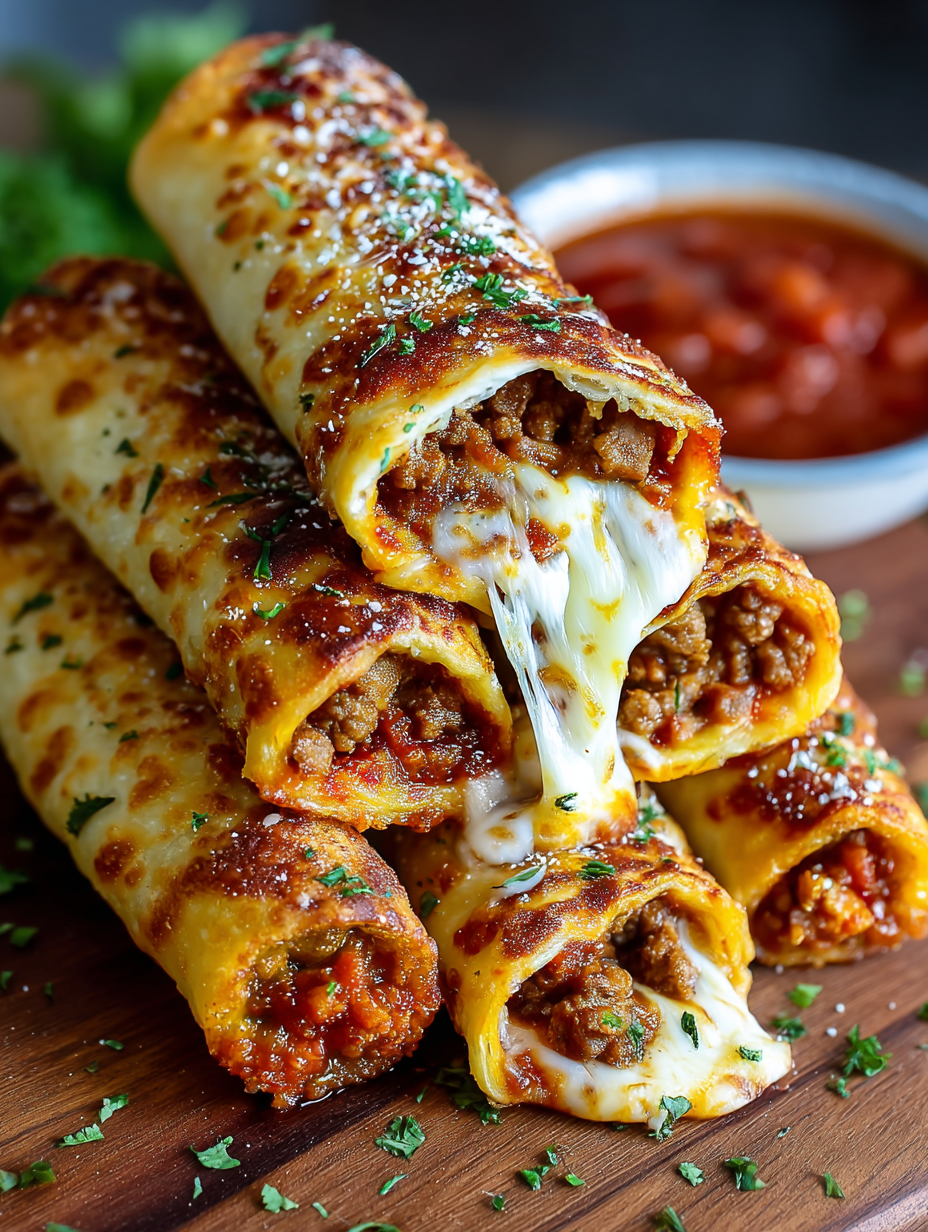
There’s something magical about the combination of cheese and taco flavors that brings back memories of family gatherings and late-night snacks. Cheesy Taco Breadsticks are not just a treat; they’re a celebration of comfort food that’s easy to whip up. Whether you’re looking for a quick solution after a long day or a dish to impress your friends during game night, these breadsticks have got you covered. With gooey cheese and seasoned beef wrapped in warm, fluffy dough, they’re bound to become a favorite in your household. Let’s dive into this delicious adventure!
Why You’ll Love This Cheesy Taco Breadsticks
These Cheesy Taco Breadsticks are the ultimate snack for any occasion. They’re quick to make, taking just about 35 minutes from start to finish. The flavor is unbeatable, with seasoned beef and melted cheese wrapped in soft, warm dough. Plus, they’re perfect for sharing—or not! Whether you’re hosting a game night or just craving something delicious, these breadsticks will satisfy your taste buds and keep everyone coming back for more.
Ingredients for Cheesy Taco Breadsticks
Gathering the right ingredients is the first step to creating these mouthwatering Cheesy Taco Breadsticks. Here’s what you’ll need:
- Ground beef: The star of the filling, providing rich flavor and protein. You can substitute with ground turkey or chicken for a lighter option.
- Onion: Adds sweetness and depth to the beef mixture. A small onion, finely diced, works best.
- Garlic: Freshly minced garlic brings a punch of flavor. You can use garlic powder in a pinch.
- Taco seasoning: This blend of spices is essential for that classic taco taste. Feel free to use homemade seasoning for a personal touch.
- Water: Helps to combine the seasoning with the beef, ensuring every bite is flavorful.
- Salt and black pepper: Simple seasonings that enhance the overall taste. Adjust to your preference.
- Refrigerated pizza dough: The perfect vessel for your cheesy filling. You can also use homemade dough if you’re feeling adventurous.
- Cheese sticks: Mozzarella, Colby Jack, or cheddar cheese sticks add gooeyness. Halving them makes for easy stuffing.
- Shredded cheese: Optional, but a sprinkle of cheddar or a Mexican cheese blend on top adds extra cheesiness.
- Unsalted butter: Used for brushing on the breadsticks, giving them a golden finish and rich flavor.
- Garlic powder and dried parsley: These add a lovely aroma and flavor to the butter mixture.
- Paprika: Optional, but it adds a hint of smokiness and color.
- Salsa, sour cream, guacamole, and nacho cheese sauce: These are perfect for dipping and elevating your snack experience.
For exact measurements, check the bottom of the article where you can find everything listed for easy printing!
How to Make Cheesy Taco Breadsticks
Step 1: Prepare the Filling
Start by heating a skillet over medium-high heat. Add the finely diced onion and minced garlic, cooking for about two minutes until they soften and become fragrant. Then, toss in the ground beef, breaking it apart with a spatula. Cook until the beef is browned and fully cooked, which should take around five to seven minutes. This step is crucial; you want that rich flavor to develop. Once done, drain any excess grease to keep your filling nice and lean.
Step 2: Season the Beef
Now it’s time to add some flavor! Stir in the taco seasoning and water, mixing well to coat the beef evenly. Let it simmer for about two to three minutes. This allows the spices to meld beautifully with the meat, creating that classic taco taste. Trust me, the aroma will have your mouth watering!
Step 3: Prepare the Dough
Preheat your oven to 220°C (425°F) and line a baking tray with parchment paper. Roll out the refrigerated pizza dough on a lightly floured surface into a rectangle. Then, cut it into ten equal rectangles. This is where the magic happens! Each piece will cradle the delicious filling, so make sure they’re big enough to hold everything without bursting.
Step 4: Assemble the Breadsticks
Take a rectangle of dough and place about one tablespoon of the seasoned beef mixture in the center. Next, add half a cheese stick on top of the beef. Now, fold the dough over the filling, pinching the seams and ends firmly closed. This step is key—ensure there are no gaps, or the gooey cheese will escape during baking. Repeat this process for all the dough rectangles, creating a delightful assembly line!
Step 5: Bake the Breadsticks
Arrange the assembled breadsticks seam-side down on the prepared baking tray. Brush them generously with the melted garlic butter mixture for that golden finish. Bake in the preheated oven for 10 to 14 minutes, or until they turn a beautiful golden brown. If you’re adding shredded cheese, sprinkle it on during the last few minutes of baking. This will create a melty, cheesy topping that’s simply irresistible!
Tips for Success
- Don’t rush the filling; let the beef brown well for maximum flavor.
- Use a pizza cutter for easy and even slicing of the dough.
- Experiment with different cheese types for unique flavors.
- Brush the breadsticks with butter right before baking for a golden crust.
- Let them cool slightly before serving to avoid burning your mouth!
Equipment Needed
- Skillet: A non-stick skillet works best, but any frying pan will do.
- Baking tray: A standard baking sheet lined with parchment paper is ideal.
- Rolling pin: If you don’t have one, a wine bottle can work in a pinch.
- Spatula: For mixing and flipping the beef.
- Knife or pizza cutter: To cut the dough into rectangles easily.
Variations
- Spicy Kick: Add diced jalapeños or a sprinkle of crushed red pepper flakes to the beef mixture for an extra kick.
- Veggie Delight: Incorporate diced bell peppers, sweet corn, or black beans into the filling for a colorful and nutritious twist.
- Cheesy Overload: Use a combination of cheese sticks, like Pepper Jack and cheddar, for a melty, flavorful surprise.
- Gluten-Free Option: Substitute the pizza dough with gluten-free dough or use corn tortillas for a different texture.
- Breakfast Style: Swap the beef for scrambled eggs and add some cooked bacon or sausage for a hearty breakfast treat.
Serving Suggestions
- Pair with a zesty salsa for a refreshing dip that complements the cheesy goodness.
- Serve alongside sour cream and guacamole for a creamy contrast.
- For drinks, consider a cold beer or a refreshing margarita to elevate your snack experience.
- Garnish with fresh cilantro or sliced jalapeños for a pop of color.
FAQs about Cheesy Taco Breadsticks
Can I make Cheesy Taco Breadsticks ahead of time?
Absolutely! You can prepare the filling and assemble the breadsticks in advance. Just store them in the fridge until you’re ready to bake. This makes for a quick snack option when you need it!
What can I use instead of ground beef?
If you’re looking for alternatives, ground turkey or chicken works well. For a vegetarian option, try using black beans or lentils mixed with your favorite veggies and spices.
How do I store leftovers?
Store any leftover Cheesy Taco Breadsticks in an airtight container in the fridge for up to three days. Reheat them in the oven for a few minutes to regain that crispy texture.
Can I freeze Cheesy Taco Breadsticks?
Yes! These breadsticks freeze beautifully. Just wrap them tightly in plastic wrap and place them in a freezer bag. When you’re ready to enjoy, bake them straight from the freezer, adding a few extra minutes to the cooking time.
What dips pair well with Cheesy Taco Breadsticks?
These breadsticks are fantastic with salsa, sour cream, guacamole, or even nacho cheese sauce. Each dip adds a unique flavor that complements the cheesy, savory goodness!
Final Thoughts
Creating Cheesy Taco Breadsticks is more than just cooking; it’s about bringing joy to your kitchen and your loved ones. The aroma of seasoned beef and melting cheese fills the air, making every bite a delightful experience. Whether you’re enjoying them during a game night or as a quick snack after a long day, these breadsticks are sure to impress. They’re versatile, easy to make, and perfect for sharing—or keeping all to yourself! So, roll up your sleeves and dive into this cheesy adventure. Trust me, once you try them, you’ll be hooked!
PrintCheesy Taco Breadsticks Are a Must-Try Snack Today!
Cheesy Taco Breadsticks are a delicious snack filled with seasoned ground beef and melted cheese, wrapped in pizza dough and baked to perfection.
- Prep Time: 20 minutes
- Cook Time: 10–14 minutes
- Total Time: About 35 minutes
- Yield: 10 breadsticks 1x
- Category: Snack
- Method: Baking
- Cuisine: Mexican
- Diet: Gluten Free
Ingredients
- 450 g ground beef
- 1 small onion, finely diced
- 2 cloves garlic, minced
- 2 tbsp taco seasoning
- 60 ml water
- ½ tsp salt, or to taste
- ¼ tsp black pepper
- 450 g refrigerated pizza dough
- 5 mozzarella, Colby Jack, or cheddar cheese sticks, halved
- 100 g shredded cheddar or Mexican cheese blend, optional
- 60 g unsalted butter, melted
- 1 tsp garlic powder
- 1 tsp dried parsley
- ¼ tsp paprika, optional
- Salsa, for serving
- Sour cream, for serving
- Guacamole, for serving
- Nacho cheese sauce, optional, for serving
Instructions
- Heat a skillet over medium-high heat. Add the onion and garlic and cook for 2 minutes. Add the ground beef and cook, breaking it apart, until browned and fully cooked.
- Drain excess grease. Stir in the taco seasoning and water. Simmer for 2–3 minutes, until the beef is well coated. Remove from the heat and let it cool.
- Preheat the oven to 220°C. Line a baking tray with parchment paper. Roll the pizza dough into a rectangle and cut it into 10 equal rectangles.
- Place about 1 tablespoon of taco beef in the centre of each dough piece. Add half a cheese stick on top.
- Fold the dough around the filling and pinch the seams and ends firmly closed. Make sure there are no gaps so the cheese doesn’t escape while baking.
- Mix the melted butter, garlic powder, dried parsley, and paprika.
- Arrange the breadsticks seam-side down on the baking tray. Brush generously with the garlic butter.
- Bake for 10–14 minutes, or until golden brown and cooked through.
- If using shredded cheese, sprinkle it over the breadsticks during the final 2–3 minutes of baking and return to the oven until melted.
- Let them cool for a few minutes, then serve warm with salsa, sour cream, guacamole, or nacho cheese.
Notes
- Optional add-ins include diced jalapeños, sweet corn, black beans, diced bell peppers, chopped green onions, Pepper Jack cheese, and a drizzle of taco sauce inside.
Nutrition
- Serving Size: 1 breadstick
- Calories: 250
- Sugar: 1g
- Sodium: 400mg
- Fat: 15g
- Saturated Fat: 7g
- Unsaturated Fat: 5g
- Trans Fat: 0g
- Carbohydrates: 20g
- Fiber: 1g
- Protein: 12g
- Cholesterol: 40mg