Introduction to Thai Sticky Finger
There’s something magical about the aroma of chicken wings baking in the oven, isn’t there? The moment I discovered the Thai Sticky Finger recipe, it felt like a culinary revelation. This dish is not just about flavor; it’s a quick solution for busy weeknights or a way to impress friends at your next gathering. With a delightful blend of soy sauce, honey, and spices, these wings are a crowd-pleaser. Whether you’re a seasoned cook or just starting out, this recipe will have you feeling like a kitchen rockstar in no time!
Why You’ll Love This Thai Sticky Finger
Thai Sticky Finger chicken wings are a game-changer for any home cook. They’re incredibly easy to whip up, making them perfect for those hectic evenings when time is tight. The sweet and savory marinade infuses the wings with flavor, ensuring every bite is a taste sensation. Plus, baking instead of frying means less mess and guilt. Trust me, once you try these, they’ll become a staple in your kitchen!
Ingredients for Thai Sticky Finger
Gathering the right ingredients is the first step to creating these mouthwatering Thai Sticky Finger chicken wings. Here’s what you’ll need:
- Chicken wings: The star of the show! Choose fresh or frozen wings, but if using frozen, make sure to thaw them first.
- Soy sauce: This adds a savory depth to the marinade. Opt for low-sodium if you’re watching your salt intake.
- Honey: Sweetness is key! It balances the saltiness of the soy sauce and gives the wings that sticky finish.
- Fish sauce: A staple in Thai cuisine, it brings umami flavor. If you’re not a fan, you can substitute with more soy sauce.
- Lime juice: Freshly squeezed lime juice brightens the dish and adds a zesty kick.
- Garlic: Minced garlic infuses the wings with aromatic goodness. Fresh is best, but jarred works in a pinch.
- Fresh ginger: Grated ginger adds warmth and a hint of spice. It’s a must for that authentic Thai flavor.
- Red pepper flakes: Adjust the heat to your liking! These add a nice kick, but feel free to leave them out for a milder version.
- Sesame oil: This nutty oil enhances the overall flavor profile. A little goes a long way!
- Green onions: Chopped for garnish, they add a fresh crunch and a pop of color.
- Sesame seeds: These are optional but add a lovely finishing touch and a bit of crunch.
For exact measurements, check the bottom of the article where you can find everything listed for easy printing. Happy cooking!
How to Make Thai Sticky Finger
Creating the perfect Thai Sticky Finger chicken wings is a straightforward process that anyone can master. Follow these simple steps, and you’ll be on your way to a delicious dish that will have everyone asking for seconds!
Step 1: Preheat the Oven
Start by preheating your oven to 400°F (200°C). This step is crucial for achieving that crispy texture we all love. While the oven heats up, line a baking sheet with aluminum foil for easy cleanup. Place a wire rack on top of the baking sheet. This allows air to circulate around the wings, ensuring they cook evenly and get that perfect crunch.
Step 2: Prepare the Marinade
In a large bowl, combine soy sauce, honey, fish sauce, lime juice, minced garlic, grated ginger, red pepper flakes, and sesame oil. Whisk everything together until well blended. Each ingredient plays a role: the soy sauce adds saltiness, honey brings sweetness, and lime juice adds brightness. This marinade is the heart of your Thai Sticky Finger wings, so make sure it’s well mixed!
Step 3: Marinate the Chicken Wings
Add the chicken wings to the marinade, tossing them to coat evenly. This is where the magic happens! Let the wings marinate for at least 30 minutes, or up to 2 hours in the refrigerator for deeper flavor. The longer they soak, the more delicious they become. Just remember to keep them covered if you’re marinating for an extended time.
Step 4: Bake the Wings
Once marinated, arrange the wings in a single layer on the wire rack. This helps them crisp up beautifully. Bake in the preheated oven for 40-45 minutes, turning them halfway through. Keep an eye on them; you want them golden brown and crispy. The aroma wafting through your kitchen will be irresistible!
Step 5: Garnish and Serve
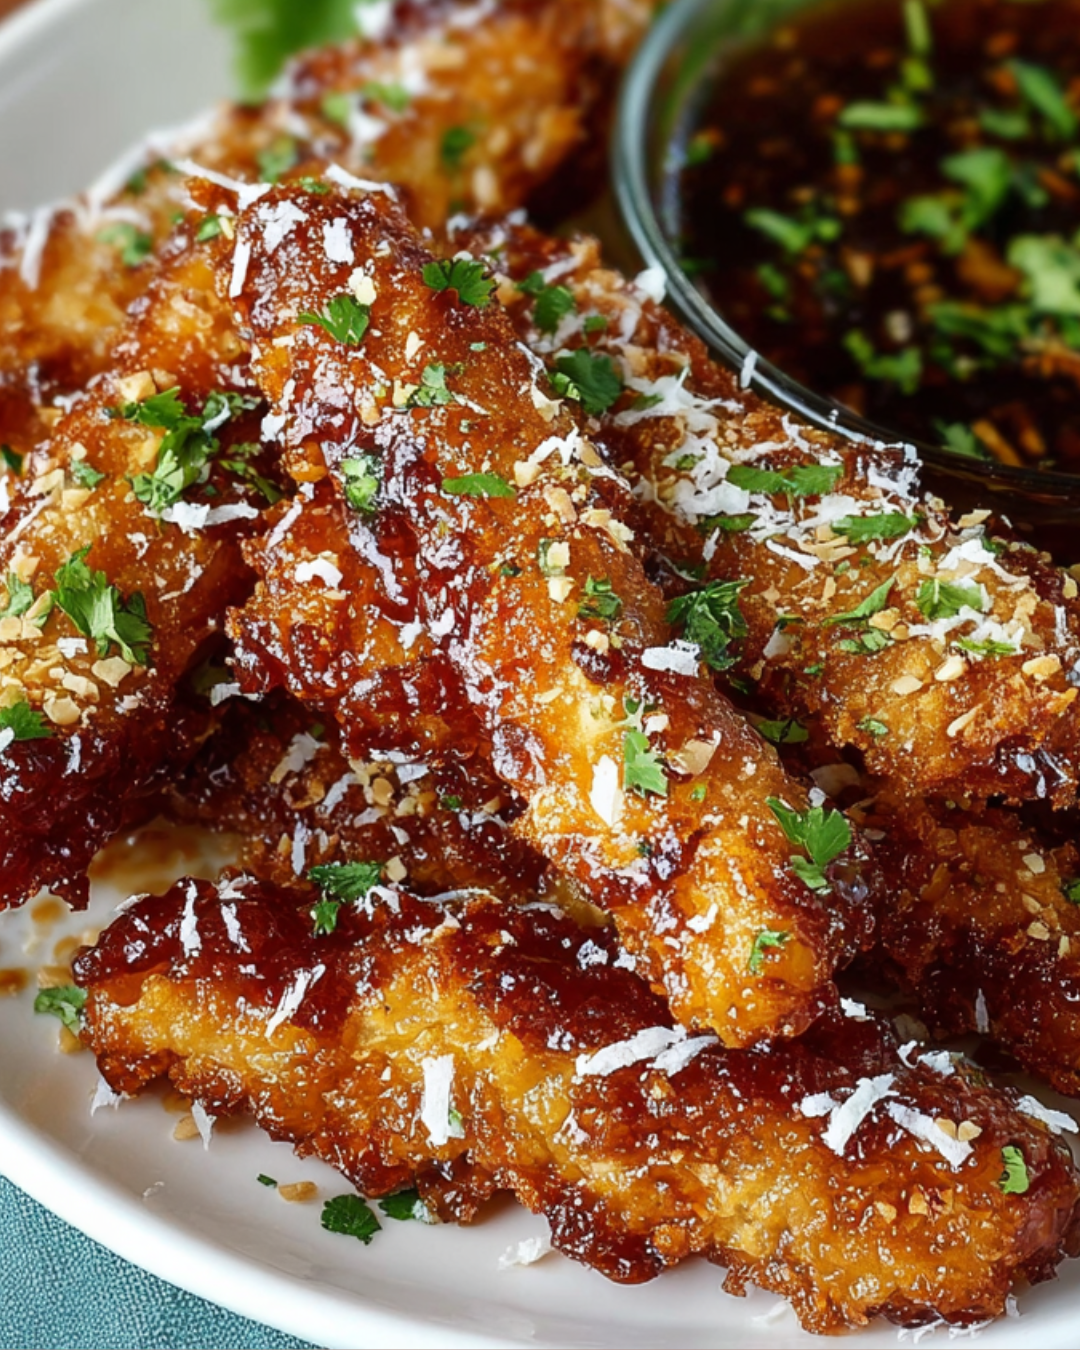
After baking, let the wings rest for about 5 minutes. This allows the juices to redistribute, making them even more succulent. Before serving, garnish with chopped green onions and a sprinkle of sesame seeds. Presentation matters! A colorful plate will make your Thai Sticky Finger wings even more appetizing. Enjoy every bite!
Tips for Success
- For extra flavor, marinate the wings overnight if you can.
- Use a meat thermometer to ensure the wings reach an internal temperature of 165°F (74°C).
- Don’t overcrowd the baking sheet; give the wings space to crisp up.
- Experiment with the marinade by adding your favorite spices or herbs.
- Serve with a side of dipping sauce for an extra kick!
Equipment Needed
- Baking sheet: A standard one works, but a rimmed sheet prevents spills.
- Wire rack: Essential for crispiness; you can use a cooling rack if needed.
- Mixing bowl: Any large bowl will do for combining the marinade.
- Whisk: A fork can substitute if you don’t have one.
Variations
- Spicy Thai Sticky Finger: Add more red pepper flakes or a splash of sriracha to the marinade for an extra kick.
- Honey Garlic Wings: Replace the fish sauce with additional honey and garlic for a sweeter, garlicky flavor.
- Herb-Infused Wings: Incorporate fresh herbs like cilantro or basil into the marinade for a fresh twist.
- Gluten-Free Option: Use tamari instead of soy sauce to keep it gluten-free without sacrificing flavor.
- Vegetarian Version: Substitute chicken wings with cauliflower florets for a delicious plant-based alternative.
Serving Suggestions
- Cucumber salad: A refreshing side that balances the wings’ richness.
- Cold beer: Pair with a crisp lager or pale ale for a perfect match.
- Rice: Serve over jasmine rice to soak up the delicious sauce.
- Presentation: Arrange wings on a platter with lime wedges for a pop of color.
FAQs about Thai Sticky Finger
As you dive into the world of Thai Sticky Finger chicken wings, you might have a few questions. Here are some common queries that can help you along the way:
Can I use frozen chicken wings for this recipe?
Absolutely! Just make sure to thaw them completely before marinating. This ensures the marinade penetrates the meat for maximum flavor.
How can I make these wings spicier?
If you crave heat, simply add more red pepper flakes or a splash of sriracha to the marinade. Adjust it to your taste for that perfect kick!
Can I grill these wings instead of baking?
Yes! Grilling adds a smoky flavor. Just marinate as usual, then grill over medium heat until cooked through and crispy.
What should I serve with Thai Sticky Finger wings?
These wings pair wonderfully with a refreshing cucumber salad or jasmine rice. A cold beer also complements the flavors beautifully!
How do I store leftovers?
Store any leftover wings in an airtight container in the fridge for up to three days. Reheat in the oven for the best texture!
Final Thoughts
Cooking Thai Sticky Finger chicken wings is more than just a recipe; it’s an experience that brings joy to the kitchen. The blend of sweet and savory flavors creates a symphony that dances on your taste buds. Each bite transports you to a bustling Thai street market, filled with vibrant aromas and laughter. Whether you’re sharing them with friends during game night or enjoying a quiet dinner at home, these wings are sure to impress. So roll up your sleeves, embrace the process, and let the magic of cooking fill your home with warmth and deliciousness!
Advertisement
Thai Sticky Finger: Discover the Perfect Wing Recipe!
A delicious recipe for Thai Sticky Finger chicken wings, marinated in a flavorful blend of soy sauce, honey, and spices, then baked to perfection.
- Prep Time: 10 minutes
- Cook Time: 45 minutes
- Total Time: 55 minutes
- Yield: Serves 4
- Category: Appetizer
- Method: Baking
- Cuisine: Thai
- Diet: Gluten Free
Ingredients
- 1 pound chicken wings
- 1/4 cup soy sauce
- 1/4 cup honey
- 2 tablespoons fish sauce
- 1 tablespoon lime juice
- 2 cloves garlic, minced
- 1 teaspoon grated fresh ginger
- 1 teaspoon red pepper flakes (adjust to taste)
- 1 tablespoon sesame oil
- 2 green onions, chopped (for garnish)
- Sesame seeds (for garnish)
Instructions
- Preheat your oven to 400°F (200°C). Line a baking sheet with aluminum foil and place a wire rack on top.
- In a large bowl, combine soy sauce, honey, fish sauce, lime juice, garlic, ginger, red pepper flakes, and sesame oil. Whisk until well blended.
- Add the chicken wings to the bowl and toss to coat them evenly in the marinade. Let them marinate for at least 30 minutes, or up to 2 hours in the refrigerator for more flavor.
- Arrange the marinated chicken wings in a single layer on the wire rack. Bake in the preheated oven for 40-45 minutes, turning them halfway through, until they are crispy and cooked through.
- Once cooked, remove the wings from the oven and let them rest for 5 minutes. Garnish with chopped green onions and sesame seeds before serving.
Notes
- For a spicier kick, add more red pepper flakes or a splash of sriracha to the marinade.
- You can also substitute chicken thighs or drumsticks for a different texture.
- Serve with a side of cucumber salad for a refreshing contrast.
Nutrition
- Serving Size: 1 serving
- Calories: 320
- Sugar: 12g
- Sodium: 800mg
- Fat: 20g
- Saturated Fat: 4g
- Unsaturated Fat: 16g
- Trans Fat: 0g
- Carbohydrates: 8g
- Fiber: 0g
- Protein: 22g
- Cholesterol: 70mg