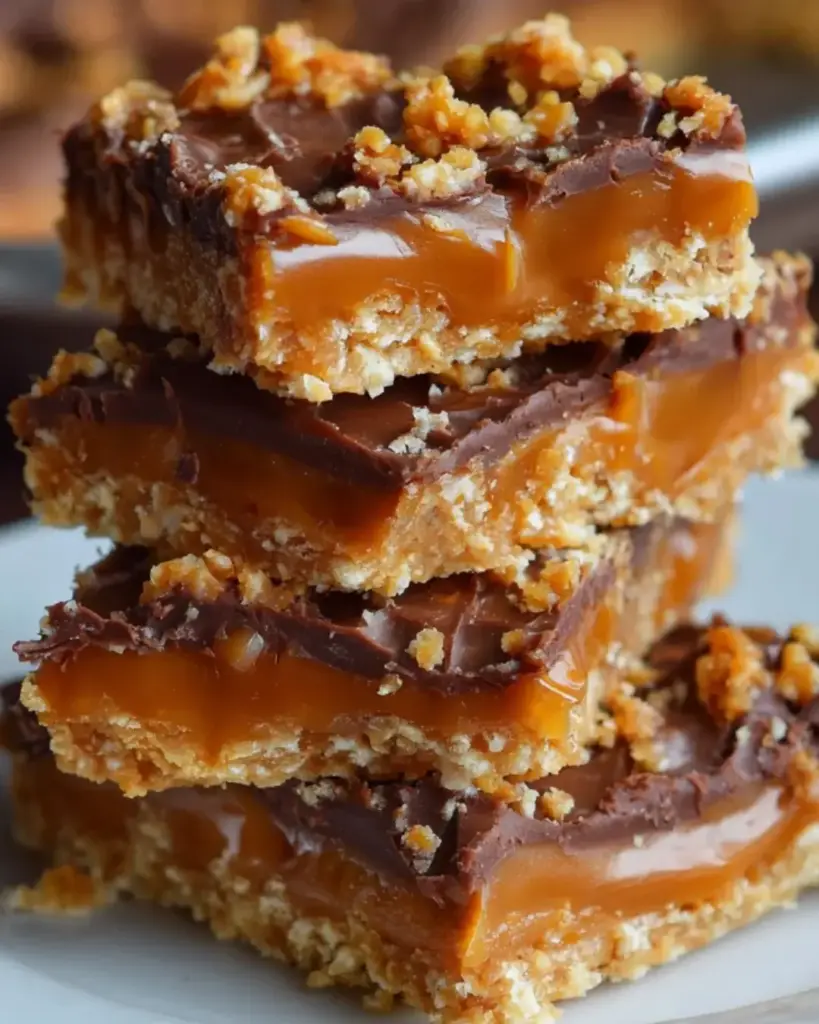
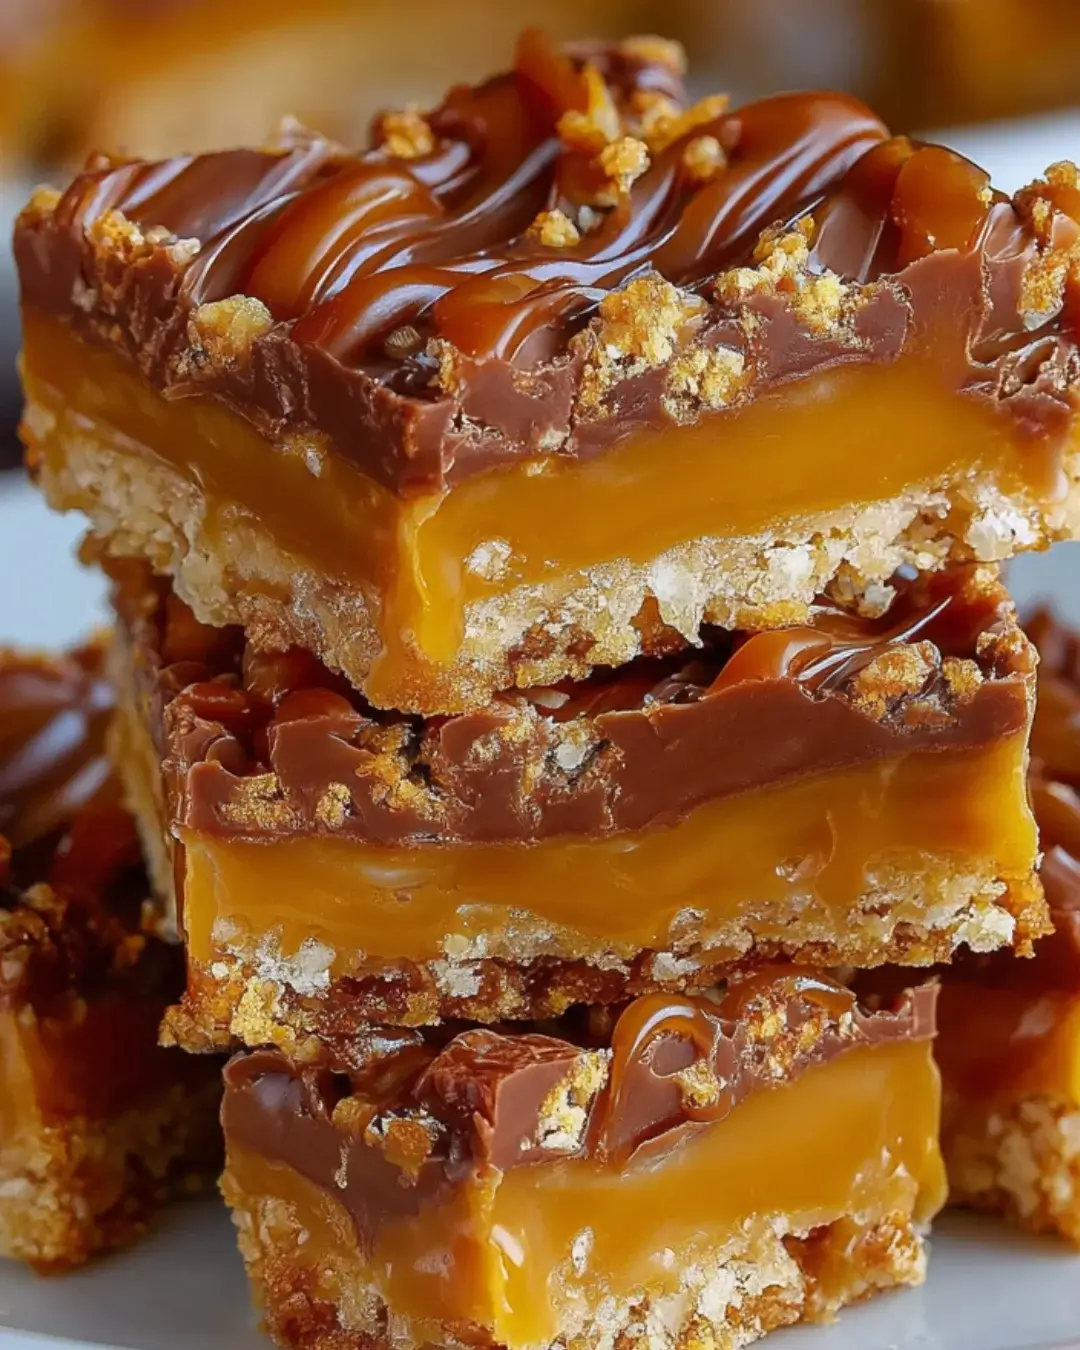
Introduction to No Bake Butterfinger Caramel Bars
There’s something magical about desserts that come together without the need for an oven.
No Bake Butterfinger Caramel Bars are a delightful treat that can satisfy your sweet tooth in no time.
Whether you’re juggling a busy schedule or just want to whip up something special for friends, this recipe is your go-to solution.
With layers of creamy peanut butter, crunchy Butterfinger pieces, and a luscious caramel topping, these bars are sure to impress.
Plus, they require minimal effort, making them perfect for any occasion. Let’s dive into this delicious adventure!
Why You’ll Love This No Bake Butterfinger Caramel Bars
These No Bake Butterfinger Caramel Bars are a dream come true for anyone craving a quick and delicious dessert.
They come together in just 20 minutes, leaving you with more time to kick back and relax.
The combination of rich chocolate, creamy peanut butter, and crunchy Butterfinger pieces creates a flavor explosion that’s hard to resist.
Perfect for gatherings or a late-night snack, these bars are sure to become a favorite!
Ingredients for No Bake Butterfinger Caramel Bars
Creating these No Bake Butterfinger Caramel Bars is a breeze, thanks to a handful of simple ingredients.
Here’s what you’ll need:
- Graham cracker crumbs: These form the base, adding a sweet crunch.
- Powdered sugar: This sweetens the mixture and gives it a smooth texture.
- Unsweetened cocoa powder: It adds a rich chocolate flavor without extra sweetness.
- Unsalted butter: Melted butter binds everything together and adds richness.
- Creamy peanut butter: This is the star ingredient, providing creaminess and a nutty taste.
- Butterfinger candy bars: Crushed for that signature crunch and caramel flavor.
- Caramel sauce: This luscious layer brings sweetness and gooeyness to the bars.
- Semi-sweet chocolate chips: Melted on top for a decadent finish.
Feel free to get creative!
For a twist, consider adding chopped nuts like peanuts or almonds for extra crunch.
If you’re not a Butterfinger fan, swap them out for your favorite candy bars, like Snickers or Reese’s.
Exact measurements are available at the bottom of the article for easy printing.
How to Make No Bake Butterfinger Caramel Bars
Making No Bake Butterfinger Caramel Bars is as easy as pie—well, easier actually!
Follow these simple steps, and you’ll have a delicious dessert ready to impress in no time.
Step 1: Prepare the Base
Start by grabbing a large mixing bowl.
Combine the graham cracker crumbs, powdered sugar, and cocoa powder.
Mix them well until they’re fully blended.
Then, pour in the melted butter and creamy peanut butter.
Stir until the mixture resembles a thick dough.
This base is the foundation of your bars, so make sure it’s well combined!
Step 2: Mix in the Butterfinger
Now comes the fun part!
Fold in the crushed Butterfinger candy bars.
Make sure they’re evenly distributed throughout the mixture.
This will give your bars that signature crunch and flavor.
Trust me, you’ll want every bite to have that delightful Butterfinger goodness!
Step 3: Press into the Dish
Grab a greased 9×9-inch baking dish.
Press the mixture firmly into the bottom of the dish.
Use a spatula or your hands to create an even layer.
This step is crucial for ensuring your bars hold together nicely once set.
Don’t be shy—press down hard!
Step 4: Add the Caramel Layer
In a small saucepan, warm the caramel sauce over low heat.
You want it to be pourable, so don’t rush this step.
Once it’s ready, pour the caramel over the pressed graham cracker mixture.
Spread it evenly to cover the base.
This layer adds a gooey sweetness that’s simply irresistible!
Step 5: Melt the Chocolate
Next, it’s time to melt the chocolate chips.
Use a microwave-safe bowl and heat them in 30-second intervals.
Stir in between until the chocolate is smooth and creamy.
Once melted, pour the chocolate over the caramel layer.
Spread it evenly for that perfect finish!
Step 6: Refrigerate and Serve
Now, it’s time for some patience.
Refrigerate the bars for at least 2 hours or until they’re set.
Once firm, cut them into squares and serve.
These No Bake Butterfinger Caramel Bars are ready to be devoured!
Enjoy the sweet satisfaction of your creation!
Tips for Success
- Make sure your butter is fully melted for a smooth mixture.
- Use a spatula to press the base firmly into the dish for better structure.
- Let the caramel cool slightly before pouring to avoid melting the base.
- Chill the bars longer if they’re not set after 2 hours.
- Store leftovers in an airtight container in the fridge for freshness.
Equipment Needed
- Mixing bowl: A large bowl for combining ingredients. A sturdy pot can work in a pinch.
- Spatula: For mixing and pressing the mixture. A wooden spoon is a great alternative.
- Baking dish: A 9×9-inch dish is ideal. Any similar-sized dish will do.
- Microwave-safe bowl: For melting chocolate. A small saucepan can also be used.
Variations
- Nutty Delight: Add chopped peanuts or almonds to the graham cracker mixture for an extra crunch.
- Chocolate Lovers: Use dark chocolate chips instead of semi-sweet for a richer flavor.
- Healthier Twist: Substitute graham cracker crumbs with crushed oats for a more wholesome base.
- Flavor Swap: Replace Butterfinger bars with Snickers or Reese’s for a different candy experience.
- Vegan Option: Use coconut oil instead of butter and dairy-free chocolate chips for a plant-based treat.
Serving Suggestions
- Pair these bars with a scoop of vanilla ice cream for a delightful contrast.
- Serve alongside a hot cup of coffee or a cold glass of milk to enhance the flavors.
- For a festive touch, drizzle extra caramel or chocolate on top before serving.
- Cut into fun shapes for kids’ parties or gatherings to make them more appealing.
FAQs about No Bake Butterfinger Caramel Bars
Can I make these bars ahead of time?
Absolutely! These No Bake Butterfinger Caramel Bars can be made a day or two in advance. Just store them in an airtight container in the fridge. They’ll be ready to impress whenever you need a sweet treat!
How do I store leftovers?
To keep your bars fresh, store any leftovers in an airtight container in the refrigerator. They should last for about a week, but trust me, they won’t last that long!
Can I use different candy bars?
Yes! Feel free to swap out the Butterfinger bars for your favorite candy bars like Snickers or Reese’s. Each variation brings a unique flavor twist to the bars!
What if I don’t have graham cracker crumbs?
No worries! You can use crushed cookies like Oreos or digestive biscuits as a substitute. Just keep in mind that it will change the flavor slightly, but it’ll still be delicious!
Are these bars suitable for a gluten-free diet?
Advertisement
To make these No Bake Butterfinger Caramel Bars gluten-free, simply use gluten-free graham crackers or a similar gluten-free cookie. Enjoy without the worry!
Final Thoughts
Creating No Bake Butterfinger Caramel Bars is more than just whipping up a dessert; it’s about sharing joy and indulgence with those you love.
The combination of creamy peanut butter, crunchy Butterfinger pieces, and rich chocolate creates a symphony of flavors that dance on your taste buds.
Whether you’re enjoying them after a long day or serving them at a gathering, these bars are sure to bring smiles.
So, roll up your sleeves, gather your ingredients, and dive into this delightful treat.
Trust me, the satisfaction of making these bars will be as sweet as the first bite!
PrintNo Bake Butterfinger Caramel Bars: Easy and Delicious!
Delicious and easy-to-make No Bake Butterfinger Caramel Bars that require no baking and are perfect for satisfying your sweet tooth.
- Prep Time: 20 minutes
- Cook Time: 0 minutes
- Total Time: 2 hours 20 minutes
- Yield: 12 servings 1x
- Category: Dessert
- Method: No Bake
- Cuisine: American
- Diet: Vegetarian
Ingredients
- 1 cup graham cracker crumbs
- 1 cup powdered sugar
- 1/2 cup unsweetened cocoa powder
- 1/2 cup unsalted butter, melted
- 1 cup creamy peanut butter
- 1 cup Butterfinger candy bars, crushed (about 4–5 bars)
- 1 cup caramel sauce
- 1 cup semi-sweet chocolate chips
Instructions
- In a large mixing bowl, combine graham cracker crumbs, powdered sugar, and cocoa powder. Mix well until combined.
- Pour in the melted butter and peanut butter. Stir until the mixture is fully combined and resembles a thick dough.
- Fold in the crushed Butterfinger candy bars until evenly distributed.
- Press the mixture firmly into the bottom of a greased 9×9-inch baking dish to create an even layer.
- In a small saucepan over low heat, warm the caramel sauce until it is pourable. Pour the caramel over the pressed graham cracker mixture, spreading it evenly.
- In a microwave-safe bowl, melt the chocolate chips in 30-second intervals, stirring in between until smooth. Pour the melted chocolate over the caramel layer and spread evenly.
- Refrigerate the bars for at least 2 hours or until set. Once set, cut into squares and serve.
Notes
- For a crunchier texture, add chopped nuts such as peanuts or almonds to the graham cracker mixture.
- Substitute the Butterfinger bars with your favorite candy bars like Snickers or Reese’s for a different flavor twist.
Nutrition
- Serving Size: 1 bar
- Calories: 220
- Sugar: 16g
- Sodium: 100mg
- Fat: 12g
- Saturated Fat: 5g
- Unsaturated Fat: 7g
- Trans Fat: 0g
- Carbohydrates: 24g
- Fiber: 1g
- Protein: 3g
- Cholesterol: 15mg