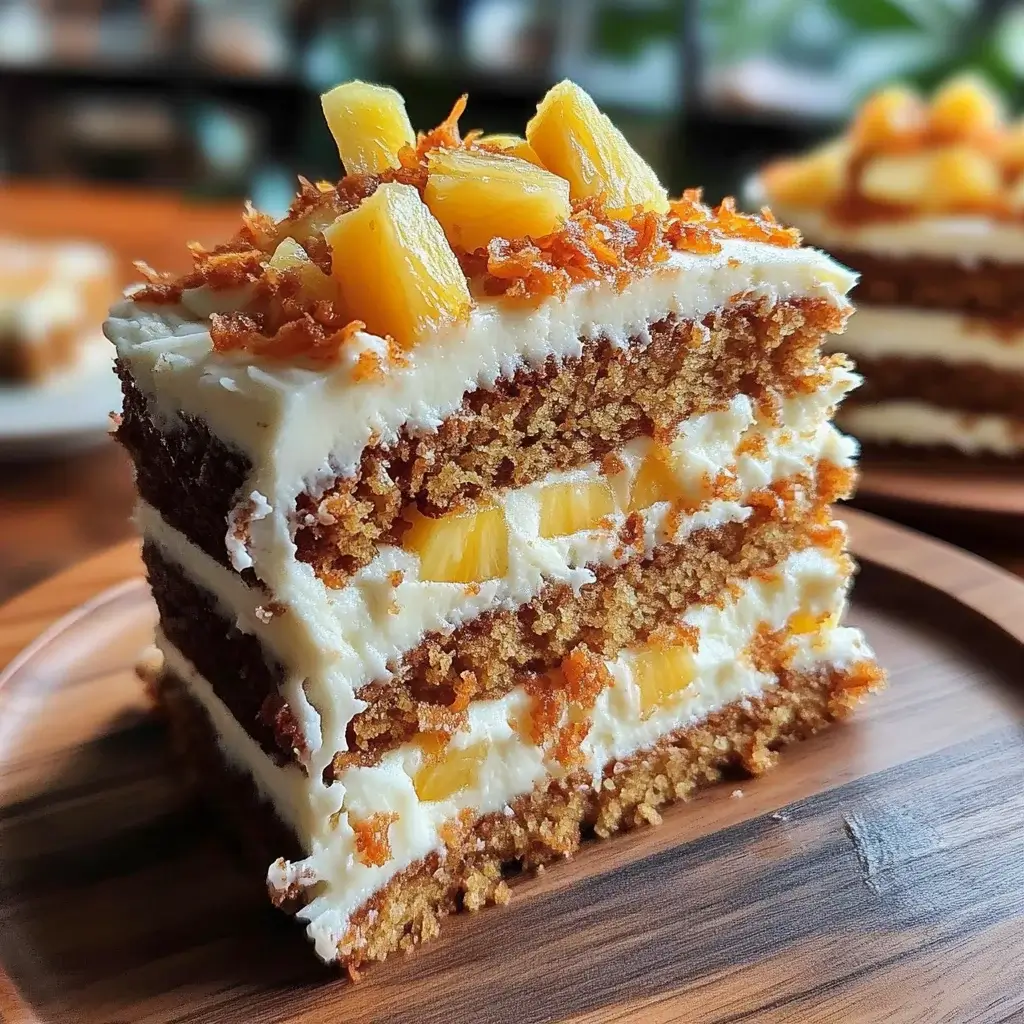
Introduction to Hawaiian Carrot Pineapple Cake
There’s something magical about a cake that brings together the sweetness of pineapple and the earthiness of carrots.
The Hawaiian Carrot Pineapple Cake is not just a dessert; it’s a slice of sunshine on your plate.
Whether you’re celebrating a special occasion or just looking to brighten up a regular Tuesday, this cake is your go-to.
It’s moist, flavorful, and topped with creamy frosting that will have everyone asking for seconds.
Trust me, this recipe is perfect for impressing your loved ones or simply treating yourself after a long day.
Why You’ll Love This Hawaiian Carrot Pineapple Cake
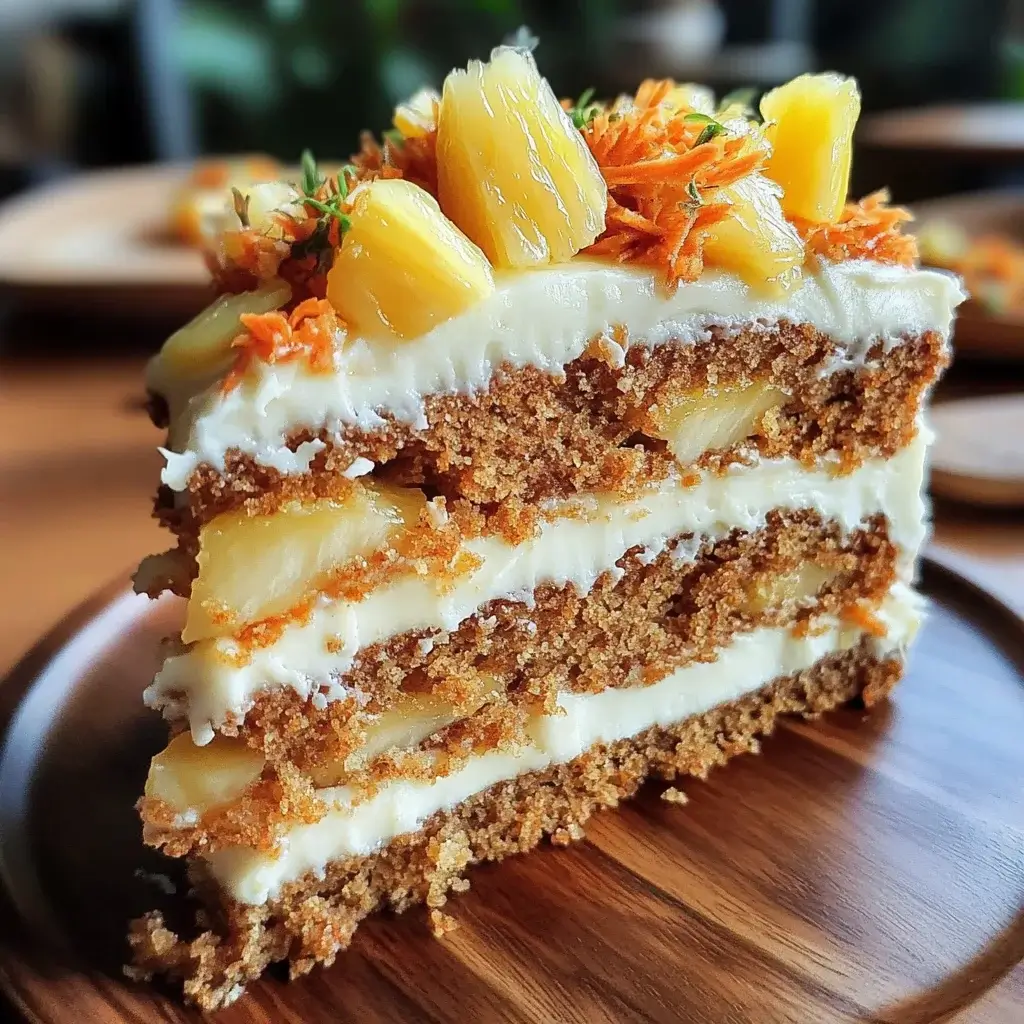
This Hawaiian Carrot Pineapple Cake is a delightful blend of flavors that will make your taste buds dance.
It’s incredibly easy to whip up, making it perfect for both novice and seasoned bakers.
In just about 50 minutes, you can create a moist, tropical treat that’s sure to impress.
Plus, the combination of carrots and pineapple means you can almost convince yourself it’s a healthy choice!
Who wouldn’t love that?
Ingredients for Hawaiian Carrot Pineapple Cake
To create this tropical delight, you’ll need a handful of simple ingredients that come together beautifully.
Here’s what you’ll gather:
- All-purpose flour: The backbone of your cake, providing structure and a soft crumb.
- Granulated sugar: Sweetens the cake and helps it achieve that lovely golden color.
- Baking powder and baking soda: These leavening agents work together to give your cake that perfect rise.
- Ground cinnamon: Adds warmth and a hint of spice, enhancing the overall flavor.
- Salt: Just a pinch to balance the sweetness and elevate the flavors.
- Vegetable oil: Keeps the cake moist and tender; you can also use melted coconut oil for a tropical twist.
- Large eggs: Bind the ingredients together and contribute to the cake’s richness.
- Grated carrots: The star of the show! They add moisture and a subtle sweetness.
- Crushed pineapple: This juicy addition brings a burst of flavor and moisture; make sure to drain it well.
- Chopped walnuts or pecans (optional): For a delightful crunch, but feel free to skip them if you prefer a nut-free cake.
- Vanilla extract: A splash of this enhances the cake’s flavor profile, making it even more irresistible.
For the creamy frosting, you’ll need:
- Cream cheese: The base of your frosting, providing that rich, tangy flavor.
- Unsalted butter: Adds creaminess and helps achieve a smooth texture.
- Powdered sugar: Sweetens the frosting and gives it that perfect spreadable consistency.
- Vanilla extract: Just like in the cake, it adds depth to the frosting.
- Milk: Use as needed to adjust the frosting’s consistency to your liking.
You can find the exact measurements for each ingredient at the bottom of the article, ready for printing.
Happy baking!
How to Make Hawaiian Carrot Pineapple Cake
Step 1: Preheat and Prepare
Preheat your oven to 350°F (175°C).
While it warms up, grab two 9-inch round cake pans and grease them with butter or cooking spray.
Then, dust them lightly with flour to prevent sticking.
This step is crucial for a smooth release when your cakes are done baking.
Trust me, you don’t want to lose any of that deliciousness!
Step 2: Mix Dry Ingredients
In a large mixing bowl, combine the all-purpose flour, granulated sugar, baking powder, baking soda, ground cinnamon, and salt.
Whisk these dry ingredients together until they’re well blended.
This ensures that the leavening agents are evenly distributed, giving your cake that perfect rise.
The aroma of cinnamon will start to fill your kitchen, and it’s just the beginning of the magic!
Step 3: Combine Wet Ingredients
In another bowl, whisk together the vegetable oil, large eggs, grated carrots, crushed pineapple, and vanilla extract.
Make sure the mixture is smooth and well combined.
The oil and eggs will create a rich base, while the carrots and pineapple add moisture and sweetness.
This is where the tropical vibes really start to shine through!
Step 4: Combine Mixtures
Pour the wet ingredients into the bowl with the dry ingredients.
Gently mix until just combined; overmixing can lead to a dense cake.
If you’re using nuts, fold them in at this stage for that delightful crunch.
The batter should be thick and fragrant, ready to transform into a cake!
Step 5: Bake the Cake
Divide the batter evenly between the prepared cake pans.
Slide them into the preheated oven and bake for 25-30 minutes.
You’ll know they’re done when a toothpick inserted in the center comes out clean.
The anticipation builds as your kitchen fills with the sweet scent of baking cake!
Step 6: Cool the Cakes
Once baked, allow the cakes to cool in the pans for about 10 minutes.
Then, carefully transfer them to wire racks to cool completely.
This step is essential; frosting a warm cake can lead to a melty mess.
Patience is key here, but the wait will be worth it!
Step 7: Make the Frosting
While the cakes cool, prepare the cream cheese frosting.
In a medium bowl, beat the softened cream cheese and unsalted butter together until smooth.
Gradually add the powdered sugar and vanilla extract, mixing until well combined.
If the frosting is too thick, add milk one tablespoon at a time until you reach your desired consistency.
This creamy topping is the perfect complement to your cake!
Step 8: Assemble the Cake
Once the cakes are completely cool, place one layer on a serving plate.
Spread a generous layer of frosting on top, then place the second layer on top.
Frost the top and sides of the cake, making it look as beautiful as it tastes.
Feel free to get creative with your frosting technique; it’s all about making it your own!
Tips for Success
- Always measure your ingredients accurately for the best results.
- Use fresh carrots and well-drained pineapple for optimal flavor and texture.
- Let your cakes cool completely before frosting to avoid melting.
- For a fun twist, add shredded coconut to the batter or frosting.
- Store leftovers in an airtight container in the fridge for up to a week.
Equipment Needed
- Mixing bowls: A set of various sizes will help you combine ingredients easily.
- Whisk: Essential for mixing dry and wet ingredients; a fork can work in a pinch.
- Measuring cups and spoons: Accurate measurements are key; use a kitchen scale for precision.
- 9-inch round cake pans: If you don’t have these, any similar-sized pans will do.
- Cooling racks: These help cakes cool evenly; a plate can substitute if needed.
Variations
- Tropical Twist: Add shredded coconut to the batter for an extra layer of flavor and texture.
- Nut-Free Option: Omit the walnuts or pecans for a nut-free cake that everyone can enjoy.
- Gluten-Free Version: Substitute all-purpose flour with a gluten-free flour blend to accommodate dietary needs.
- Lower Sugar: Reduce the granulated sugar by half and use ripe bananas for natural sweetness.
- Vegan Adaptation: Replace eggs with flax eggs and use a plant-based cream cheese for the frosting.
Serving Suggestions
- Pair your Hawaiian Carrot Pineapple Cake with a scoop of vanilla ice cream for a delightful contrast.
- A dollop of whipped cream on top adds a light, airy touch.
- Serve with fresh fruit like pineapple or berries for a colorful presentation.
- Enjoy with a cup of coffee or a tropical fruit smoothie.
- Garnish with toasted coconut flakes for an extra tropical flair.
FAQs about Hawaiian Carrot Pineapple Cake
Can I make Hawaiian Carrot Pineapple Cake ahead of time?
Absolutely! This cake actually tastes better the next day as the flavors meld together. Just store it in an airtight container in the fridge, and it will stay fresh for up to a week.
What can I substitute for the vegetable oil?
If you’re looking for a healthier option, you can replace half the vegetable oil with unsweetened applesauce. This keeps the cake moist while reducing the fat content.
Can I freeze Hawaiian Carrot Pineapple Cake?
Yes, you can freeze the cake! Wrap it tightly in plastic wrap and then in aluminum foil. It can be frozen for up to three months. Just thaw it in the fridge before serving.
Is this cake suitable for a gluten-free diet?
Definitely! You can use a gluten-free flour blend in place of all-purpose flour. Just make sure to check the other ingredients for gluten content.
How can I make the frosting less sweet?
Advertisement
If you find the cream cheese frosting too sweet, try reducing the powdered sugar by a cup. You can also add a pinch of salt to balance the sweetness.
Final Thoughts
Baking the Hawaiian Carrot Pineapple Cake is more than just following a recipe; it’s about creating memories.
The aroma wafting through your kitchen will transport you to a tropical paradise, even if you’re just in your home.
Each slice is a celebration of flavors, bringing joy to gatherings or quiet moments alike.
Whether you’re sharing it with friends or savoring it solo, this cake is a reminder that life’s sweetest moments often come from simple pleasures.
So, roll up your sleeves, embrace the process, and enjoy every delicious bite of this delightful creation!
PrintHawaiian Carrot Pineapple Cake: Discover the Recipe!
A delicious and moist Hawaiian Carrot Pineapple Cake topped with creamy frosting, perfect for any occasion.
- Prep Time: 20 minutes
- Cook Time: 30 minutes
- Total Time: 50 minutes
- Yield: 12 servings 1x
- Category: Dessert
- Method: Baking
- Cuisine: Hawaiian
- Diet: Vegetarian
Ingredients
- 2 cups all-purpose flour
- 2 cups granulated sugar
- 1 teaspoon baking powder
- 1 teaspoon baking soda
- 1 teaspoon ground cinnamon
- 1/2 teaspoon salt
- 1 cup vegetable oil
- 4 large eggs
- 2 cups grated carrots (about 4 medium carrots)
- 1 cup crushed pineapple, drained
- 1 cup chopped walnuts or pecans (optional)
- 1 teaspoon vanilla extract
- 8 ounces cream cheese, softened
- 1/2 cup unsalted butter, softened
- 4 cups powdered sugar
- 1 teaspoon vanilla extract
- 1–2 tablespoons milk (as needed for consistency)
Instructions
- Preheat your oven to 350°F (175°C). Grease and flour two 9-inch round cake pans.
- In a large mixing bowl, combine the flour, sugar, baking powder, baking soda, cinnamon, and salt. Whisk together until well blended.
- In another bowl, whisk together the vegetable oil, eggs, grated carrots, crushed pineapple, and vanilla extract until smooth.
- Pour the wet ingredients into the dry ingredients and mix until just combined. If using, fold in the chopped nuts.
- Divide the batter evenly between the prepared cake pans. Bake for 25-30 minutes or until a toothpick inserted in the center comes out clean.
- Allow the cakes to cool in the pans for 10 minutes, then transfer them to wire racks to cool completely.
- While the cakes are cooling, prepare the cream cheese frosting. In a medium bowl, beat the softened cream cheese and butter together until smooth. Gradually add the powdered sugar and vanilla extract, mixing until well combined. If the frosting is too thick, add milk one tablespoon at a time until desired consistency is reached.
- Once the cakes are completely cool, place one layer on a serving plate and spread a layer of frosting on top. Place the second layer on top and frost the top and sides of the cake.
- Serve immediately or refrigerate until ready to serve.
Notes
- For a tropical twist, add shredded coconut to the batter or sprinkle on top of the frosting.
- You can also replace the walnuts with shredded coconut for a different texture.
- For a lighter version, substitute half the oil with unsweetened applesauce.
Nutrition
- Serving Size: 1 slice
- Calories: 450
- Sugar: 35g
- Sodium: 200mg
- Fat: 22g
- Saturated Fat: 5g
- Unsaturated Fat: 15g
- Trans Fat: 0g
- Carbohydrates: 55g
- Fiber: 1g
- Protein: 5g
- Cholesterol: 70mg