
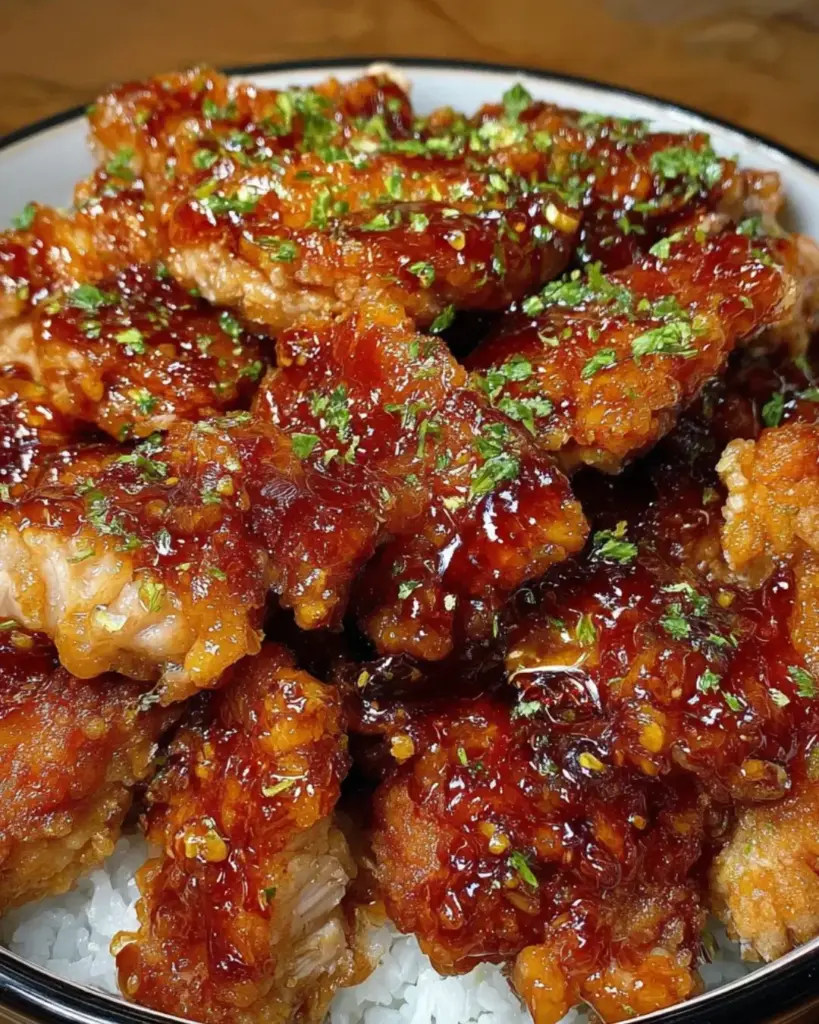
Introduction to Crispy Honey Garlic Chicken
There’s something magical about the aroma of chicken baking in the oven, especially when it’s coated in a crispy layer and drizzled with a sweet, sticky sauce.
Crispy Honey Garlic Chicken is not just a meal; it’s a delightful experience that brings comfort and joy to the dinner table.
Whether you’re looking for a quick solution after a long day or a dish to impress your loved ones, this recipe has you covered.
With its perfect balance of flavors and textures, it’s bound to become a favorite in your household.
Why You’ll Love This Crispy Honey Garlic Chicken
This Crispy Honey Garlic Chicken is a game-changer for busy weeknights.
It’s quick to prepare, taking just 45 minutes from start to finish, and the flavors are simply irresistible.
The combination of crispy chicken and a sweet-savory sauce will have everyone at the table asking for seconds.
Plus, it’s versatile enough to pair with your favorite sides, making it a go-to recipe for any occasion.
Ingredients for Crispy Honey Garlic Chicken
To create this mouthwatering Crispy Honey Garlic Chicken, you’ll need a handful of simple ingredients that pack a punch of flavor.
Here’s what you’ll gather:
- Chicken thighs: Boneless and skinless, they stay juicy and tender while baking.
- All-purpose flour: This forms the crispy coating that gives the chicken its crunch.
- Salt and black pepper: Essential seasonings that enhance the chicken’s natural flavor.
- Garlic powder and onion powder: These add depth and a savory kick to the batter.
- Paprika: A touch of smokiness and color to elevate the dish.
- Baking powder: Helps the coating puff up and become extra crispy.
- Eggs and milk: This mixture acts as a binding agent for the flour coating.
- Honey: The star of the show, providing sweetness and a beautiful glaze.
- Soy sauce: Adds a savory umami flavor that balances the sweetness of the honey.
- Garlic: Freshly minced for a robust flavor in the sauce.
- Vegetable oil: Used in the sauce to enhance richness.
- Sesame seeds (optional): For a nutty crunch and visual appeal.
- Chopped green onions (optional): A fresh garnish that adds color and a mild onion flavor.
For exact measurements, check the bottom of the article where you can find everything listed for easy printing.
Feel free to get creative with substitutions! If you prefer chicken breasts for a leaner option, go for it. Just adjust the cooking time as needed.
How to Make Crispy Honey Garlic Chicken
Creating Crispy Honey Garlic Chicken is a straightforward process that yields delicious results.
Follow these simple steps, and you’ll have a dish that impresses everyone at the table.
Step 1: Preheat and Prepare
Start by preheating your oven to 400°F (200°C).
While it warms up, line a baking sheet with parchment paper.
This will help the chicken cook evenly and make cleanup a breeze.
Step 2: Mix the Dry Ingredients
In a large bowl, combine the all-purpose flour, salt, black pepper, garlic powder, onion powder, paprika, and baking powder.
Mix these dry ingredients well.
This blend will create that irresistible crispy coating.
Step 3: Prepare the Egg Mixture
In another bowl, whisk together the eggs and milk until fully combined.
This mixture will help the flour stick to the chicken, ensuring a perfect crunch.
Step 4: Coat the Chicken
Take each chicken thigh and dip it into the egg mixture, letting any excess drip off.
Then, coat it in the flour mixture, pressing gently to ensure it sticks.
Place the coated chicken on the prepared baking sheet.
Step 5: Bake the Chicken
Slide the baking sheet into the preheated oven.
Bake the chicken for 25-30 minutes, or until it turns golden brown and crispy.
The aroma will be mouthwatering!
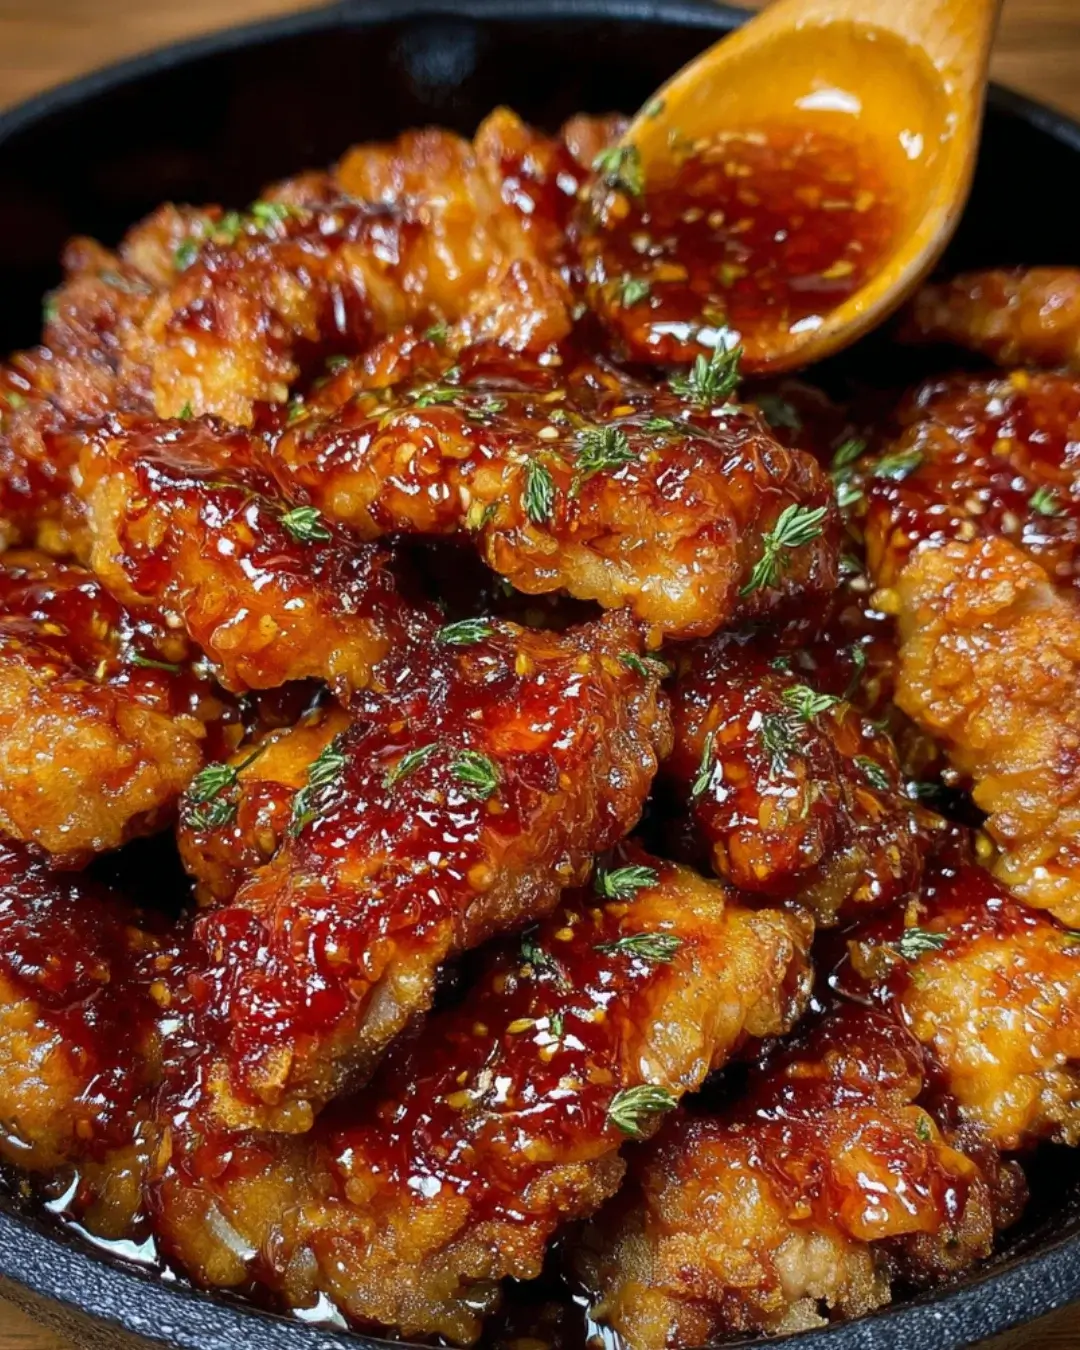
Step 6: Make the Honey Garlic Sauce
While the chicken bakes, grab a small saucepan.
Combine honey, soy sauce, minced garlic, and vegetable oil over medium heat.
Bring it to a simmer and cook for about 5 minutes, stirring occasionally.
This sauce is the sweet-savory star of the dish.
Step 7: Drizzle and Caramelize
Once the chicken is done baking, remove it from the oven.
Drizzle the honey garlic sauce generously over the top.
If you like, sprinkle sesame seeds for an extra crunch.
Return the chicken to the oven for an additional 5-10 minutes.
This allows the sauce to caramelize slightly, enhancing the flavor.
Step 8: Serve and Enjoy
After the final bake, let the chicken rest for a few minutes.
This helps the juices settle, making each bite tender.
Garnish with chopped green onions if desired, and serve hot.
Get ready for compliments!
Tips for Success
- For extra crunch, mix in panko breadcrumbs with the flour.
- Let the chicken rest after baking for juicier bites.
- Use a meat thermometer; chicken should reach 165°F (75°C).
- Experiment with different spices in the flour mix for unique flavors.
- Double the honey garlic sauce if you love extra glaze!
Equipment Needed
- Baking sheet: A standard sheet works, but a wire rack can help with even crispiness.
- Parchment paper: For easy cleanup; aluminum foil is a good alternative.
- Mixing bowls: Use any size; just ensure they’re large enough for mixing.
- Whisk: A fork can work in a pinch for the egg mixture.
- Meat thermometer: Optional, but great for ensuring perfect doneness.
Variations
- Spicy Honey Garlic Chicken: Add a teaspoon of red pepper flakes to the honey garlic sauce for a kick.
- Gluten-Free Option: Substitute all-purpose flour with a gluten-free flour blend for a safe alternative.
- Honey Mustard Twist: Mix honey with Dijon mustard for a tangy variation on the sauce.
- Vegetarian Version: Use tofu or cauliflower instead of chicken for a plant-based delight.
- Herb-Infused: Add fresh herbs like thyme or rosemary to the flour mixture for an aromatic touch.
Serving Suggestions
- Steamed rice: A fluffy bed of jasmine or basmati rice complements the chicken perfectly.
- Stir-fried vegetables: Colorful veggies add freshness and crunch to your plate.
- Cold beer: A crisp lager or pale ale pairs wonderfully with the sweet and savory flavors.
- Presentation: Serve on a large platter, garnished with green onions and sesame seeds for a pop of color.
FAQs about Crispy Honey Garlic Chicken
Can I use chicken breasts instead of thighs?
Absolutely! Chicken breasts can be used for a leaner option. Just keep an eye on the cooking time, as they may cook faster than thighs.
How do I store leftovers?
Store any leftover Crispy Honey Garlic Chicken in an airtight container in the fridge for up to three days. Reheat in the oven for the best texture.
Can I make the honey garlic sauce ahead of time?
Yes! You can prepare the honey garlic sauce in advance and store it in the fridge. Just warm it up before drizzling over the chicken.
What can I serve with Crispy Honey Garlic Chicken?
This dish pairs wonderfully with steamed rice, stir-fried vegetables, or a fresh salad. The options are endless!
Is this recipe suitable for meal prep?
Definitely! Crispy Honey Garlic Chicken is perfect for meal prep. Just cook a batch and portion it out for quick lunches or dinners throughout the week.
Final Thoughts
Crispy Honey Garlic Chicken is more than just a meal; it’s a celebration of flavors that brings everyone together.
Advertisement
The satisfying crunch of the chicken, paired with the sweet and savory sauce, creates a dish that’s hard to resist.
Whether you’re cooking for family or friends, this recipe is sure to impress.
It’s quick, easy, and packed with flavor, making it a perfect choice for any occasion.
So, roll up your sleeves, gather your ingredients, and enjoy the joy of cooking this delightful dish.
Your taste buds will thank you!
PrintCrispy Honey Garlic Chicken: A Flavorful Delight Awaits!
Crispy Honey Garlic Chicken is a delicious dish featuring tender chicken thighs coated in a crispy batter and drizzled with a sweet and savory honey garlic sauce.
- Prep Time: 15 minutes
- Cook Time: 30 minutes
- Total Time: 45 minutes
- Yield: 4 servings 1x
- Category: Main Course
- Method: Baking
- Cuisine: Asian
- Diet: Gluten Free
Ingredients
- 2 pounds chicken thighs, boneless and skinless
- 1 cup all-purpose flour
- 1 teaspoon salt
- 1 teaspoon black pepper
- 1 teaspoon garlic powder
- 1 teaspoon onion powder
- 1/2 teaspoon paprika
- 1/2 teaspoon baking powder
- 2 large eggs
- 1/4 cup milk
- 1/2 cup honey
- 1/4 cup soy sauce
- 3 cloves garlic, minced
- 1 tablespoon vegetable oil
- 1 tablespoon sesame seeds (optional)
- Chopped green onions for garnish (optional)
Instructions
- Preheat your oven to 400°F (200°C) and line a baking sheet with parchment paper.
- In a large bowl, combine the flour, salt, pepper, garlic powder, onion powder, paprika, and baking powder. Mix well.
- In another bowl, whisk together the eggs and milk until fully combined.
- Dip each chicken thigh into the egg mixture, allowing excess to drip off, then coat it in the flour mixture. Place the coated chicken on the prepared baking sheet.
- Bake the chicken in the preheated oven for 25-30 minutes, or until golden brown and crispy.
- While the chicken is baking, prepare the honey garlic sauce. In a small saucepan over medium heat, combine honey, soy sauce, minced garlic, and vegetable oil. Bring to a simmer and cook for about 5 minutes, stirring occasionally.
- Once the chicken is done, remove it from the oven and drizzle the honey garlic sauce over the top. If desired, sprinkle with sesame seeds.
- Return the chicken to the oven for an additional 5-10 minutes to allow the sauce to caramelize slightly.
- Remove from the oven and let it rest for a few minutes before serving. Garnish with chopped green onions if desired.
Notes
- For extra crunch, consider adding panko breadcrumbs to the flour mixture.
- You can substitute chicken breasts for thighs if you prefer a leaner option. Adjust cooking time as needed.
Nutrition
- Serving Size: 1 serving
- Calories: 450
- Sugar: 30g
- Sodium: 800mg
- Fat: 20g
- Saturated Fat: 3g
- Unsaturated Fat: 17g
- Trans Fat: 0g
- Carbohydrates: 30g
- Fiber: 1g
- Protein: 30g
- Cholesterol: 150mg