Waking up to a kitchen filled with the aroma of a savory breakfast can be transformative. If you’re tired of the same old routine, let me introduce you to the magnificent Chickpea Omelette—a vegan, gluten-free dish that is sure to elevate your mornings! This protein-packed delight not only brings a fluffy texture and rich flavor that rivals traditional omelettes, but it’s also quick to whip up, making it just right for those busy mornings. You can customize it with your favorite veggies, allowing for endless variations to keep breakfast exciting. Are you ready to change your breakfast game for good? Let’s dive into this delicious recipe!
Why is the Chickpea Omelette amazing?
Simplicity: This recipe is quick and easy to prepare, making it perfect for busy mornings or last-minute breakfast cravings.
Nutritious: Packed with plant-based protein and fiber, it provides a wholesome start to your day without the heaviness of traditional egg omelettes.
Customizable: You can personalize your omelette with an array of veggies, from vibrant bell peppers to earthy mushrooms. Explore variations and find your favorite!
Crispy & Fluffy: The unique texture combines light fluffiness with crispy edges, ensuring every bite is satisfying and full of flavor.
Vegan Delight: As a fantastic vegan alternative, this chickpea omelette caters to multiple dietary needs, including gluten-free and soy-free diets. Embrace the joy of plant-based cooking!
Chickpea Omelette Ingredients
-
For the Batter
• Chickpea Flour – This essential ingredient provides structure and is the star of your chickpea omelette.
• Water – Hydrates chickpea flour to create the right batter consistency; you can substitute with plant-based milk for a creamier flavor.
• Nutritional Yeast – Adds a cheesy taste to your omelette; feel free to omit it if you’re not going for a cheesy vibe.
• Salt – Enhances the flavor; consider using black salt for an authentic eggy taste. -
For the Vegetables
• Vegetables of Choice – Fresh ingredients like bell peppers, mushrooms, or spinach add texture and flavor to your omelette.
• Oil – Necessary for frying and preventing sticking; you can swap it for non-stick spray or skip altogether for a no-oil option.
Step‑by‑Step Instructions for Chickpea Omelette
Step 1: Mix the Dry Ingredients
In a mixing bowl, combine chickpea flour, nutritional yeast, and salt. Use a whisk to blend them until evenly distributed, ensuring there are no lumps. This should take about 1-2 minutes. The blend should have a slightly grainy texture, hinting at the delightful chickpea omelette to come.
Step 2: Create the Batter
Gradually add half of the water to the dry mixture, whisking continuously until a smooth paste forms. Slowly incorporate the remaining water while whisking, which will help achieve a homogeneous consistency. Aim for a creamy batter with no clumps. Let it rest for 10 minutes; this enhances the texture of your chickpea omelette.
Step 3: Prepare the Vegetables
While the batter rests, prep your chosen vegetables. Dice bell peppers, onions, or any other favorites you’d like to add. Heat a skillet over medium-low heat and drizzle with oil. Sauté the vegetables for about 3-5 minutes, stirring often, until they are tender and fragrant. This will add flavor to your chickpea omelette.
Step 4: Combine Vegetables and Batter
Once the vegetables are tender, remove them from the heat and add them to the rested chickpea batter. Stir until the veggies are well integrated into the mixture, ensuring an even distribution. The colors of the vegetables should brighten up the batter, readying your chickpea omelette for cooking.
Step 5: Heat the Skillet
Preheat a well-oiled skillet over medium heat. Allow it to get hot, as this is key for a nice, crispy exterior on your chickpea omelette. You’ll know it’s ready when a drop of water sizzles upon contact. This ensures optimal cooking conditions for your delicious breakfast fix.
Step 6: Cook the Chickpea Omelette
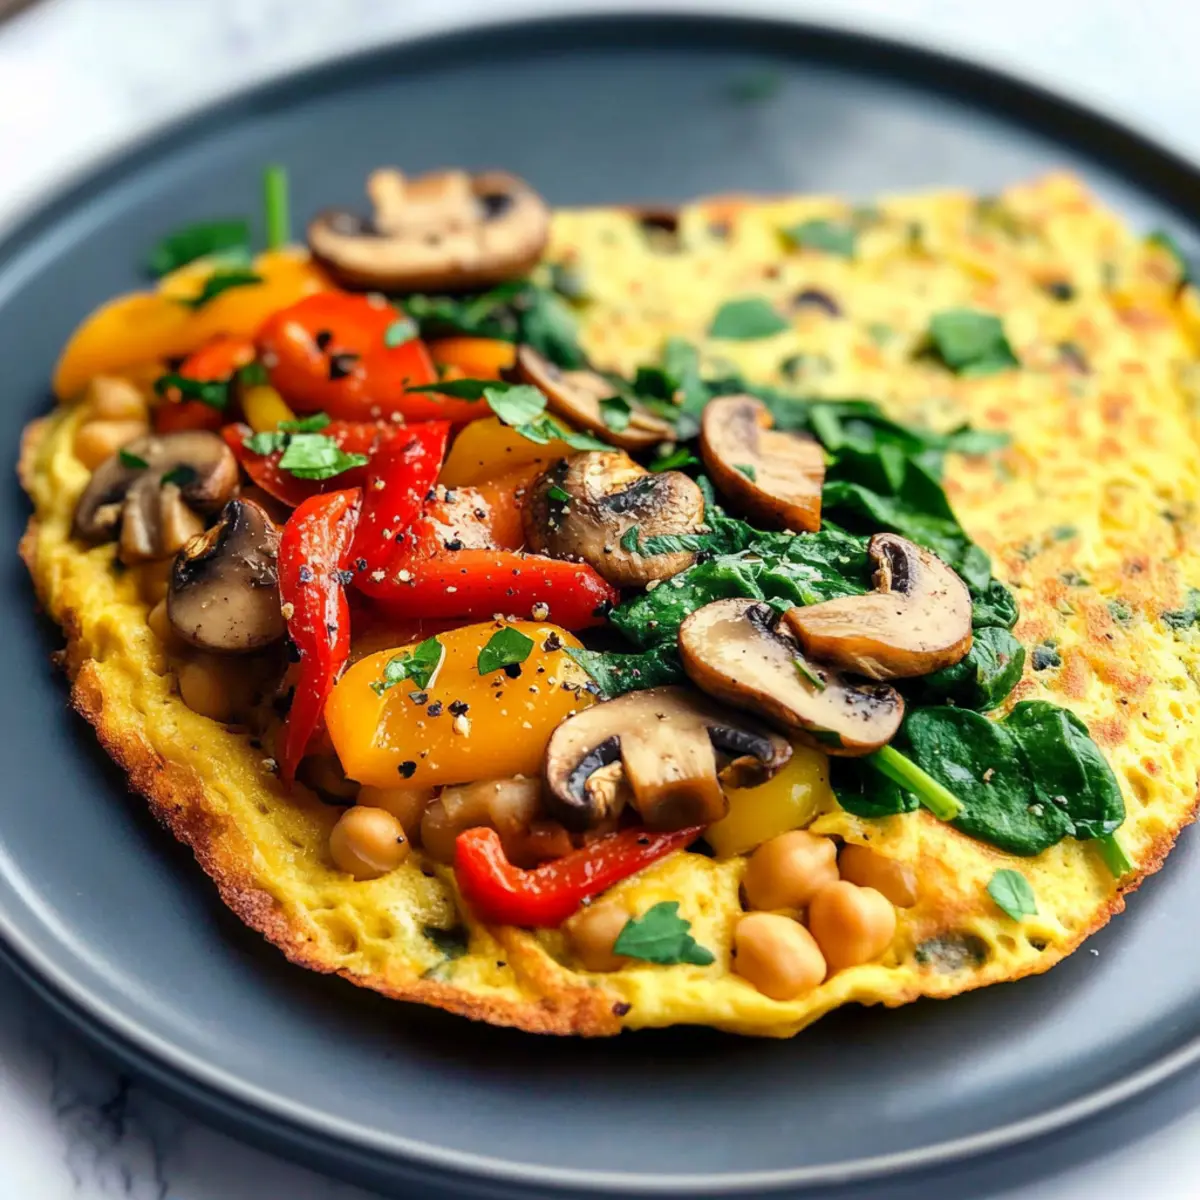
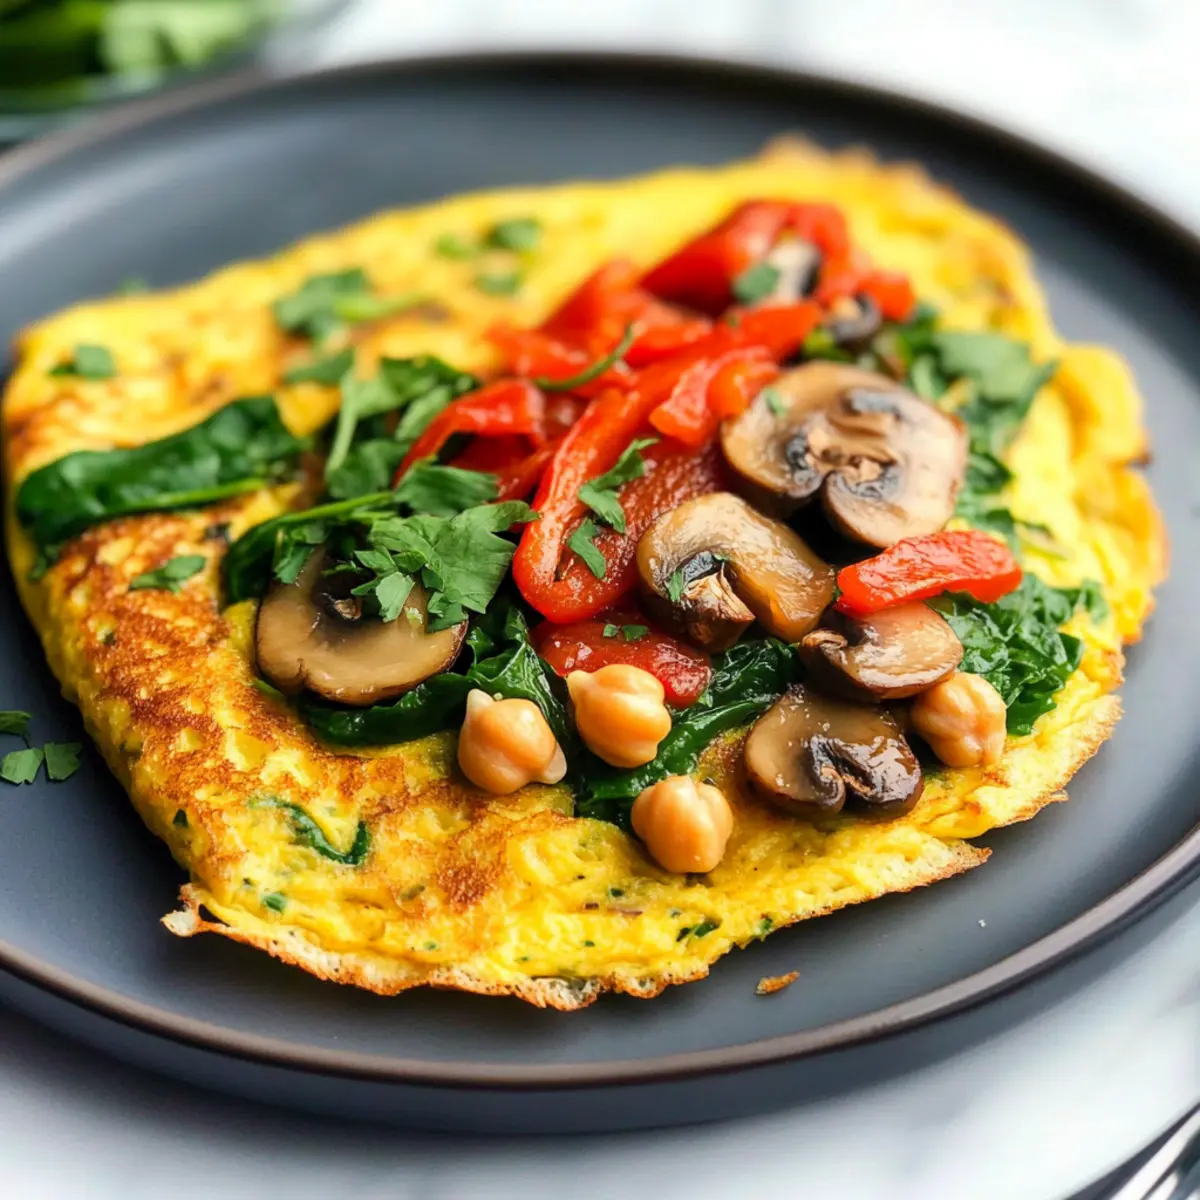
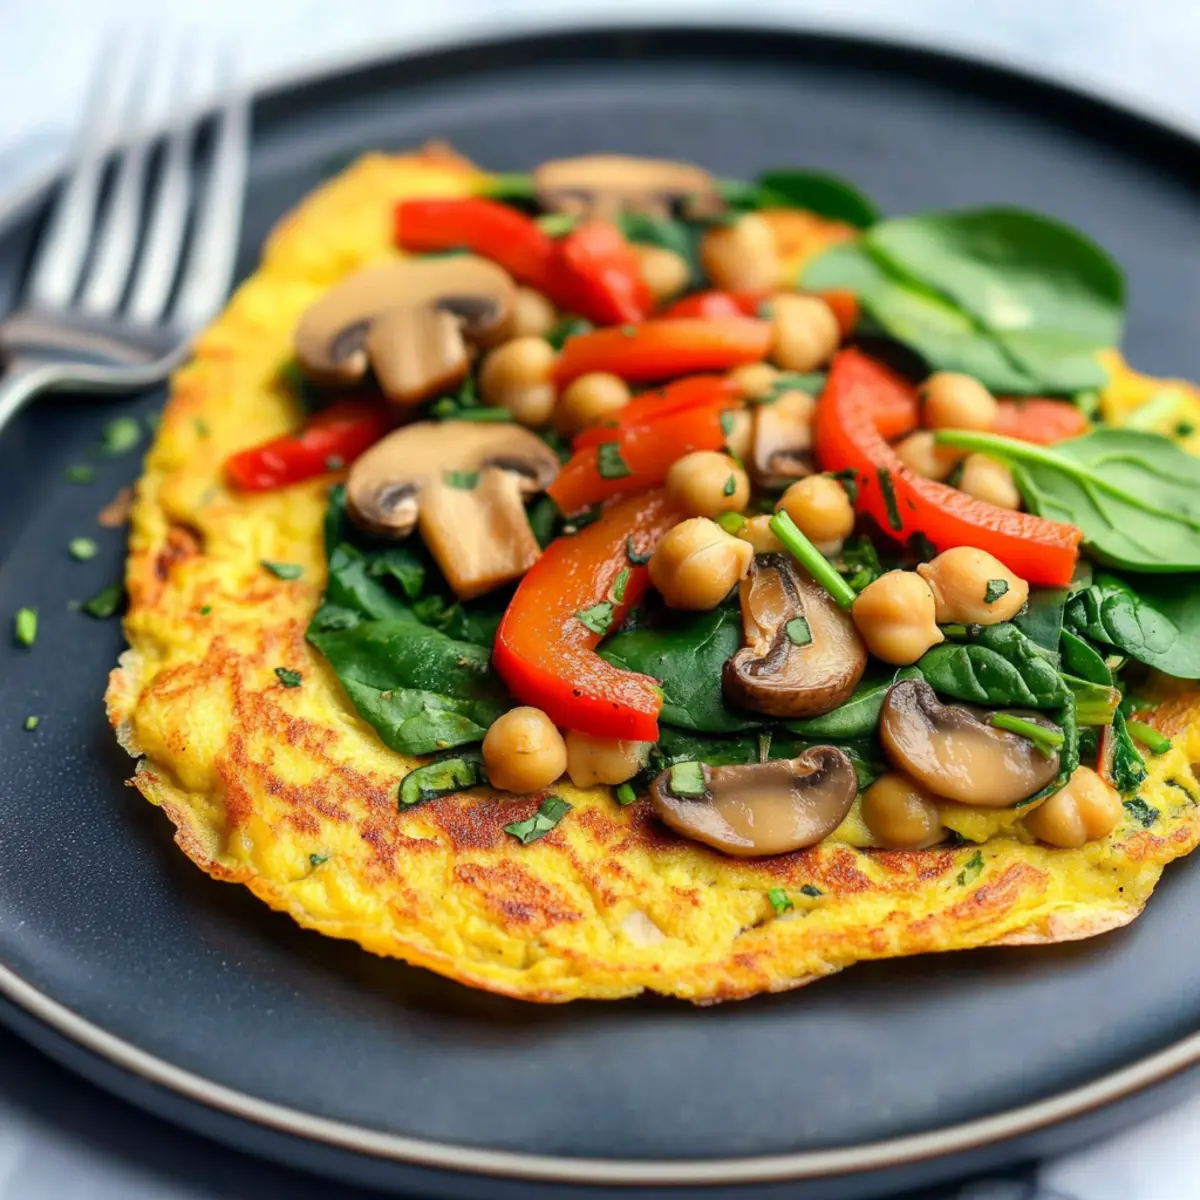
Pour the batter into the hot skillet, shaping it into a thick round, much like a pancake. Cook for about 5 minutes, or until the top looks dry and no longer shiny. This indicates that your chickpea omelette is almost ready to flip, with nice golden edges forming.
Step 7: Flip and Finish Cooking
Carefully flip the omelette using a spatula, making sure to do this gently to avoid breaking it. Cook for an additional 3-5 minutes on the other side, checking for doneness. The omelette should feel firm yet tender to the touch, achieving that perfect fluffy texture everyone loves.
Step 8: Serve and Enjoy
If desired, sprinkle cheese in the center of the omelette just before folding it in half. This allows the cheese to melt nicely. Once ready, transfer your chickpea omelette to a plate, and consider topping it with salsa, avocado, or a dollop of vegan yogurt for a scrumptious finish. Enjoy your nourishing breakfast!
Chickpea Omelette Variations & Substitutions
Feel free to get creative and customize your omelette experience with these tasty variations!
-
Mung Bean Flour: Substitute chickpea flour with mung bean flour for a nuttier flavor and slightly different texture. Mung bean flour has a unique taste that enhances the overall dish and adds a new twist to the family favorite.
-
Creamy Plant Milk: Use almond, oat, or coconut milk in place of water for a richer, creamier batter. Plant-based milk brings an extra layer of flavor to your chickpea omelette, creating a luscious breakfast treat.
-
Fresh Herbs: Mix in fresh herbs like basil or dill to elevate the flavor profile of your omelette. A sprinkle of fresh herbs can add brightness and a fragrant aroma, making every bite more enjoyable!
-
Spicy Kick: Add chopped jalapeños or a dash of chili powder for heat. Kick your breakfast up a notch with a zesty twist that will awaken your taste buds, just perfect for spice lovers!
-
Savory Additions: Toss in some sautéed mushrooms or avocado for creaminess! These additions not only enhance texture but also provide a satisfying blend of flavors that make your omelette extravagant.
-
Non-Dairy Cheese: For those craving that cheesiness, add a sprinkle of your favorite non-dairy cheese before folding. This brings a melty charm to your omelette, giving it a nostalgic touch reminiscent of traditional favorites.
-
Zucchini Noodles: Substitute sautéed veggies with spiralized zucchini for a fun twist on the traditional omelette. Zucchini noodles add a whimsical texture while keeping things light and fresh!
-
Seasonal Veggies: Take advantage of seasonal produce! Experiment with asparagus in the spring or roasted butternut squash in the fall for a delightful seasonal experience. Seasonal ingredients can bring exciting flavors to your breakfast table.
Let your imagination run wild with these ideas and discover the multitude of ways to enjoy your chickpea omelette. With every variation, there’s an opportunity to create something uniquely delicious and just right for your morning! If you’re looking for other exciting meals, you might enjoy learning about quick breakfast options and how to make delicious plant-based sides to complement your dish!
Expert Tips for the Chickpea Omelette
-
Rest the Batter: Allowing the batter to sit for about 10 minutes improves the final texture, giving your chickpea omelette a fluffier bite.
-
Hot Skillet: Preheat your skillet properly to avoid sticking; a well-seasoned cast-iron or non-stick pan works wonders for perfect cooking.
-
Balanced Veggies: Be cautious not to overload with vegetables; too many can affect the omelette’s structure. Aim for an even ratio of batter to veggies.
-
Adjust Cooking Time: If using more vegetables, increase the cooking time slightly to ensure everything is cooked through without overcooking the omelette’s base.
-
Experiment with Flavors: Don’t hesitate to add herbs or spices to your batter for extra flavor; garlic powder or fresh herbs can elevate your chickpea omelette wonderfully!
Storage Tips for Chickpea Omelette
Fridge: Any leftover chickpea omelette can be stored in the refrigerator for up to 3-5 days. Remember to wrap it securely or place it in an airtight container to retain its texture.
Uncooked Batter: If you have extra batter, you can store it in an airtight container in the refrigerator for 2-3 days. This allows you to make fresh omelettes on demand!
Reheating: When ready to enjoy your stored omelette, gently reheat it in a skillet over low heat until warmed through, ensuring the edges regain their crispy texture.
Freezer: For longer storage, cooked omelettes can be frozen for up to 2 months. Layer them between parchment paper in an airtight container to prevent sticking.
Make Ahead Options
These Chickpea Omelettes are perfect for meal prep enthusiasts! You can prepare the chickpea batter up to 24 hours in advance; simply mix the chickpea flour, nutritional yeast, and salt, then add water to create your batter. Store it in an airtight container in the refrigerator to maintain freshness. Additionally, you can chop your vegetables and keep them in a separate container for up to 3 days. When you’re ready to enjoy your omelette, just combine the batter with sautéed veggies in a hot skillet and cook until golden brown, giving you a delightful breakfast with minimal effort on busy mornings!
What to Serve with Chickpea Omelette
Waking up to a splendid breakfast is just the beginning! Pairing your chickpea omelette with delightful sides will elevate your morning experience even further.
-
Avocado Toast: Creamy and rich, the avocado’s smooth texture complements the fluffy omelette beautifully, offering a satisfying mouthfeel.
-
Fresh Fruit Salad: A vibrant mix of seasonal fruits adds a refreshing and juicy contrast, cleansing the palate and brightening your breakfast plate.
-
Sautéed Greens: Spinach or kale sautéed with garlic infuses your meal with earthy flavors and nutrients, enhancing the omelette’s profile.
-
Toasted Whole Grain Bread: The nutty crunch of whole grain toast pairs perfectly with the omelette, making each bite delightful and hearty.
-
Salsa or Pico de Gallo: The zesty, tangy flavors of fresh salsa elevate the dish, adding an exciting twist that pairs wonderfully with the savory omelette.
-
Dairy-Free Yogurt: A dollop of creamy vegan yogurt on the side can bring a cool, refreshing touch, balancing the warm omelette.
-
Herbed Quinoa: Fluffy quinoa mixed with fresh herbs introduces a unique texture and additional protein, making the meal more filling.
-
Chai or Herbal Tea: A warm beverage like chai or herbal tea rounds off the meal with comforting spices, enhancing the overall breakfast experience.
-
Homemade Smoothie: A fruity smoothie can add a delightful touch of sweetness, making breakfast deliciously wholesome and vibrant.
Chickpea Omelette Recipe FAQs
How do I select the best chickpea flour?
Absolutely! When choosing chickpea flour, look for a fine, even texture without any clumps. Opt for organic varieties when possible to ensure the best flavor and quality. A pale yellow color signifies high-quality chickpeas. Store the flour in an airtight container in a cool, dark place to maintain freshness.
What’s the best way to store leftovers?
Very! Leftover chickpea omelette can be refrigerated for up to 3-5 days. Simply wrap it in plastic wrap or place it in an airtight container. For optimal texture, reheat in a skillet over low heat to regain that delicious crispiness.
Advertisement
Can I freeze chickpea omelette?
Absolutely! You can freeze the cooked chickpea omelette for up to 2 months. To do this, allow it to cool completely, then layer each omelette with parchment paper before placing them in an airtight container. This prevents them from sticking together. When ready to enjoy, simply thaw overnight in the fridge and reheat in a skillet.
What if my omelette comes out too dry or crumbly?
No worries! If your chickpea omelette turns out dry, it could be due to overcooking or using too much flour. To troubleshoot, consider adjusting the water-to-flour ratio in your batter; it should be creamy, not too thick. If you’re incorporating many vegetables, increase the liquid slightly to balance it out.
Is this recipe suitable for people with allergies?
Definitely! The chickpea omelette is inherently vegan, gluten-free, and soy-free, making it a fantastic option for those with specific dietary needs. However, if you’re cooking for pets or individuals with allergies, ensure that none of the vegetables or additional toppings contain allergens. It’s always best to double-check ingredient labels.
How can I make my chickpea omelette fluffier?
Of course! To achieve a fluffier texture, allow the batter to rest for about 10 minutes before cooking. This step helps the chickpea flour absorb water effectively. Ensure your skillet is adequately heated before cooking; this will help create that perfect fluffy outer layer while keeping the inside tender. Enjoy experimenting!

Chickpea Omelette: Your Fluffy Vegan Breakfast Fix
Ingredients
Equipment
Method
- In a mixing bowl, combine chickpea flour, nutritional yeast, and salt. Whisk until evenly distributed.
- Gradually add half of the water to the dry mixture, whisking until a smooth paste forms. Then, incorporate the remaining water.
- Let the batter rest for 10 minutes.
- Meanwhile, prepare your chosen vegetables by dicing them. Heat a skillet over medium-low heat and drizzle with oil.
- Sauté the vegetables for about 3-5 minutes until tender.
- Combine the sautéed vegetables with the rested batter.
- Preheat a well-oiled skillet over medium heat.
- Pour the batter into the skillet, shaping it into a thick round. Cook for about 5 minutes.
- Flip the omelette carefully and cook for an additional 3-5 minutes.
- Serve with optional toppings like salsa, avocado, or vegan yogurt.