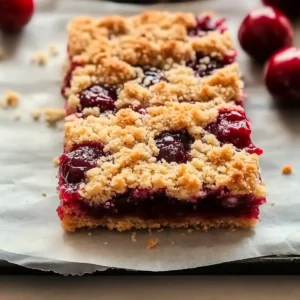
Fresh cherries might be the best-kept secret of summer, and they shine in this delightful Quick Cherry Crumble Bars recipe! Blending the comforting essence of a classic pie with the ease of a cookie bar, these treats promise to enchant your taste buds. The best part? They come together in no time and are wonderfully adaptable; switch up the fruit to match your cravings or whatever is at hand. Whether you need a sweet snack for a picnic or a crowd-pleasing dessert for a backyard barbecue, these bars are not only quick to prepare but also a guaranteed hit. So, are you ready to transform simple ingredients into something special? Let’s dive into this cherry-filled adventure!
Why are Cherry Crumble Bars the best treat?
Fresh cherries steal the spotlight in this delightful dessert, making every bite juicy and vibrant. Quick preparation means you can whip up these bars in under an hour, perfect for last-minute gatherings. Versatile variations allow you to experiment with seasonal fruits like blueberries or peaches, offering something new each time. Crowd-pleasing appeal ensures they’re a hit at picnics, potlucks, or simply enjoyed at home with a scoop of vanilla ice cream. Looking for more fruity delights? Check out our Healthy Cherry Earl tea or indulge in Chocolate Chip Bars for an extra treat!
Cherry Crumble Bars Ingredients
For the Crust and Topping
- Flour – Provides structure; you can use all-purpose or a gluten-free blend if desired.
- Sugar – Sweetens and helps with browning; brown sugar adds a deeper flavor.
- Baking Powder – Acts as a leavening agent to ensure the crust rises nicely.
- Salt – Enhances the overall flavors of the bars.
- Butter – Adds richness and moisture; ensure it’s at room temperature for the best texture.
- Egg – Binds everything together; no substitutes recommended for texture.
- Milk – Adds moisture; any kind of milk works, including plant-based options.
For the Cherry Filling
- Fresh Sweet Cherries – The star of your cherry crumble bars; select firm varieties, and thaw if using frozen ones.
- Cornstarch – Thickens the cherry filling to keep it from becoming too runny; arrowroot powder can be used as a substitute.
Each ingredient plays a crucial role in bringing your Cherry Crumble Bars to life, making these treats irresistible and delicious.
Step‑by‑Step Instructions for Cherry Crumble Bars
Step 1: Preheat Oven
Begin by preheating your oven to 375°F (190°C). While it warms up, take an 8×8 or 9×9 baking dish and line it with parchment paper for easy removal later. Don’t forget to spray the parchment with nonstick spray, ensuring your Cherry Crumble Bars will come out smoothly after baking.
Step 2: Prepare Dough
In a large mixing bowl, combine flour, sugar, baking powder, and salt. Use a whisk to blend the dry ingredients thoroughly. Next, grate in room temperature butter and mix until the mixture resembles coarse crumbs. Add one egg and a splash of milk, stirring gently until the dough comes together in a cohesive ball.
Step 3: Create the Base
Take about two-thirds of your prepared dough and firmly press it into the bottom of your lined baking dish. Make sure to spread it evenly to form a sturdy crust for your Cherry Crumble Bars. It’s a good idea to use your fingers or the back of a measuring cup to achieve a smooth surface.
Step 4: Prepare Cherry Filling
While your crust sets, prepare the cherry filling. Mash the fresh sweet cherries in a bowl until they’re slightly chunky, then strain to remove excess juice. Mix the strained cherries with sugar and cornstarch, ensuring everything is well combined. Layer this delicious mixture evenly over your crust for a burst of fruity goodness.
Step 5: Add Topping
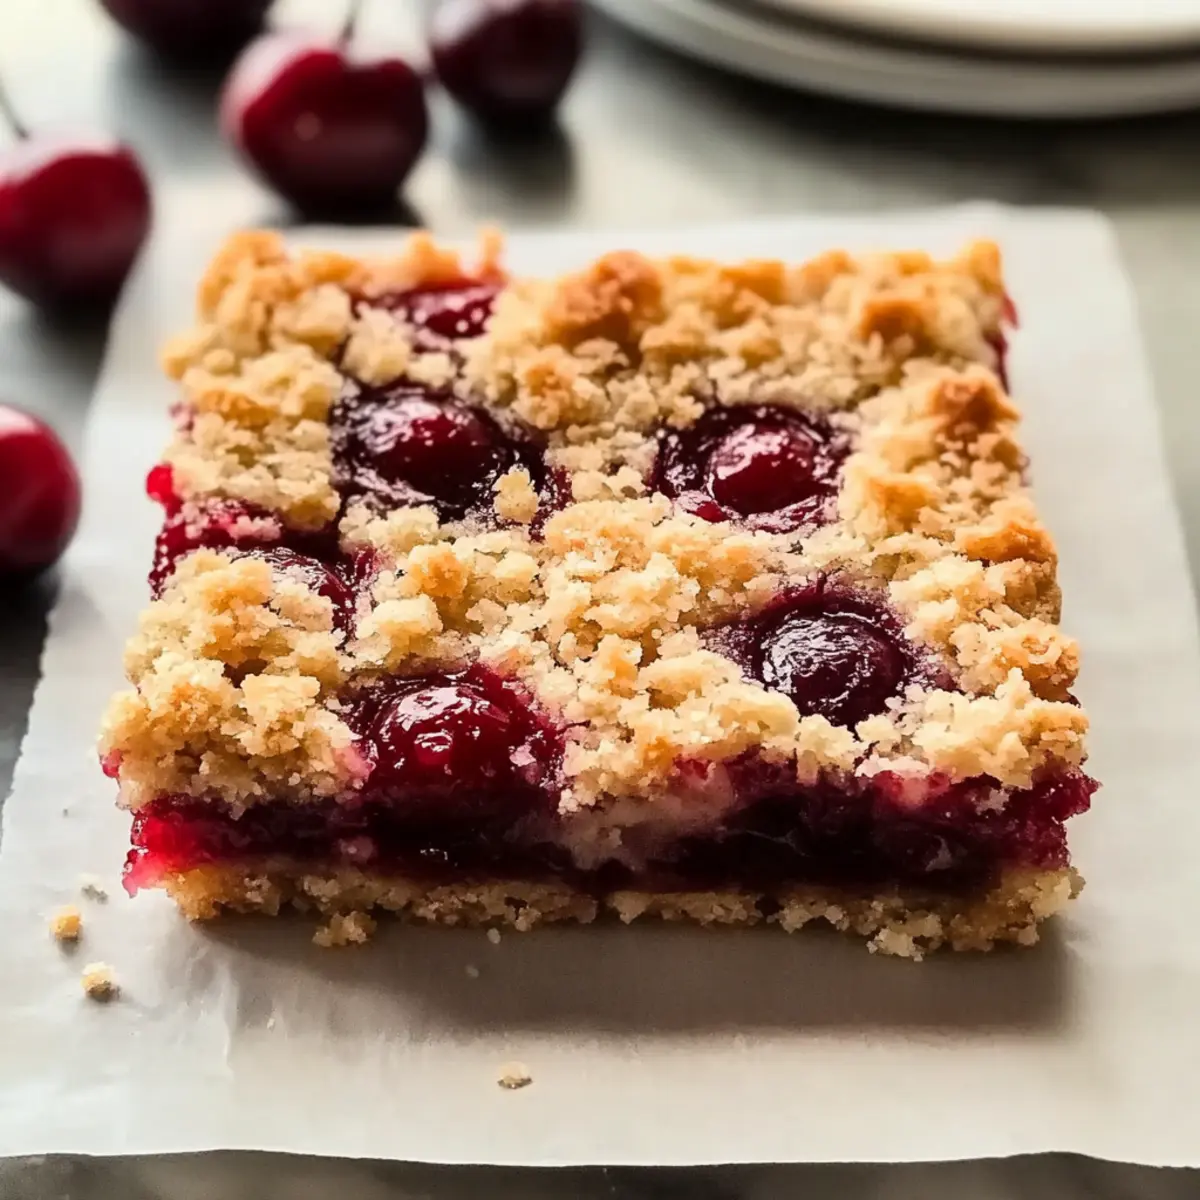
Crumble the remaining dough over the cherry filling, spreading it as evenly as possible. The topping will create a delightful, crispy texture that contrasts beautifully with the soft cherry layer below. This step is essential for a perfect finish to your Cherry Crumble Bars.
Step 6: Bake
Place your baking dish in the preheated oven and bake for 32-36 minutes. Look for a lovely golden brown color on the topping; this indicates your Cherry Crumble Bars are perfectly baked. The aroma in your kitchen will be a delectable hint of what’s to come.
Step 7: Cool
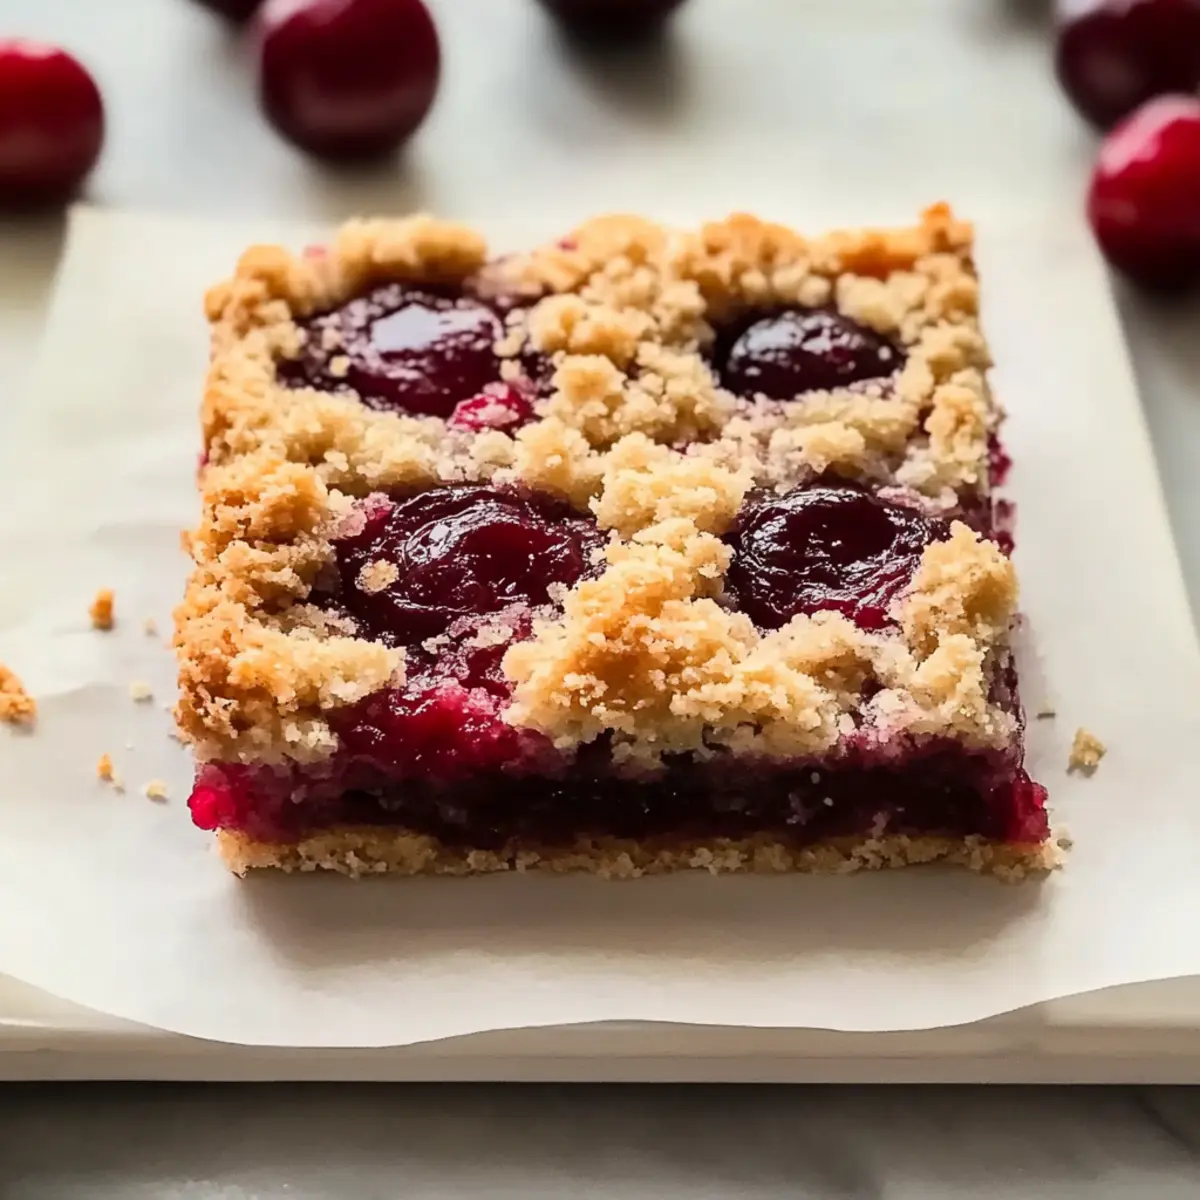
Once baked, remove the dish from the oven and let it cool completely at room temperature. This can take about 2-3 hours, but patience is key! Cooling allows the filling to set, making it easier to slice into perfect squares that showcase the enticing layers of your Cherry Crumble Bars.
Storage Tips for Cherry Crumble Bars
Room Temperature: Store the bars in an airtight container at room temperature for up to 2 days to maintain softness and flavor.
Fridge: For longer freshness, refrigerate the bars for up to 5 days in an airtight container. Enjoy them chilled for a refreshing treat!
Freezer: For long-term storage, wrap individual portions tightly in plastic wrap and place them in a freezer-safe container. They can be frozen for up to 3 months.
Reheating: To enjoy them warm, thaw in the fridge overnight and reheat in the microwave for a few seconds, allowing the gooey cherry filling to shine in these Cherry Crumble Bars!
Cherry Crumble Bars: Adaptable Delights
Feel free to make these cherry crumble bars your own with delightful twists that will tickle your taste buds!
-
Fruit Swap: Substitute fresh cherries with blueberries or peaches for a new fruit experience.
-
Spiced Up: Add a sprinkle of cinnamon or nutmeg to the dough for a cozy, spiced flavor that warms the heart.
-
Nutty Twist: Stir in chopped walnuts or pecans to the filling for an added crunch and depth.
-
Oatmeal Boost: Incorporate rolled oats into the crumble topping for a heartier texture that’s also delicious.
-
Vegan Option: Replace the egg with a flaxseed or chia seed mixture to create a vegan version that still tastes amazing.
-
Flavor Infusion: Swap almond extract for vanilla or coconut extract, creating a subtle yet delicious flavor variation.
-
Chocolate Add-In: Mix in mini chocolate chips into the cherry filling for a decadent twist that perfectly complements the fruit.
-
Gluten-Free: Use a gluten-free flour blend as a direct substitute for all-purpose flour, ensuring everyone can enjoy these bars.
Tantalized by these variations? They’re just as scrumptious as Healthy Cherry Earl tea or a satisfying piece of Chocolate Chip Bars – a true treat for any occasion!
Tips for the Best Cherry Crumble Bars
-
Room Temperature Butter: Ensure your butter is at room temperature to create a crumbly yet cohesive dough that won’t turn greasy.
-
Don’t Overmix: Mix the dough just until combined; overworking can lead to tough bars instead of the tender crumb you desire.
-
Proper Cooling: Allow the bars to cool completely before slicing to avoid a messy presentation and ensure the cherry filling sets properly.
-
Layer Evenly: Spread the cherry filling evenly to ensure consistent flavors in every bite of your Cherry Crumble Bars.
-
Fruity Variations: Experiment with seasonal fruits for unique flavors—blueberries or peaches make delightful alternatives to cherries!
What to Serve with Quick Cherry Crumble Bars
These fruity delights are perfect for creating a comforting, scene-stealing dessert table.
-
Vanilla Ice Cream: The creamy coldness beautifully contrasts the warm bars and enhances the cherry flavors. A scoop of this classic treat is simply irresistible alongside your Quick Cherry Crumble Bars.
-
Whipped Cream: Light and airy, whipped cream adds a fluffy touch that balances the sweet tang of cherries. A dollop on each serving elevates the sensory experience.
-
Fresh Mint Leaves: Their coolness and vibrant color brighten up the plate. The mint not only brings a refreshing taste but also enhances the overall presentation of your dessert.
-
Coffee or Espresso: A rich cup of coffee or espresso complements the sweetness of the crumble bars. The warm notes of coffee elevate the dessert, making it a delightful afternoon treat.
-
Chilled Lemonade: The zesty sweetness of lemonade pairs wonderfully with the fruity cherry filling. It’s a refreshing drink option for warm days, enhancing the homemade vibe.
-
Chocolate Drizzle: A gentle drizzle of chocolate can take every bite to the next level. The rich flavor adds a decadent twist to your Quick Cherry Crumble Bars.
-
Nutty Granola: Sprinkle some granola on top for an added crunch. The nuttiness complements the fruitiness beautifully while adding texture and heartiness to the dessert.
-
Hot Chocolate: On chilly evenings, a warm cup of hot chocolate feels like a cozy embrace alongside the cherry crumble bars. The richness of hot chocolate transforms a simple snack into a comforting experience.
Make Ahead Options
These Quick Cherry Crumble Bars are a fantastic choice for meal prep, saving you time on busy days! You can prepare the crust and topping up to 24 hours in advance by mixing the ingredients and storing the dough in an airtight container in the refrigerator. The cherry filling can also be made ahead and refrigerated for up to 3 days; just ensure the cherries are strained well to prevent sogginess. When you’re ready to bake, simply press the crust into the pan, layer on the filling, sprinkle the topping, and bake as directed. With this make-ahead strategy, you’ll have delicious Cherry Crumble Bars ready to serve with minimal effort, perfect for any occasion!
Cherry Crumble Bars Recipe FAQs
What type of cherries should I use for Cherry Crumble Bars?
For the best flavor and texture, I recommend using fresh, sweet cherries. Look for firm, plump cherries that are bright in color without any dark spots or blemishes. If using frozen cherries, be sure to thaw and drain them to prevent excess moisture in your filling.
Advertisement
How should I store leftover Cherry Crumble Bars?
You can store your Cherry Crumble Bars in an airtight container at room temperature for up to 2 days. If you want to keep them fresher for longer, refrigerate them for up to 5 days. They taste delightful chilled, so don’t hesitate to enjoy them straight from the fridge!
Can I freeze Cherry Crumble Bars?
Absolutely! To freeze, wrap individual portions tightly in plastic wrap and place them in a freezer-safe container or bag. They can be frozen for up to 3 months. When you’re ready to enjoy them, simply thaw them in the fridge overnight, then warm them in the microwave for a few seconds to revitalize that gooey cherry filling.
What should I do if my Cherry Crumble Bars are too crumbly and falling apart?
If your bars are falling apart, it may be due to not pressing the crust firmly enough or not letting them cool completely before cutting. For better results, make sure to press the dough mixture firmly into the pan and allow the bars to cool for at least 2-3 hours before slicing. This helps the filling set and keeps everything intact.
Are Cherry Crumble Bars suitable for people with dietary restrictions?
You can certainly adapt this recipe to accommodate dietary preferences! For a gluten-free version, simply swap out the all-purpose flour for a gluten-free blend. If you’re concerned about allergies, be mindful of ingredients like butter and egg; consider using a dairy-free alternative for butter and a flaxseed or chia seed egg substitute for the egg. Just remember that these adjustments may slightly change the texture and flavor of the final product.

Cherry Crumble Bars: Easy, Irresistibly Fruity Delight
Ingredients
Equipment
Method
- Preheat your oven to 375°F (190°C). Line an 8x8 or 9x9 baking dish with parchment paper and spray with nonstick spray.
- In a large mixing bowl, combine flour, sugar, baking powder, and salt. Mix in room temperature butter until it resembles coarse crumbs. Add egg and milk, stirring until combined.
- Press about two-thirds of the dough into the bottom of the lined baking dish to form a crust.
- Mash the fresh cherries until slightly chunky. Strain excess juice and mix with sugar and cornstarch. Layer over the crust.
- Crumble the remaining dough over the cherry filling.
- Bake for 32-36 minutes until golden brown on top.
- Cool completely at room temperature for 2-3 hours before slicing.