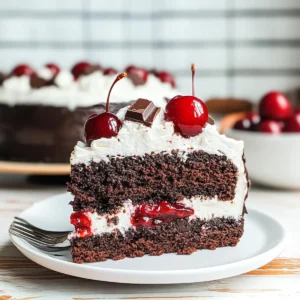
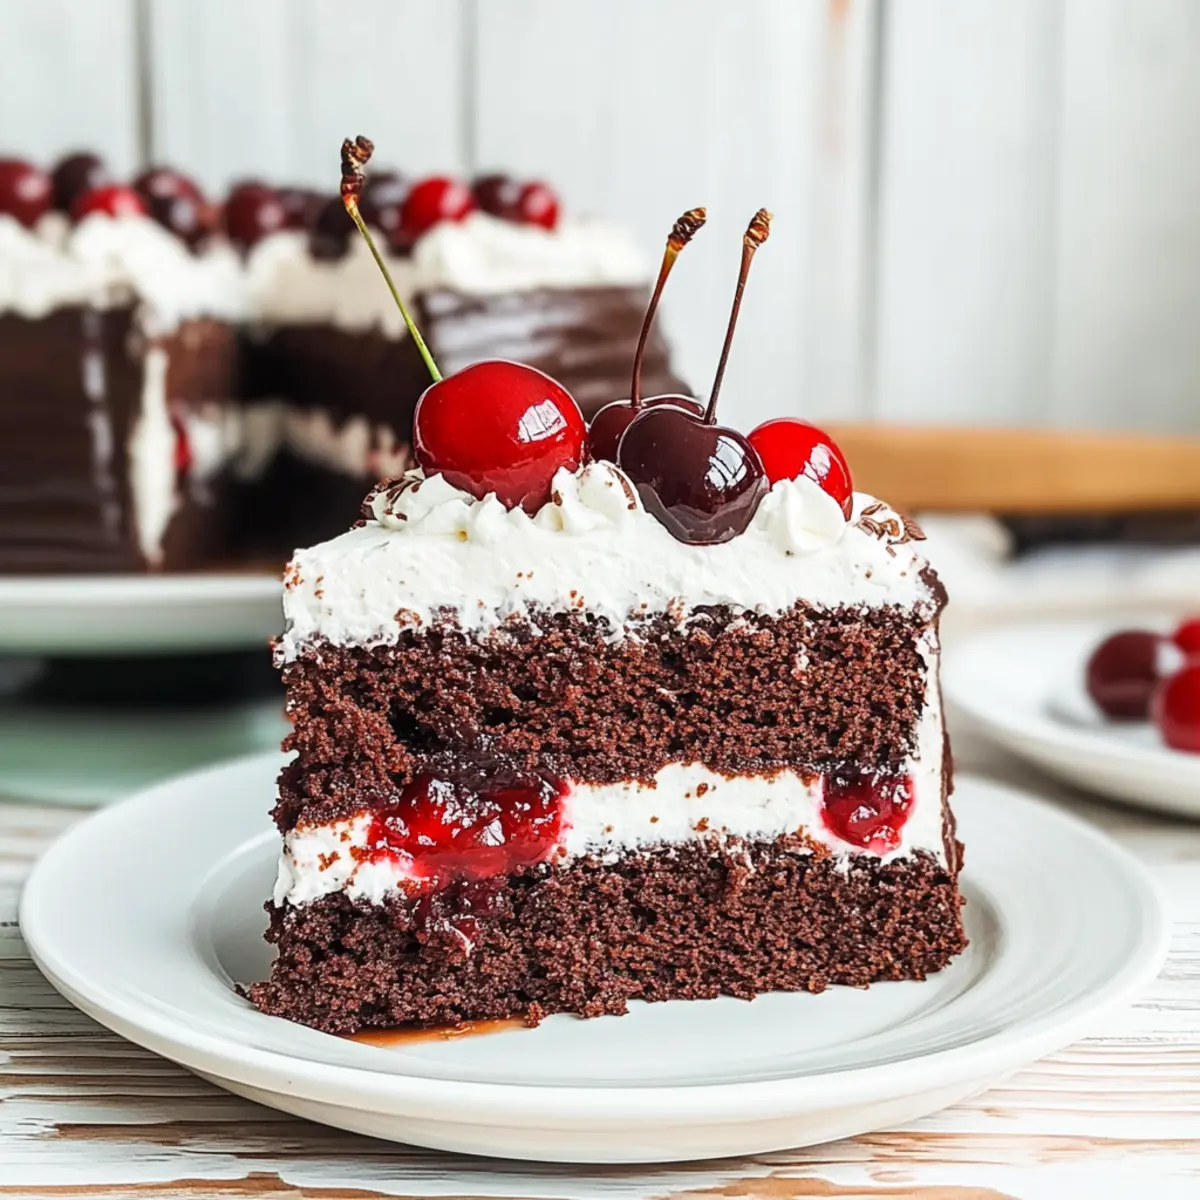
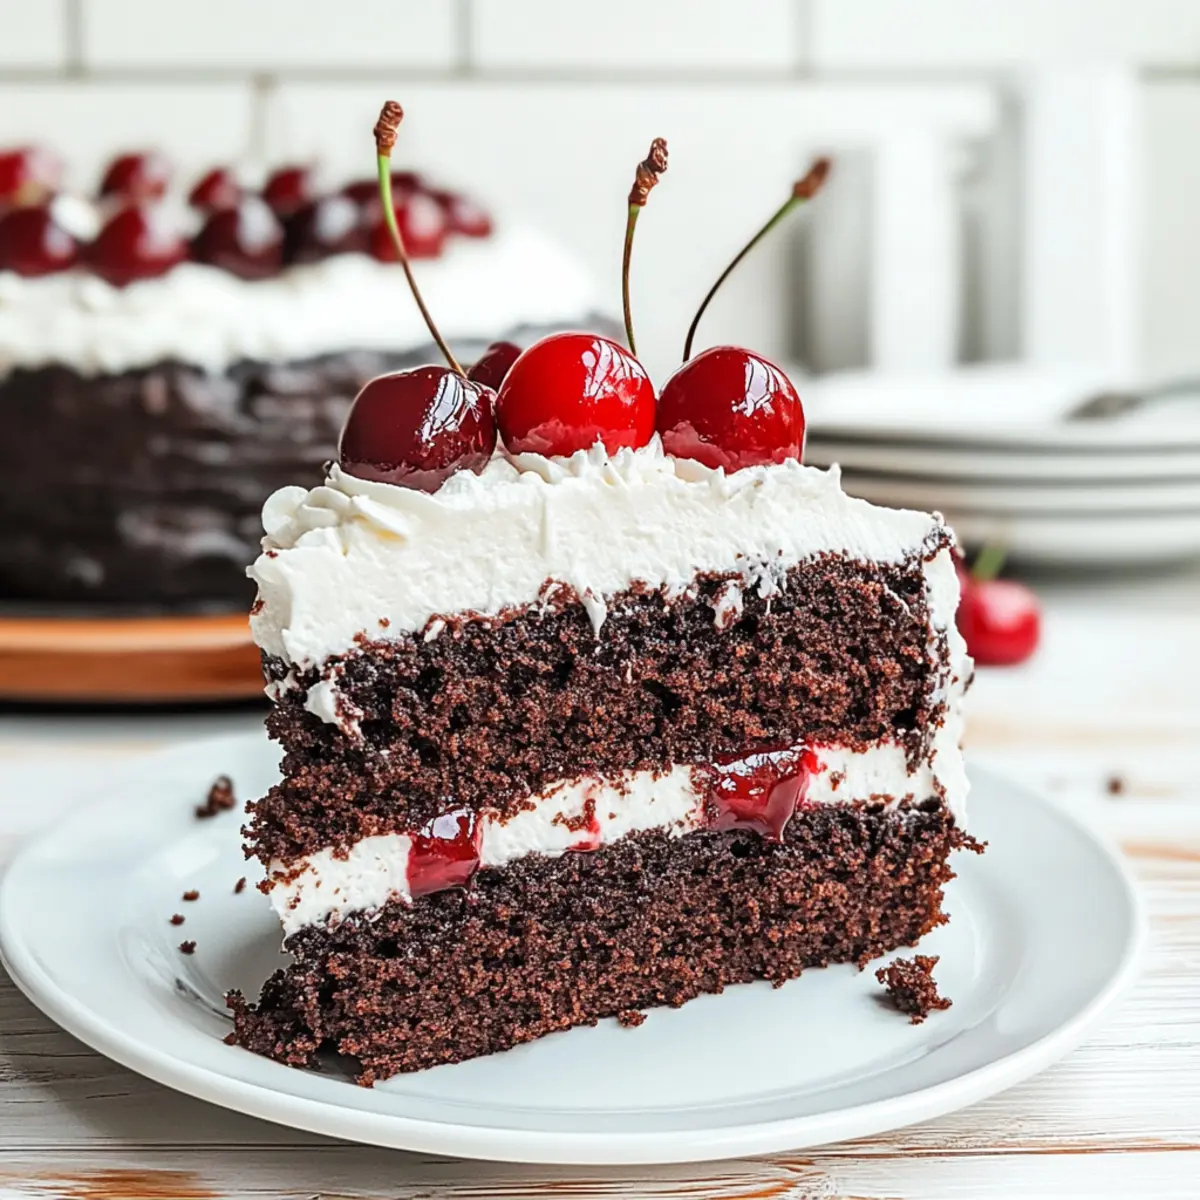
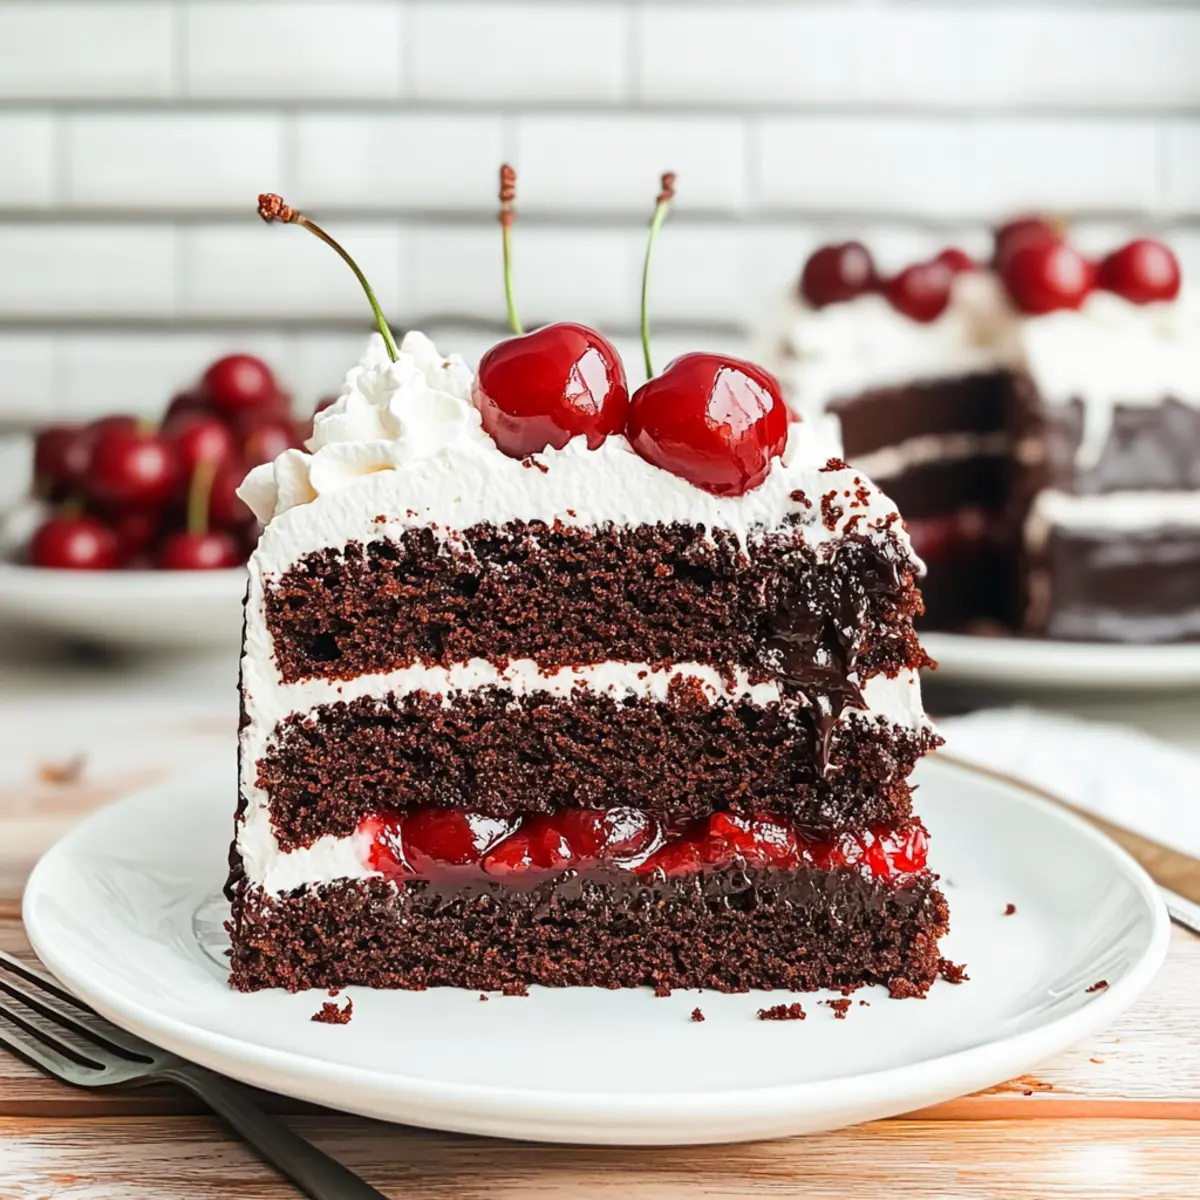
As I carefully layered the cake, the tantalizing aroma of chocolate wafted through my kitchen, transporting me to a quaint German café. This deliciously moist Black Forest Cake is a tradition I love to uphold, combining fluffy chocolate layers with a sweet-tart cherry filling and a generous cloud of whipped cream. The best part? It’s super easy to make from scratch, making it a wonderful choice for both special occasions and everyday indulgence. With each bite, you’ll experience a delightful blend of flavors and textures that will impress your family and friends, all while steering clear of those fast-food temptations. Ready to dive into making this classic dessert? Let’s embark on this baking adventure together!
Why is this Black Forest Cake special?
Decadent Layers: The rich, moist chocolate cake layers are complemented by a sweet-tart cherry filling that bursts with flavor. Creamy Topping: Topped with airy whipped cream, this cake is a perfect balance of textures. Easy to Make: With straightforward steps, you can create this delightful dessert without advanced baking skills. Perfect for Every Occasion: Whether it’s a birthday bash or a cozy family dinner, it’s sure to impress. Crowd-Pleasing Favorite: Everyone loves the classic flavor of Black Forest Cake—it never fails to elicit smiles! If you’re also looking for other crowd-pleasers, check out our Churro Cheesecake Donut or Salted Caramel Cheesecake.
Black Forest Cake Ingredients
• Here’s everything you need to create a delightful Black Forest Cake from scratch!
For the Cake
- All-Purpose Flour – Provides structure and form to the cake; measure accurately for best results.
- Dutch-Processed Cocoa Powder – Adds a rich chocolate flavor; you can substitute with unsweetened cocoa powder, but it may alter the taste.
- Baking Powder & Baking Soda – Essential leavening agents that ensure your cake rises perfectly.
- Salt – Enhances flavor and balances the sweetness in the cake.
- Buttermilk – Creates moisture and a tender crumb; regular milk with a splash of vinegar works as a substitute.
- Vegetable Oil – Keeps the cake moist; can be swapped with canola oil if preferred.
- Granulated Sugar – Sweetens the cake; accurate measurement helps avoid density issues.
- Large Eggs & Egg White – Provides stability and lightness for a fluffy texture.
For the Cherry Filling
- Granulated Sugar (for cherry filling) – Sweetens the cherry mixture to complement the flavors.
- Cornstarch – Thickens the cherry filling to achieve a gel-like consistency.
- Tart Cherries (frozen or canned) – Provides the classic fruitiness of Black Forest Cake; fresh cherries can be used if available.
- Butter – Adds a rich richness to the filling; can be omitted for a lighter version.
- Almond Extract – Enhances the cherry flavor, but you can use more vanilla extract if allergies exist.
For Assembly
- Chocolate Syrup – Boosts moisture and chocolate flavor between cake layers.
- Heavy Whipping Cream – Forms the luscious whipped cream frosting; stabilizing options are available to maintain structure.
- Powdered Sugar – Sweetens the whipped cream for a delightful finish.
- Bittersweet Baking Chocolate – Ideal for shavings on top; milk chocolate offers a sweeter alternative.
- Fresh Cherries – Optional garnish to elevate presentation and add a fresh touch.
Now that you have your ingredients ready, let’s jump into creating this stunning Black Forest Cake that everyone will adore!
Step‑by‑Step Instructions for Black Forest Cake
Step 1: Preheat Oven
Begin by preheating your oven to 350°F (175°C). While the oven heats, prepare two 8-inch round cake pans by lining the bottoms with parchment paper and spraying the sides with cooking spray. This ensures your Black Forest Cake layers release easily after baking, creating a beautiful foundation for your delightful dessert.
Step 2: Prepare Dry Ingredients
In a large mixing bowl, whisk together 2 cups of all-purpose flour, ¾ cup of Dutch-processed cocoa powder, 1 ½ teaspoons of baking powder, 1 teaspoon of baking soda, and ½ teaspoon of salt. This dry mixture is crucial for providing structure and flavor to your Black Forest Cake, so ensure it’s well combined and free of lumps. Set this bowl aside as you move on to the wet ingredients.
Step 3: Mix Wet Ingredients
In a separate bowl, combine 1 cup of buttermilk, 1 teaspoon of vanilla extract, and if desired, 1 teaspoon of instant coffee granules. In another large mixing bowl, beat together ½ cup of vegetable oil and 1 ½ cups of granulated sugar. Gradually add 2 large eggs, one at a time, mixing until the mixture becomes lighter in color and well blends; this will create a moist and rich base for your cake.
Step 4: Combine Ingredients
Now, gradually add the dry ingredients to the wet mixture, alternating with the buttermilk mixture. Begin and end with the dry ingredients, mixing just until the batter is smooth and fully combined. Be careful not to overmix, as this can result in a dense texture. Your Black Forest Cake batter should have a rich chocolate aroma and a silky consistency, ready for baking.
Step 5: Bake
Divide the batter evenly between the prepared cake pans and smooth the tops with a spatula. Place the pans in the preheated oven and bake for 28-35 minutes. To check for doneness, insert a toothpick into the center of a cake—if it comes out clean or with a few crumbs, your cakes are perfectly baked.
Step 6: Cool
Once baked, remove the cake pans from the oven and let them cool in the pans for 15-20 minutes. This allows them to set properly. Afterwards, carefully transfer the cakes to wire racks to cool completely at room temperature. This cooling step is essential for layering your Black Forest Cake later on.
Step 7: Make Cherry Filling
In a medium saucepan over medium heat, combine 1 cup of sugar, 2 tablespoons of cornstarch, and 2 cups of tart cherries (either frozen or canned), stirring until the mixture thickens. This should take around 5-7 minutes. Remove from heat and add 1 tablespoon of butter and ½ teaspoon of almond extract, stirring well. Allow the cherry filling to cool before using it in your cake.
Step 8: Prepare Whipped Cream
In a mixing bowl, whip 2 cups of heavy whipping cream with ¼ cup of powdered sugar and 1 teaspoon of vanilla extract until stiff peaks form. This creamy topping will crown your Black Forest Cake, providing a delightful contrast to the chocolate and cherries. Once whipped, store the cream in the refrigerator until you’re ready to assemble the cake.
Step 9: Layer and Assemble Cake
Carefully slice each cooled cake layer in half horizontally, resulting in four layers. Place the first layer on a serving plate and drizzle with chocolate syrup, followed by a layer of cherry filling and whipped cream. Repeat this process for the next layers, finishing with a thick layer of whipped cream on the top layer for a gorgeous finish, reflecting the classic Black Forest Cake elegance.
Step 10: Decorate
Use a vegetable peeler to create chocolate shavings from bittersweet baking chocolate and sprinkle them generously over the top of your frosted cake. For an extra touch, garnish with fresh cherries. This decorative step not only enhances the presentation but adds a special charm, making your Black Forest Cake irresistible to all who see it.
What to Serve with Black Forest Cake
Indulging in a slice of this delightful cake calls for complementary dishes that enhance the experience and create a festive atmosphere.
- Fresh Berries: The sweetness of strawberries or raspberries provides a refreshing contrast to the rich chocolate and cherry flavors.
- Vanilla Ice Cream: A scoop of creamy vanilla ice cream is heavenly with chocolate cake, as it melts into the layers and adds a delightful chill.
- Espresso or Coffee: The boldness of espresso complements the cake’s sweetness perfectly, elevating its luxurious flavors. A warm cup alongside creates a café-like experience at home.
- Chocolate-Covered Almonds: These add a satisfying crunch and echo the chocolate depth in the cake, making them a delightful crunchy sidekick.
- Whipped Cream Topped Hot Chocolate: For a cozy option, serve a mug of rich hot chocolate topped with whipped cream, creating a comforting pairing with each bite.
- Light Salad with Balsamic Dressing: A fresh salad adds a refreshing crunch, enhancing the sweet flavors of the cake while offering a slight tang from the dressing, balancing indulgence.
- Mint-infused Sparkling Water: This refreshing drink cleanses the palate, making every bite of Black Forest Cake an adventure, and is great for gatherings as a non-alcoholic option.
- Sliced Citrus Fruits: The bright acidity of orange or grapefruit slices can uplift the palate after the richness of chocolate cake, providing a lovely balance.
- Chocolate Fondue: Create a fun dessert experience by offering chocolate fondue with fruits or marshmallows, aligning the decadent theme with your cake.
Expert Tips for Black Forest Cake
- Use Room Temperature Ingredients: Ensuring eggs and buttermilk are at room temperature helps to achieve a smooth batter, preventing a dense Black Forest Cake.
- Don’t Overbake: Keep an eye on the baking time; overbaking can lead to a dry cake. A toothpick should come out with a few moist crumbs for perfect results.
- Chill Whipped Cream: For a stable whipped cream topping, refrigerate it briefly before frosting the cake; this will hold its shape beautifully.
- Customize Cherry Filling: If using canned cherries, be sure to drain them well to avoid excess liquid, which can make the filling too runny.
- Layer with Care: When stacking, let each layer settle for a couple of minutes before adding the next, preventing slippage and ensuring clean layers in your Black Forest Cake.
Make Ahead Options
These scrumptious Black Forest Cake components are perfect for meal prep enthusiasts! You can prepare the cake layers up to 3 days in advance; simply cool them completely, wrap each layer tightly in plastic wrap, and refrigerate. The cherry filling can also be made up to 2 days ahead—just store it in an airtight container in the fridge. When you’re ready to serve, layer the chilled cake with chocolate syrup, cherry filling, and whipped cream, finishing by garnishing with chocolate shavings and fresh cherries. This way, you’ll have your beautiful Black Forest Cake ready to impress your loved ones with minimal effort!
How to Store and Freeze Black Forest Cake
- Fridge: Store the cake in the refrigerator for up to 2 days. Ensure it’s covered with plastic wrap or in an airtight container to prevent it from drying out.
- Freezer: Freezing is not recommended for the assembled cake due to the whipped cream. However, you can freeze the cake layers separately for up to 3 months; wrap them tightly in plastic wrap and foil.
- Cherry Filling: The cherry filling can be stored in an airtight container in the fridge for up to 5 days or frozen for up to 3 months.
- Reheating: If you’ve frozen the cake layers, thaw them in the refrigerator overnight before frosting. Do not refreeze once thawed to maintain the best texture and flavor of your Black Forest Cake.
Black Forest Cake Variations & Substitutions
Feel free to get creative with this delightful recipe, customizing it to suit your taste buds!
- Gluten-Free: Substitute all-purpose flour with a gluten-free flour blend to maintain a similar texture while making it gluten-friendly.
- Dairy-Free: Use almond milk or coconut milk in place of buttermilk and substitute heavy whipping cream with coconut cream for a luscious topping.
- Sugar-Free: Opt for a sugar substitute in the batter and cherry filling, adjusting amounts accordingly for sweetness.
- Spice It Up: Add a pinch of cinnamon or a dash of chili powder to the batter for a warm, spicy twist that enhances the chocolate flavor.
- Chocolate-Covered Cherry: For an extra treat, dip fresh cherries in melted chocolate and place them on top of the cake for an indulgent garnish.
- Nutty Addition: Fold in some chopped walnuts or pecans into the cherry filling for a lovely crunch that contrasts beautifully with the cake.
- Layered Delight: Experiment with additional filling layers—consider adding a layer of cream cheese frosting for a tangy twist, or try a layer of raspberry filling for a berry blast!
- Coffee Lovers: Infuse the whipped cream with a hint of espresso or coffee liqueur for a caffeine kick that complements the chocolate perfectly.
Whether you’re enjoying a traditional slice or trying one of these fun twists, each bite is bound to bring joy! If you’re on the lookout for more delicious desserts, don’t miss our High Protein Cheesecake or our delightful Strawberry Cheesecake Stuffed cookies.
Black Forest Cake Recipe FAQs
What type of cherries should I use for the filling?
You can use tart cherries, either frozen or canned, as they provide that classic flavor associated with Black Forest Cake. If you’re lucky enough to have fresh cherries in season, those can be a delightful alternative. Just be aware that fresh cherries may require some extra cooking time to achieve the desired consistency for your filling.
How should I store my Black Forest Cake?
Store your Black Forest Cake in the refrigerator for up to 2 days, making sure it’s covered with plastic wrap or kept in an airtight container to maintain its moisture. Just keep in mind that the whipped cream topping is best fresh, so try to consume it within that timeframe.
Advertisement
Can I freeze Black Forest Cake?
Freezing the assembled Black Forest Cake is not recommended because of the whipped cream, which doesn’t hold up well when frozen. However, you can freeze the cake layers separately for up to 3 months. Make sure to wrap each layer tightly in plastic wrap followed by aluminum foil before placing them in the freezer.
What are some tips for troubleshooting the cake texture?
If your cake turns out too dense, it may be due to overmixing the batter. When combining dry and wet ingredients, mix just until incorporated. Additionally, ensure that your flour is accurately measured using the fluff, spoon, and level method to avoid excess flour, which can lead to a dry texture. If you find the cake is too dry after baking, next time reduce the baking time by a few minutes.
What dietary considerations should I keep in mind?
If you’re making this cake for someone with nut allergies, replace almond extract with additional vanilla extract to maintain that lovely flavor. Furthermore, if you’re serving this delight to kids or non-drinkers, rest easy knowing this Black Forest Cake recipe is completely alcohol-free, making it a family-friendly choice.
Can I make the cherry filling ahead of time?
Absolutely! You can prepare the cherry filling a day in advance and store it in the refrigerator for up to 5 days. This will save you time on the day you plan to assemble your cake. Just make sure to let it cool to room temperature before layering it with your cake, ensuring it doesn’t melt the whipped cream.

Irresistible Black Forest Cake Made Easy at Home
Ingredients
Equipment
Method
- Preheat your oven to 350°F (175°C). Prepare two 8-inch round cake pans with parchment paper and cooking spray.
- In a large mixing bowl, whisk together the dry ingredients: flour, cocoa powder, baking powder, baking soda, and salt.
- In a separate bowl, combine buttermilk, vanilla extract, and coffee granules. In another bowl, beat together oil and sugar, then add eggs one at a time.
- Gradually mix the dry ingredients into the wet mixture, alternating with the buttermilk mixture until smooth.
- Divide the batter evenly between the pans and bake for 28-35 minutes. Check for doneness with a toothpick.
- Let the cakes cool in the pans for 15-20 minutes before transferring them to wire racks to cool completely.
- Make the cherry filling by heating sugar, cornstarch, and cherries in a saucepan. Add butter and almond extract once thickened.
- Whip the heavy cream with powdered sugar and vanilla extract until stiff peaks form. Refrigerate until ready to assemble.
- Slice each cooled cake layer in half. Layer the first with chocolate syrup, cherry filling, and whipped cream. Repeat for remaining layers.
- Decorate the top with chocolate shavings and fresh cherries to finish your Black Forest Cake.