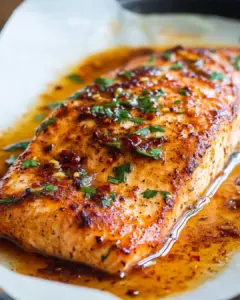
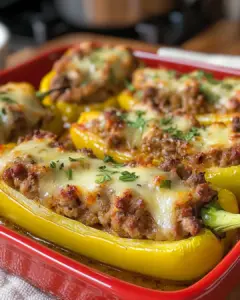
BBQ chicken is a timeless favorite, loved for its smoky, tangy, and slightly sweet flavors. Whether you’re preparing a quick weeknight dinner or a special meal for a backyard gathering, this savory BBQ chicken recipe delivers on both taste and convenience.
In this article, we’ll explore the rich history of BBQ chicken, expert tips for achieving the juiciest results, pairing suggestions, storage advice, and answers to frequently asked questions.
The History of BBQ Chicken: A Classic Dish with Deep Roots
Barbecue has been a staple in many cultures for centuries, evolving through various cooking techniques and marinades. While slow-smoked meats are a barbecue tradition in the Southern United States, BBQ chicken has gained popularity worldwide due to its quick cooking time and ability to absorb bold flavors.
The origins of BBQ chicken date back to indigenous tribes who used open flames to cook game meats, often marinating them in fruit-based sauces. Over time, different regions developed their own unique takes on barbecue sauce, from the vinegar-based blends of North Carolina to the rich, molasses-infused sauces of Kansas City.
Today, BBQ chicken remains a versatile dish that can be grilled, baked, or slow-cooked, offering a range of textures and flavors depending on the cooking method used.
Secrets to Achieving the Juiciest BBQ Chicken
Many people struggle with dry chicken when making BBQ recipes. Follow these expert tips to ensure moist and tender results every time:
1. Choose the Right Cut
While this recipe calls for boneless, skinless chicken breasts, you can also use chicken thighs for an even juicier option. Thighs contain more fat, making them naturally more flavorful.
2. Marinate for Maximum Flavor
Marinating is essential for infusing the chicken with deep, smoky flavors. A minimum of one hour is recommended, but for even better results, let the chicken marinate overnight in the refrigerator.
3. Bake at the Right Temperature
A moderate oven temperature of 375°F (190°C) ensures the chicken cooks through without drying out. Cooking at too high a temperature can cause the sauce to burn before the meat is fully cooked.
4. Baste for Extra Moisture
Brushing on extra BBQ sauce during baking adds another layer of flavor while keeping the chicken moist. For a caramelized finish, apply the final layer of sauce during the last 5 minutes of baking.
5. Rest Before Slicing
Allowing the chicken to rest for about 5 minutes after cooking helps the juices redistribute, keeping the meat succulent and tender.
Ingredients:
- 4 boneless, skinless chicken breasts
- 1 cup BBQ sauce
- ½ cup chicken broth
- 1 tablespoon apple cider vinegar
- Salt and pepper to taste
Directions:
- Prepare the Marinade: In a mixing bowl, combine the BBQ sauce, chicken broth, and apple cider vinegar. Stir until well blended.
- Season the Chicken: Lightly season the chicken breasts with salt and pepper on both sides.
- Marinate the Chicken: Place the seasoned chicken breasts in a resealable plastic bag or a shallow dish. Pour half of the marinade over the chicken, ensuring each piece is thoroughly coated. Seal the bag or cover the dish, and refrigerate for at least 1 hour to allow the flavors to meld.
- Preheat the Oven: Set your oven to 375°F (190°C) and allow it to preheat.
- Arrange for Baking: Remove the marinated chicken from the refrigerator and arrange the breasts in a baking dish. Discard any marinade that was in contact with the raw chicken.
- Bake the Chicken: Place the baking dish in the preheated oven and bake for 20 minutes.
- Baste with Remaining Marinade: After 20 minutes, remove the dish from the oven and generously brush the chicken with the remaining unused marinade. Return the dish to the oven.
- Continue Baking: Bake for an additional 15-20 minutes, or until the chicken reaches an internal temperature of 165°F (74°C) and the juices run clear.
- Rest Before Serving: Once cooked, remove the chicken from the oven and let it rest for 5 minutes to retain its juices.
- Serve and Enjoy: Transfer the chicken to serving plates, optionally garnishing with fresh herbs or a squeeze of lemon juice for added zest.
Nutritional Information (Per Serving):
- Calories: 250
- Protein: 30g
- Carbohydrates: 15g
- Fat: 8g
- Saturated Fat: 2g
- Cholesterol: 90mg
- Sodium: 800mg
- Fiber: 0g
- Sugar: 12g
Note: Nutritional values are approximate and can vary based on specific ingredients used.
Best Side Dishes to Pair with BBQ Chicken
BBQ chicken pairs well with a variety of side dishes, from classic comfort foods to light and refreshing options. Here are some perfect pairings:
Classic Comfort Foods:
- Creamy coleslaw – The cool, tangy crunch complements the smoky chicken.
- Baked mac and cheese – A rich and cheesy side dish for a hearty meal.
- Cornbread – Slightly sweet and buttery, cornbread soaks up BBQ sauce beautifully.
Light and Refreshing Sides:
- Grilled vegetables – Zucchini, bell peppers, and asparagus add a smoky depth to the meal.
- Garden salad – A fresh green salad with a citrus vinaigrette balances the richness of BBQ sauce.
- Roasted sweet potatoes – The natural sweetness of sweet potatoes enhances the tangy BBQ flavors.
Storage and Reheating Tips
How to Store Leftover BBQ Chicken
- Refrigeration: Store leftover BBQ chicken in an airtight container in the fridge for up to 4 days.
- Freezing: Wrap the chicken in foil or plastic wrap and store it in a freezer-safe container for up to 3 months.
How to Reheat Without Drying It Out
- Oven: Preheat to 300°F (150°C) and reheat for about 10–15 minutes, covered with foil to prevent moisture loss.
- Stovetop: Add a splash of chicken broth or water to a pan, cover, and reheat over low heat.
- Microwave: Place a damp paper towel over the chicken and heat in 30-second intervals to prevent dryness.
Frequently Asked Questions About BBQ Chicken
1. Can I Make This Recipe on the Grill Instead of the Oven?
Yes! Grill the marinated chicken over medium heat (375°F) for about 6-7 minutes per side, basting with BBQ sauce during the last few minutes.
2. How Do I Prevent My BBQ Chicken from Burning?
Since BBQ sauce contains sugar, it can burn quickly at high heat. Cook the chicken at a moderate temperature and apply the final layer of sauce only during the last few minutes of cooking to prevent scorching.
3. What’s the Best Type of BBQ Sauce for This Recipe?
This recipe works well with any BBQ sauce, but consider these options for different flavor profiles:
- Sweet & smoky: Kansas City-style sauce
- Tangy & vinegar-based: Carolina-style sauce
- Spicy & bold: Texas-style BBQ sauce
4. Can I Use Bone-In Chicken Instead?
Absolutely! Bone-in, skin-on chicken thighs or drumsticks work well for this recipe. Adjust the cooking time to about 35–40 minutes to ensure they are fully cooked.
5. How Do I Make This Recipe Healthier?
To make a lighter version, choose a low-sugar BBQ sauce, and serve the chicken with steamed vegetables or a side salad instead of heavy sides.
Advertisement
6. What’s the Best Way to Meal Prep This Recipe?
Marinate the chicken in advance and store it in the refrigerator for up to 24 hours before cooking. You can also cook a large batch and refrigerate or freeze portions for easy meals throughout the week.
Conclusion: A Simple Yet Flavorful BBQ Chicken Recipe for Any Occasion
This savory BBQ chicken recipe is a must-try for anyone who loves bold flavors with minimal effort. Whether you’re baking it in the oven or grilling it outdoors, this dish delivers tender, juicy chicken with a perfect balance of smoky, tangy, and sweet flavors.
With the right cooking techniques and serving suggestions, you can create a delicious, well-rounded meal that the whole family will love. Plus, with easy storage and reheating options, this recipe is perfect for meal prep and leftovers.
So, the next time you’re craving BBQ chicken, skip the takeout and make this homemade version instead—you won’t regret it!


