A Nostalgic Bite of Home
There’s something special about the comforting crunch of homemade chicken strips. For me, they take me back to my childhood, sitting at the kitchen counter while my mom prepared a fresh batch straight out of the oven. The aroma of garlic and paprika filled the air, teasing my taste buds before I could even take the first bite. Those golden, crispy bites weren’t just food; they were warm memories served on a plate, moments of laughter shared with my siblings as we dipped them into our favorite sauces.
Now, as an adult, I find myself recreating that same magic in my own kitchen. But instead of deep-frying, I opt for a lighter, oven-baked version that’s just as satisfying. These Crispy Golden Chicken Strips are the perfect balance of crunch, tenderness, and flavor—without the guilt of heavy frying. Whether you’re cooking for your family, meal-prepping for the week, or just craving a childhood favorite, this recipe is one you’ll want to make again and again.
What Makes These Chicken Strips Irresistible?
A good chicken strip isn’t just about the crunch—it’s about the perfect marriage of texture and flavor. This recipe delivers on all fronts:
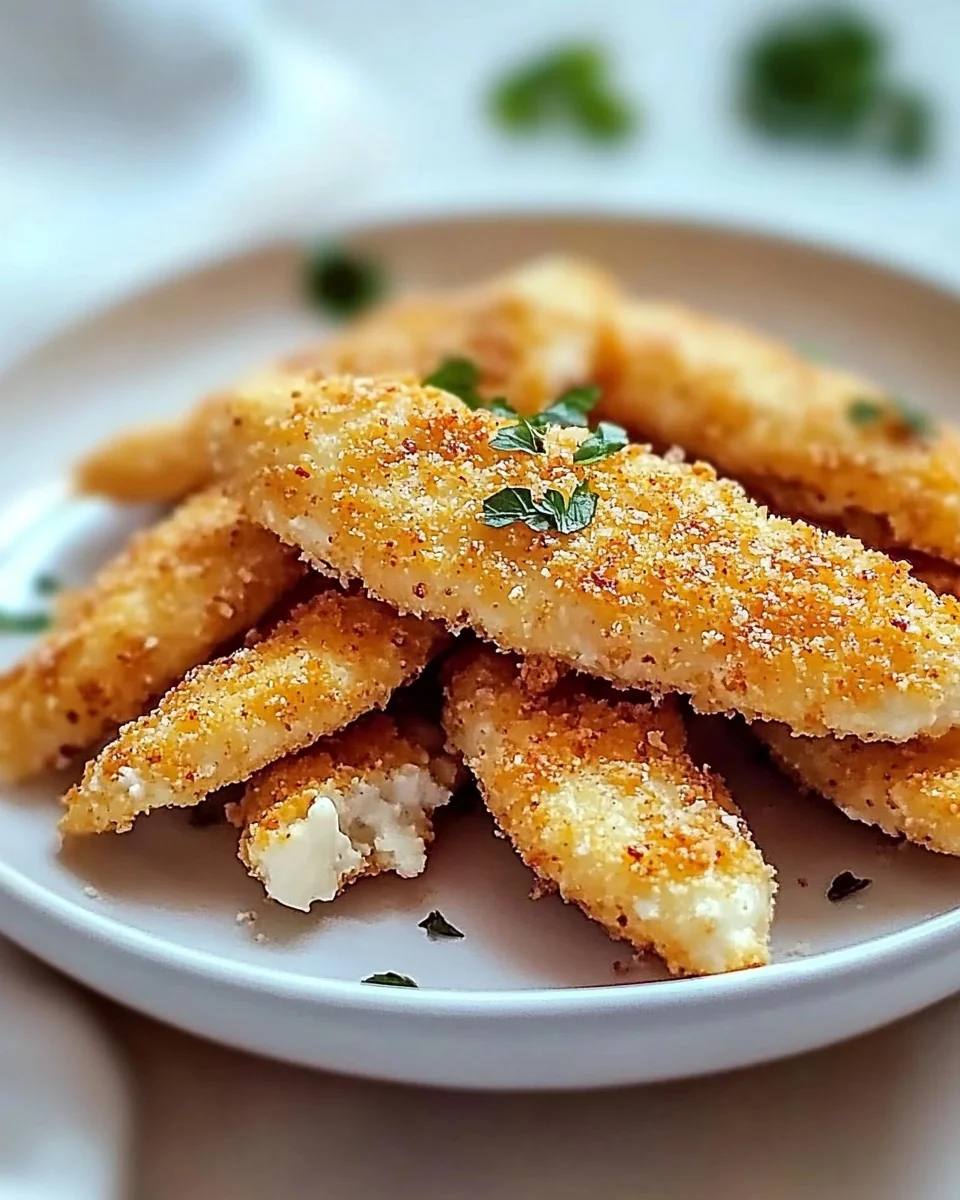
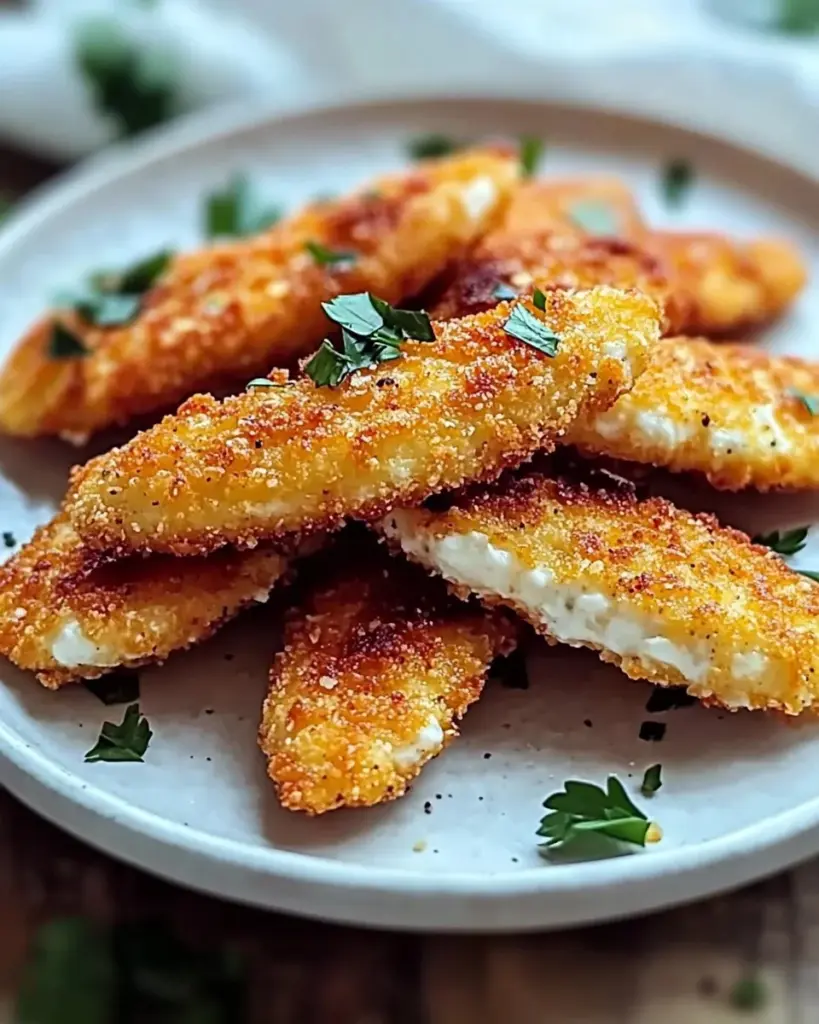
- Crispy Coating Without Frying – Thanks to panko breadcrumbs and a light olive oil spray, these strips get golden and crunchy without needing a deep fryer.
- Bursting with Flavor – A blend of garlic powder, paprika, onion powder, and Parmesan cheese ensures every bite is packed with savory goodness.
- Juicy and Tender Inside – While the outside crisps up beautifully, the chicken inside stays moist and flavorful.
- Healthier Than Traditional Fried Chicken Strips – Baked instead of fried, these chicken strips cut down on unnecessary fats without compromising on taste.
Crispy Golden Chicken Strips
Ingredients
- 1 lb chicken breasts or tenders (cut into strips)
- 2 large eggs (beaten)
- 1 cup panko breadcrumbs (or regular breadcrumbs)
- ½ cup grated Parmesan cheese (optional, for extra flavor)
- 1 tsp garlic powder
- 1 tsp paprika
- ½ tsp onion powder
- ½ tsp salt
- ¼ tsp black pepper
- Olive oil spray (for coating)
Directions
- Prep the Oven
Preheat your oven to 400°F (200°C). Line a baking sheet with parchment paper or lightly grease it with olive oil spray. - Set Up the Breading Station
In a shallow bowl, whisk the eggs. In another bowl, combine breadcrumbs, Parmesan cheese (if using), garlic powder, paprika, onion powder, salt, and black pepper. - Coat the Chicken
Dip each chicken strip into the beaten eggs, ensuring it’s fully coated. Then, dredge it in the breadcrumb mixture, pressing gently so the coating sticks. - Arrange and Spray
Place the breaded chicken strips on the prepared baking sheet in a single layer. Lightly spray the tops with olive oil to help them crisp up. - Bake to Perfection
Bake for 18-22 minutes, flipping halfway through, until the chicken is golden brown and cooked through. The internal temperature should reach 165°F (75°C). - Serve and Enjoy
Let the chicken strips rest for a few minutes before serving. Pair them with your favorite dipping sauce, such as honey mustard or ranch.
Nutritional Breakdown (Per Serving)
- Calories: 250
- Protein: 25g
- Carbohydrates: 18g
- Fats: 10g
- Fiber: 1g
- Sodium: 400mg
Perfect for a quick meal, snack, or game-day treat!
The Secret to Perfectly Crispy Chicken Strips
1. Use Panko for Extra Crunch
Regular breadcrumbs work, but panko breadcrumbs take the crispiness to another level. They create a light, airy crunch that mimics deep-fried chicken without the grease.
2. Don’t Skip the Parmesan
While optional, Parmesan cheese adds a subtle umami boost that makes these strips even more flavorful. The cheese also helps with browning, making them extra golden.
3. Bake at the Right Temperature
Baking at 400°F (200°C) ensures that the chicken cooks through while achieving that signature crispy crust. Anything lower, and you risk soggy strips.
4. Olive Oil Spray is a Game Changer
A light mist of olive oil helps create an even, golden-brown crust. It also prevents the breadcrumbs from drying out while baking.
5. Let Them Rest Before Serving
Allowing the chicken strips to sit for a few minutes after baking helps them firm up, preventing the crispy coating from sliding off when you take a bite.
Creative Serving Ideas
Chicken strips are incredibly versatile, making them perfect for various meals and occasions. Here are a few fun ways to enjoy them:
- Classic Dipper Style – Serve with a side of ranch, honey mustard, BBQ sauce, or garlic aioli for the ultimate snack.
- Crispy Chicken Wraps – Slice the strips and wrap them in a tortilla with lettuce, tomatoes, and a drizzle of dressing for a quick lunch.
- Chicken Strip Salad – Add them to a fresh green salad with avocado, cherry tomatoes, and a zesty vinaigrette for a protein-packed meal.
- Game Day Platter – Pair with fries, mozzarella sticks, and wings for the ultimate party spread.
- Kid-Friendly Meal – Serve with a side of mac and cheese or mashed potatoes for a comforting family dinner.
Storing and Reheating Tips
If you have leftovers (which is rare because they disappear fast!), here’s how to store and reheat them properly:
Storing
- Refrigerate: Place cooled chicken strips in an airtight container and store in the fridge for up to 3 days.
- Freeze: For longer storage, arrange the strips on a baking sheet, freeze them individually, then transfer them to a freezer bag. They last up to 2 months.
Reheating
- Oven: Bake at 375°F (190°C) for 10 minutes to restore crispiness.
- Air Fryer: Heat at 350°F (175°C) for 5-6 minutes until hot and crispy.
- Microwave: Not recommended, as it can make them soggy.
Frequently Asked Questions
1. Can I make these chicken strips gluten-free?
Yes! Simply swap the panko breadcrumbs for gluten-free breadcrumbs and ensure all seasonings are gluten-free.
2. What’s the best dipping sauce for these?
Popular choices include ranch, honey mustard, BBQ sauce, sriracha mayo, buffalo sauce, and garlic aioli.
3. Can I use chicken thighs instead of chicken breasts?
Absolutely! Chicken thighs offer a juicier bite but may take a few extra minutes to cook.
4. How can I make these even crispier?
For an extra crispy texture, toast the panko breadcrumbs in a dry pan for a few minutes before coating the chicken.
5. Can I cook these in an air fryer?
Yes! Preheat the air fryer to 375°F (190°C) and cook for 10-12 minutes, flipping halfway through.
6. What sides go well with chicken strips?
Try them with coleslaw, roasted vegetables, potato wedges, or a simple Caesar salad for a balanced meal.
Advertisement
Conclusion
These Crispy Golden Chicken Strips are more than just a meal—they’re a nostalgic experience, a way to bring a little warmth and comfort to your table. Whether you’re making them for a weeknight dinner, a gathering with friends, or simply because you crave something crunchy and delicious, this recipe delivers every time.
With their irresistible crunch, bold flavor, and healthier baked preparation, these chicken strips will quickly become a household favorite. So grab your ingredients, preheat your oven, and get ready to enjoy one of the best homemade chicken strip recipes you’ll ever taste.
Looking for more delicious, easy-to-make recipes? Keep exploring and find new favorites to share with your loved ones. Happy cooking!